Learning Ukulele 50 Sites Top 50 Ukulele Sites Argapa Ukuleles - one size louder: 6/1/19 - 7/1/19

Tuesday, June 25, 2019

More holes!

The connection points between wood and strings; holes. On my first couple of travel ukes I made ferrules but those were very fiddly to get right. Often a small burr on an edge would tear the string without being seen. So I think this is a better way. 

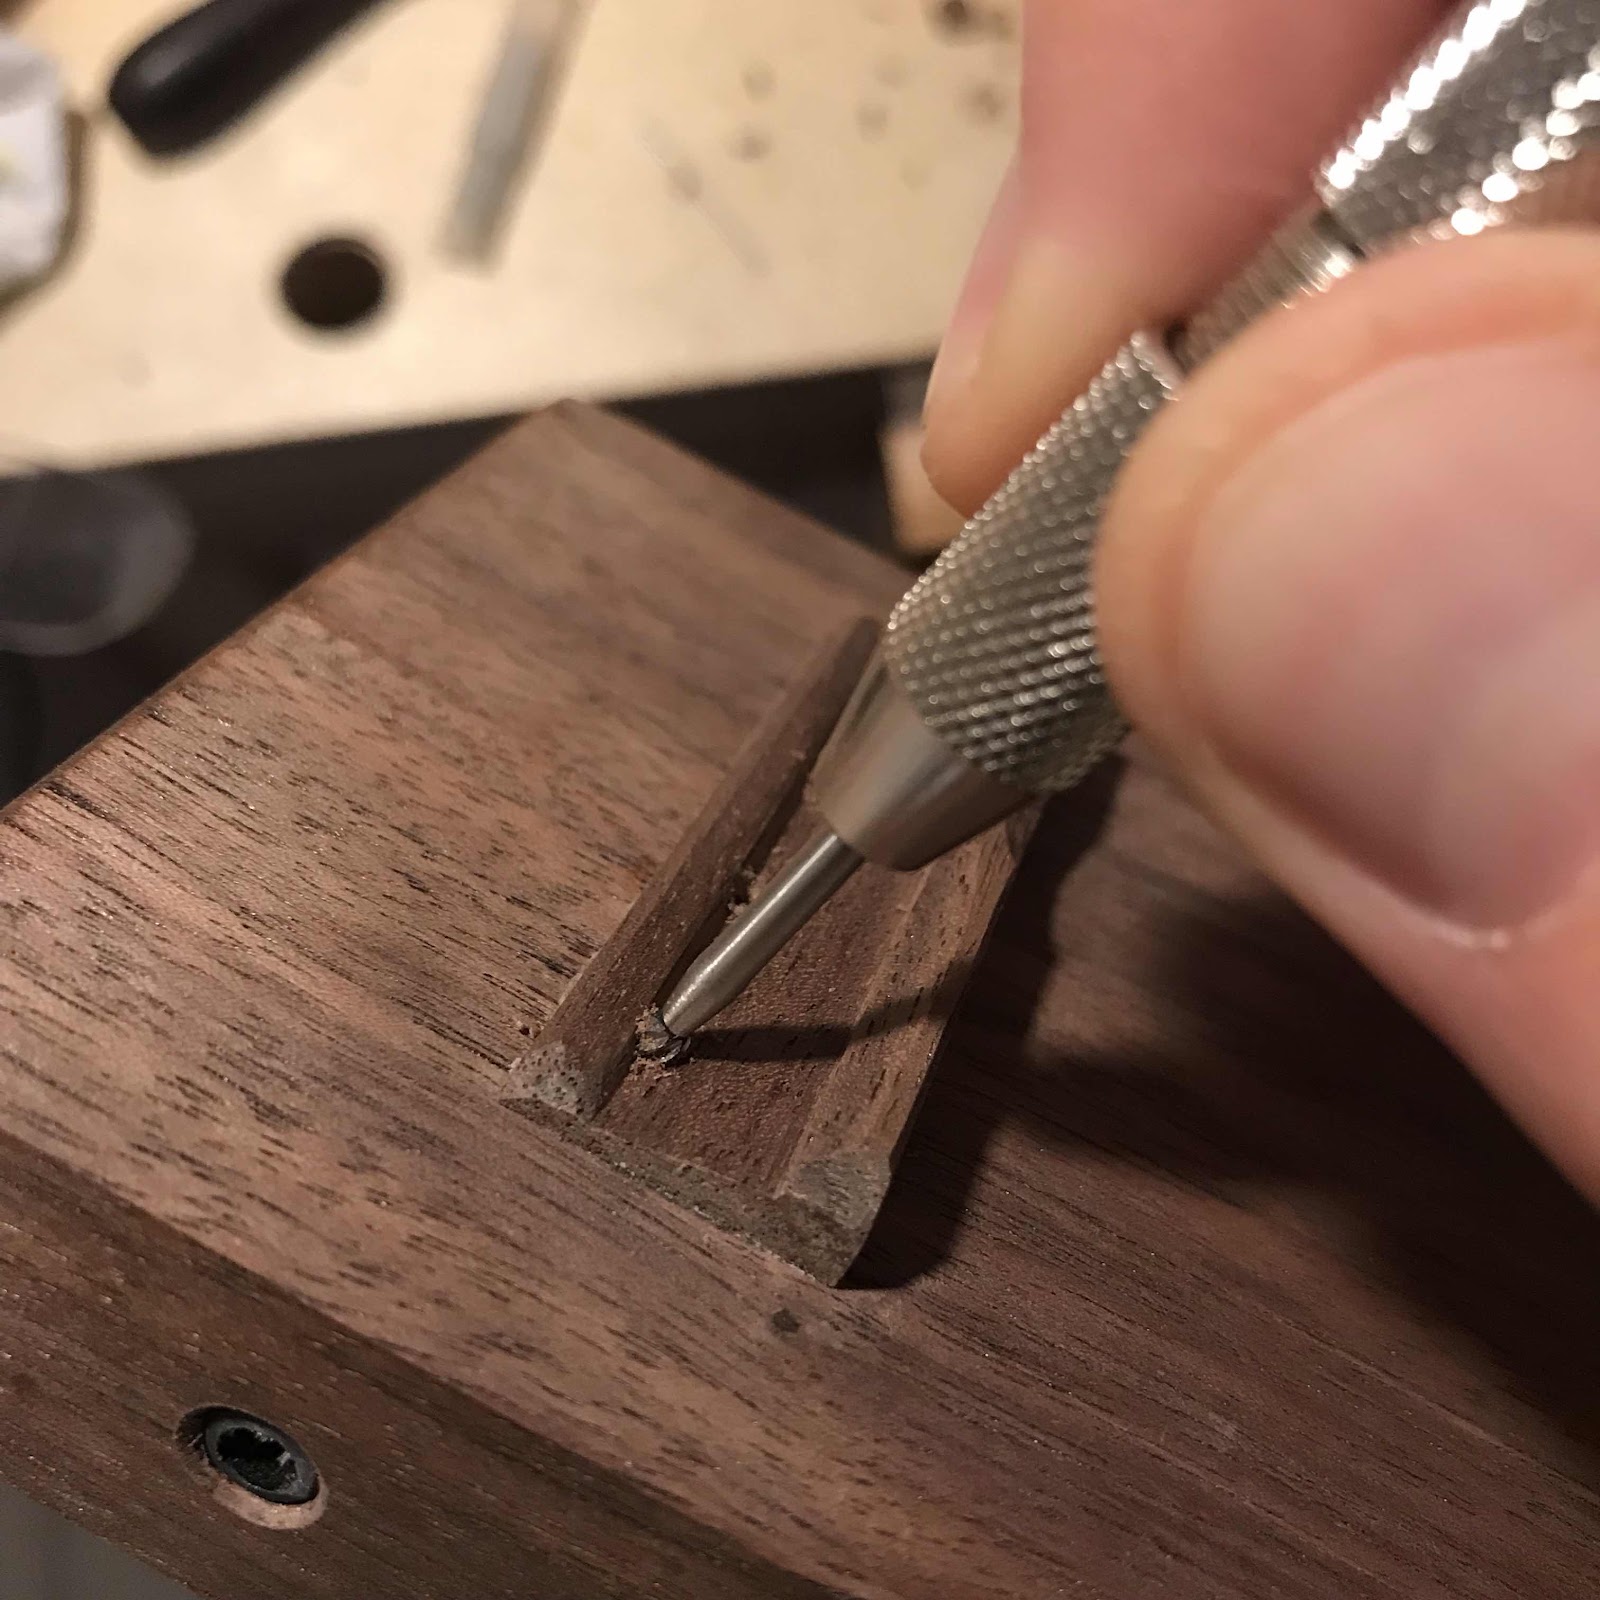
I’ve been away last week so there’s not a heap of progress to show today but some. First is me chamfering the edges of the holes through the bridge, with my wee pin wise. 


Then I made holes in the pegs. I forgot to take pics of fitting the pegs but I’m pretty sure I did that with the last one. 


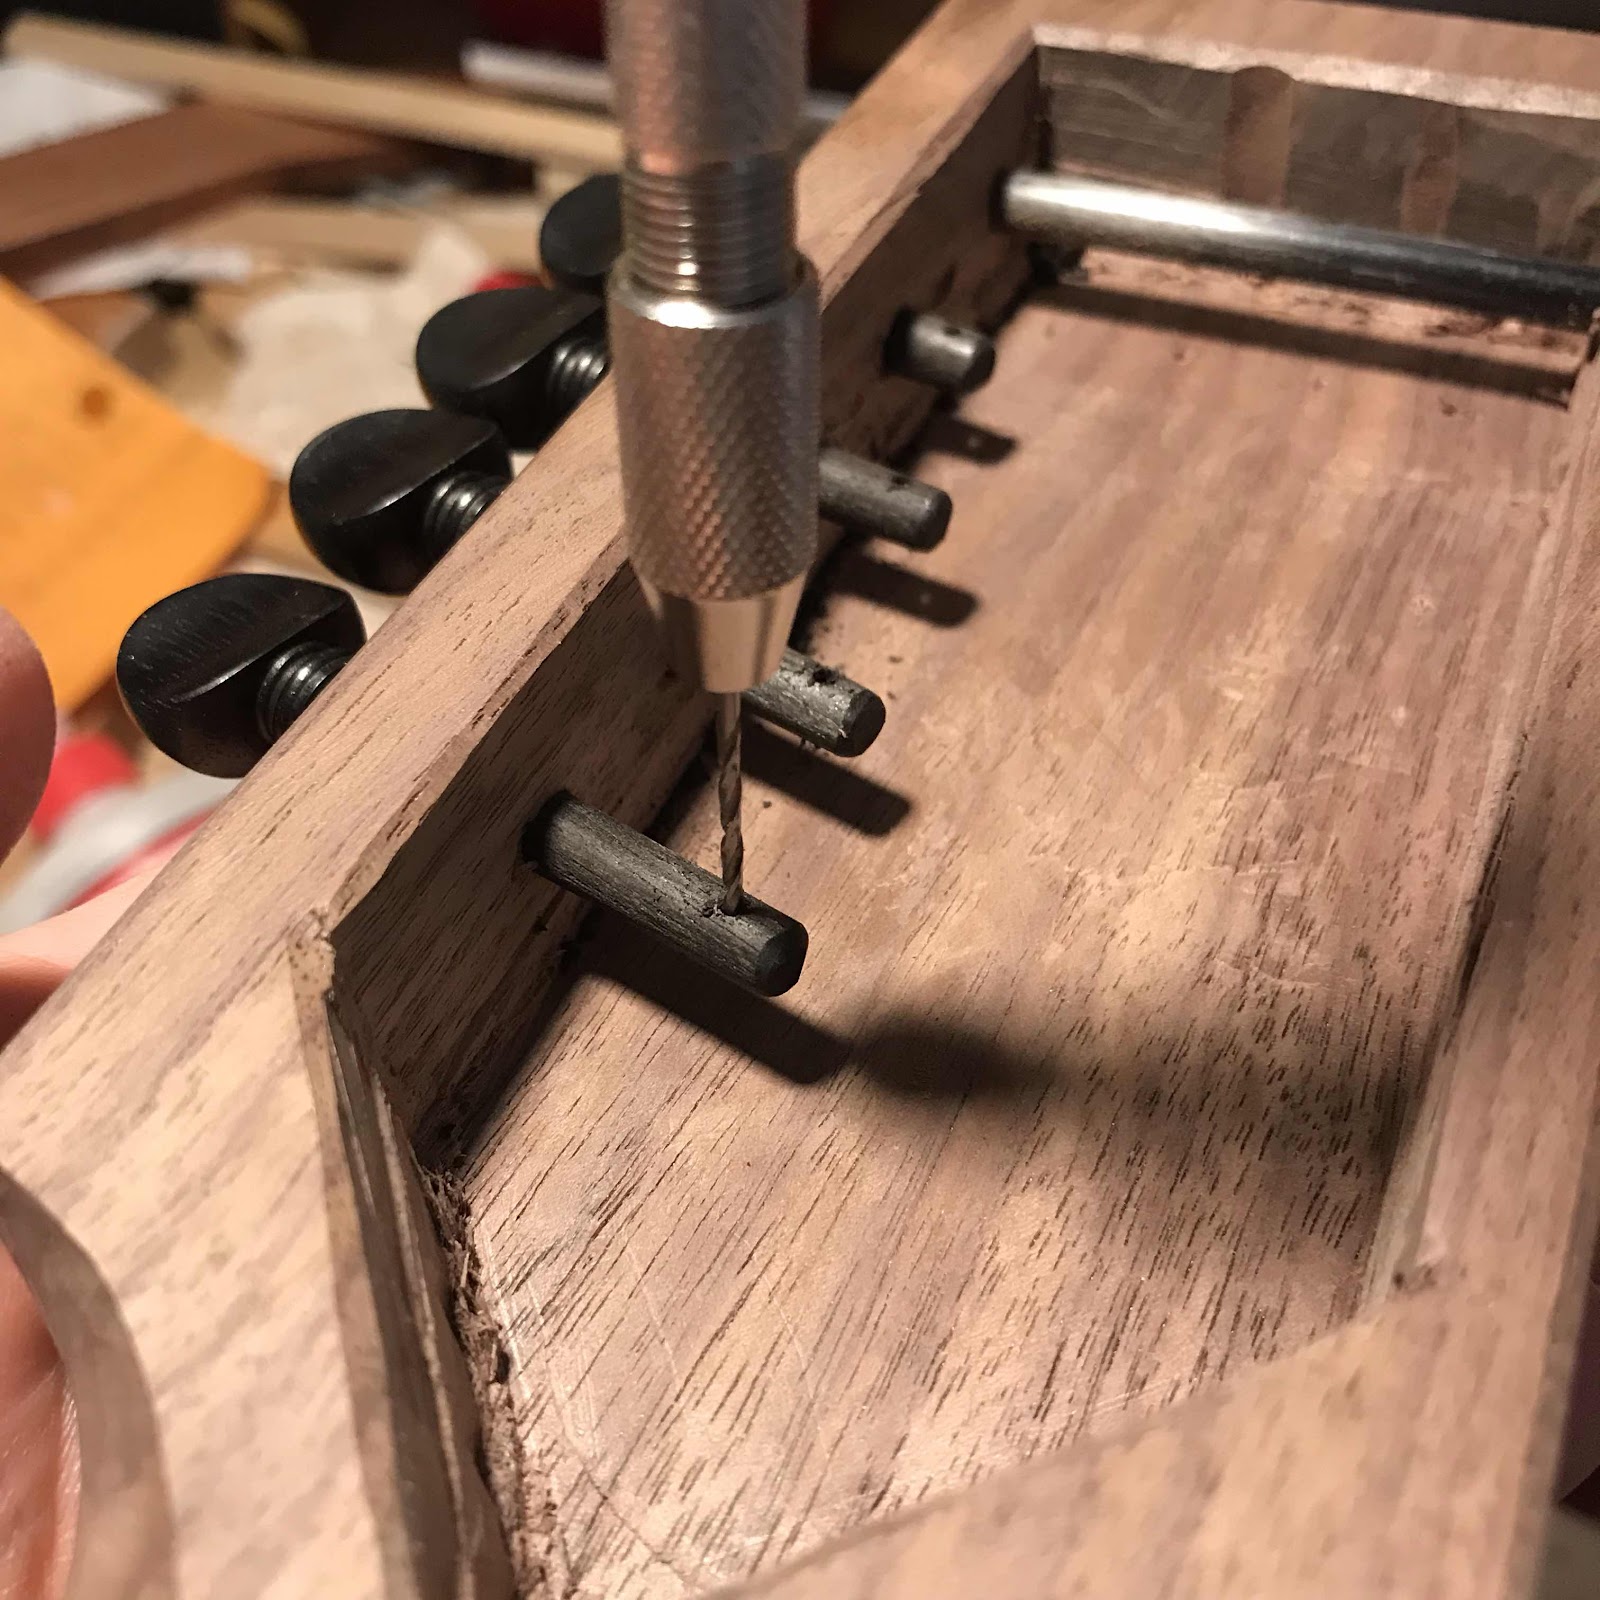
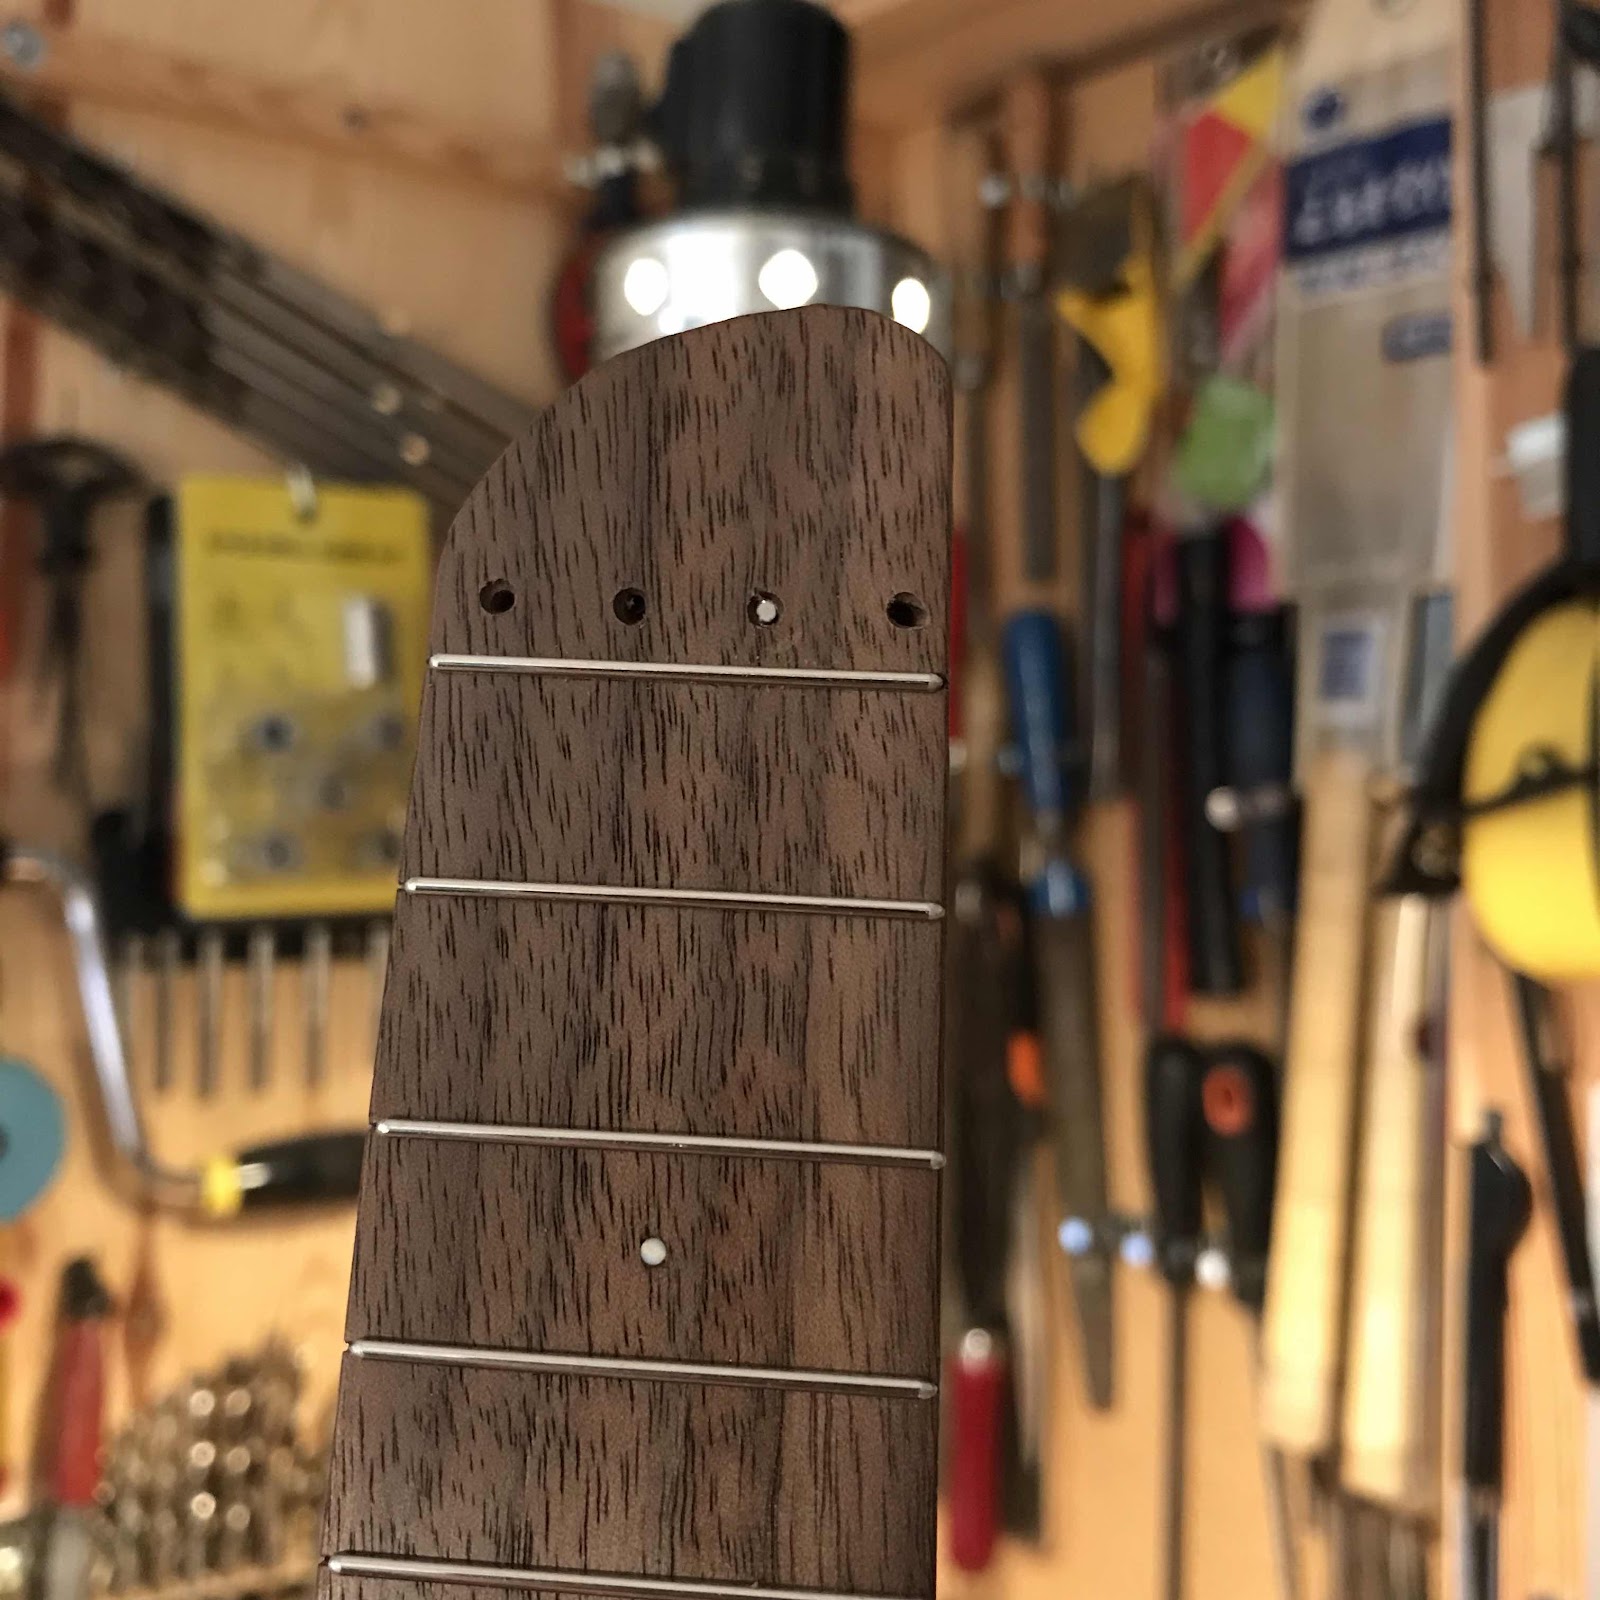
And last, the most tricky holes. The ones at the nut end, going through to the round back of the neck. I can’t drill them straight down, then the outer ones would burst out on the sides of the neck. And if I aim towards the middle I’m afraid they’ll collide. So I aim the outer ones towards the middle, and the middle holes are slanted to exit a bit further from the nut. If all works they should form a nice arch at the back. 

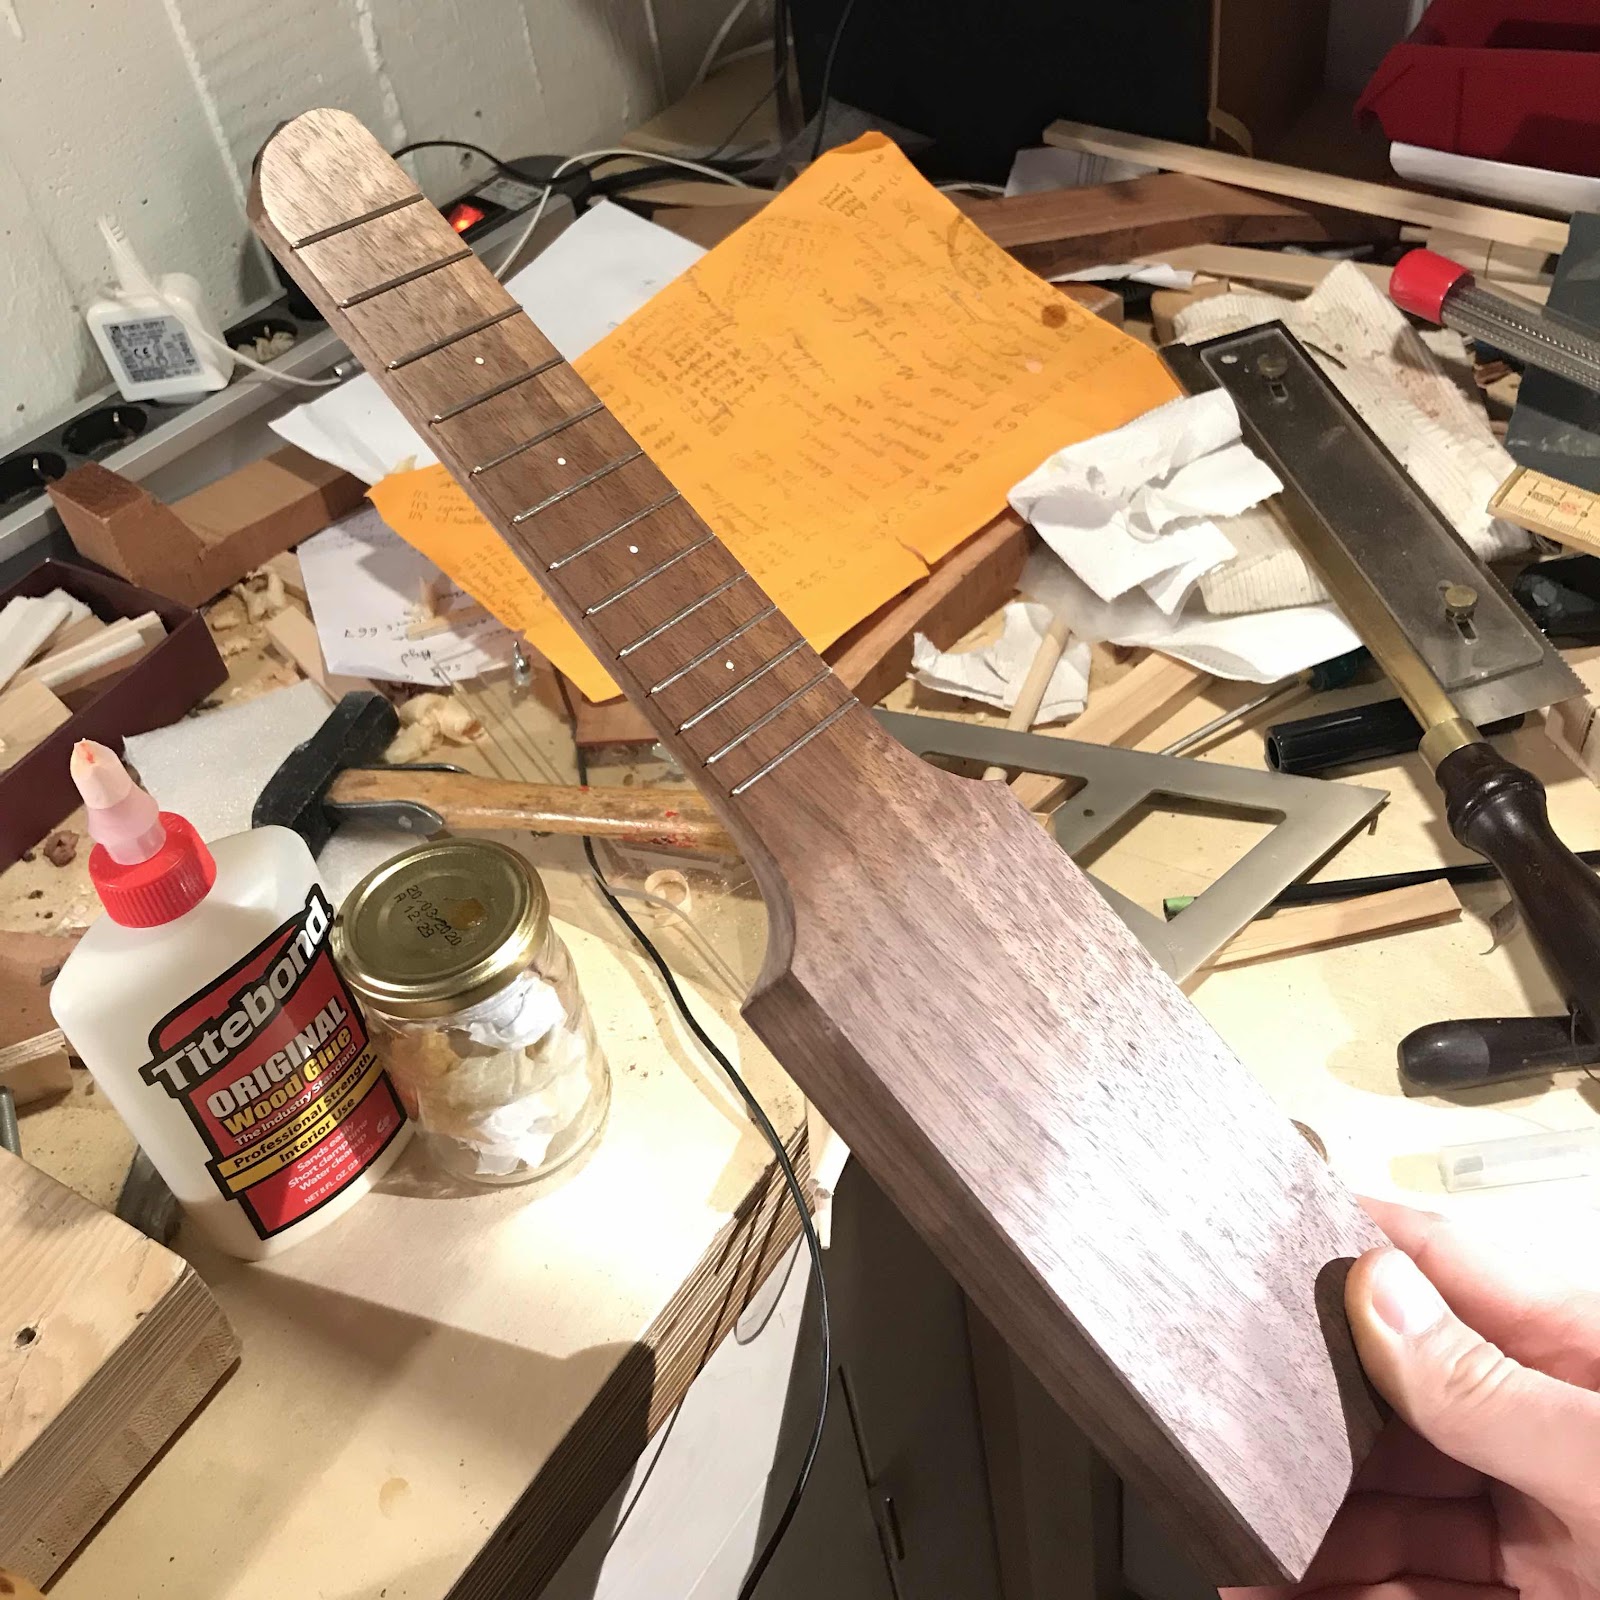
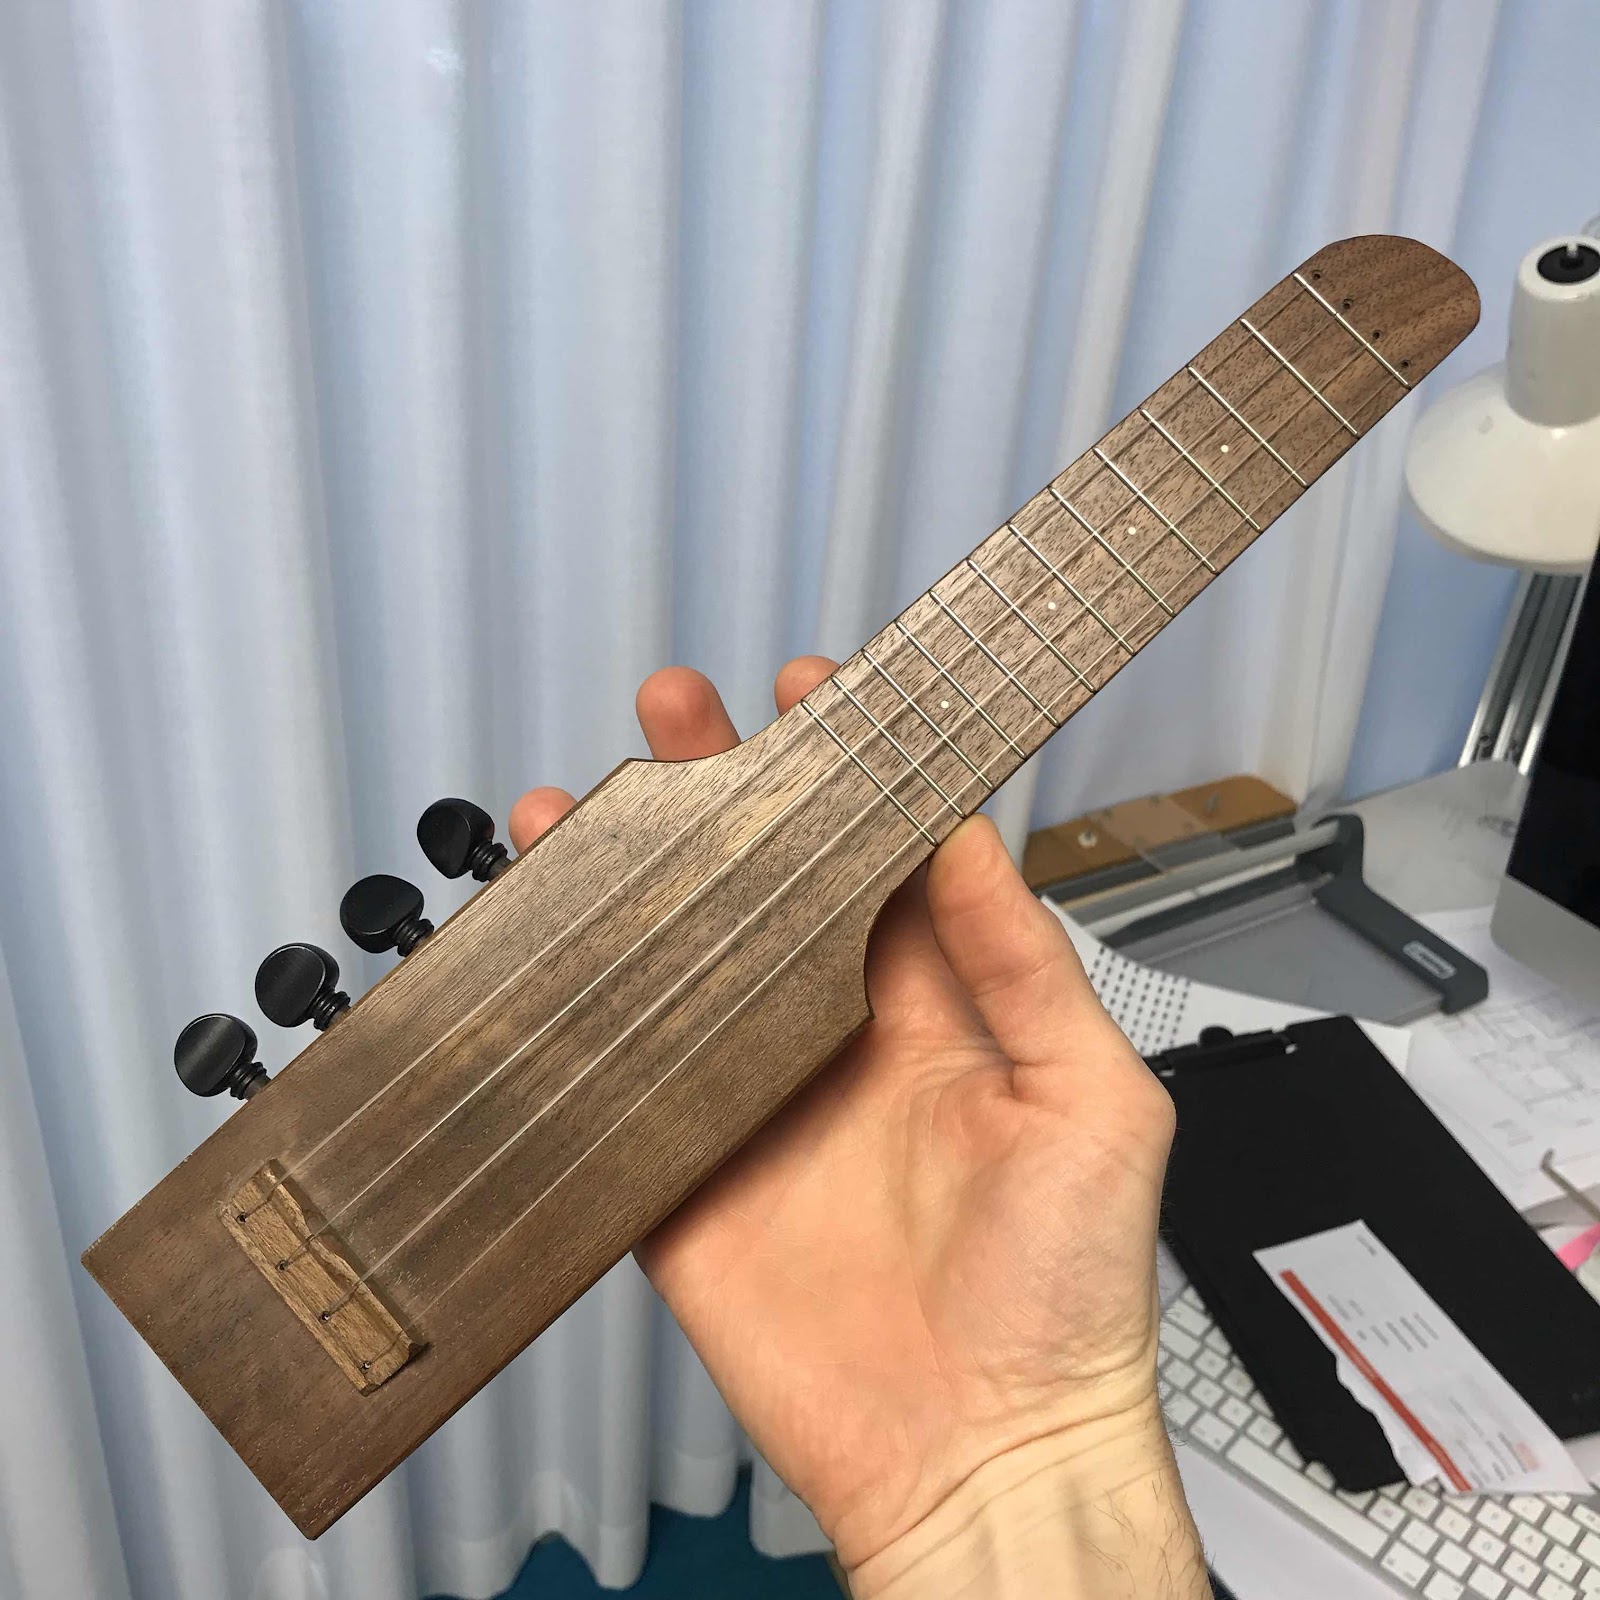
Well, here’s the front. 


Friday, June 14, 2019

Bridge and holes and stuff

I finished pressing the frets in, after a wash coat of shellac. I must be doing something right, it only took me 45 minutes or so. 


And after the frets are in place I can position the bridge lengthwise and sideways. 


Another of the many advantages of this design; look at the easy clamping of the bridge!


Then I made the hole for the carbon fibre tube around which the strings will go, and drilled the slanted holes for the pegs. 


This last pic is to serve as a reminder of the bridge profile. In case I ship this before I make a longer blank. 


Tuesday, June 4, 2019

More prögress on the travellers

I finished the travel uke you’ve seen me working on, but instead of taking pics I wrapped it up for shipping! Stupid, I know, but it meant I had to crack on with the other I have on the bench. Starting out by carving the neck, I opted to skip the entry point carve and go directly for some spokeshave action.

In the pic you see my Miller’s Falls cigar spokeshave, a cylindrical kind that is extremely fiddly to sharpen and set up. In fact I haven’t had that much success with it before, but this time my mindset must have been just right because it worked wonderfully. The point of the cigar shape is of course that you can do very tight inner radii curves.


And it leaves a fine surface. This’ll go into the zero sanding series.


The straight Stanley spokeshave and the Little Victor plane also helped, can’t remember if the small wooden spokeshave saw any action. In the pic it’s hiding under the wooden rule.


But later that day I thought better than I did in the morning and unravelled the packing on the finished Argapa 114. Just to show you.


The hollowed out backside is a bit rough. I need a spear point blade for my Record router, I imagine it would cut more cleanly.


The last two pics were taken at the office btw. You won’t find carpet like that at home.