Learning Ukulele 50 Sites Top 50 Ukulele Sites Argapa Ukuleles - one size louder: Repairs
Showing posts with label Repairs. Show all posts

Friday, March 11, 2022

Reinforcing the bridge patch

Remember the nasty, chewed-up bridge patch? That was more like a wide brace of soft spruce? I sure did, and wanted to glue a thin piece of maple so the ball ends of the strings have something more solid to pull against. 

First pic shows me doing a smart thing: I held a piece of paper under the brace and rubbed the edges of it so they marked the paper. Then I could measure the width more easily, outside the guitar. 


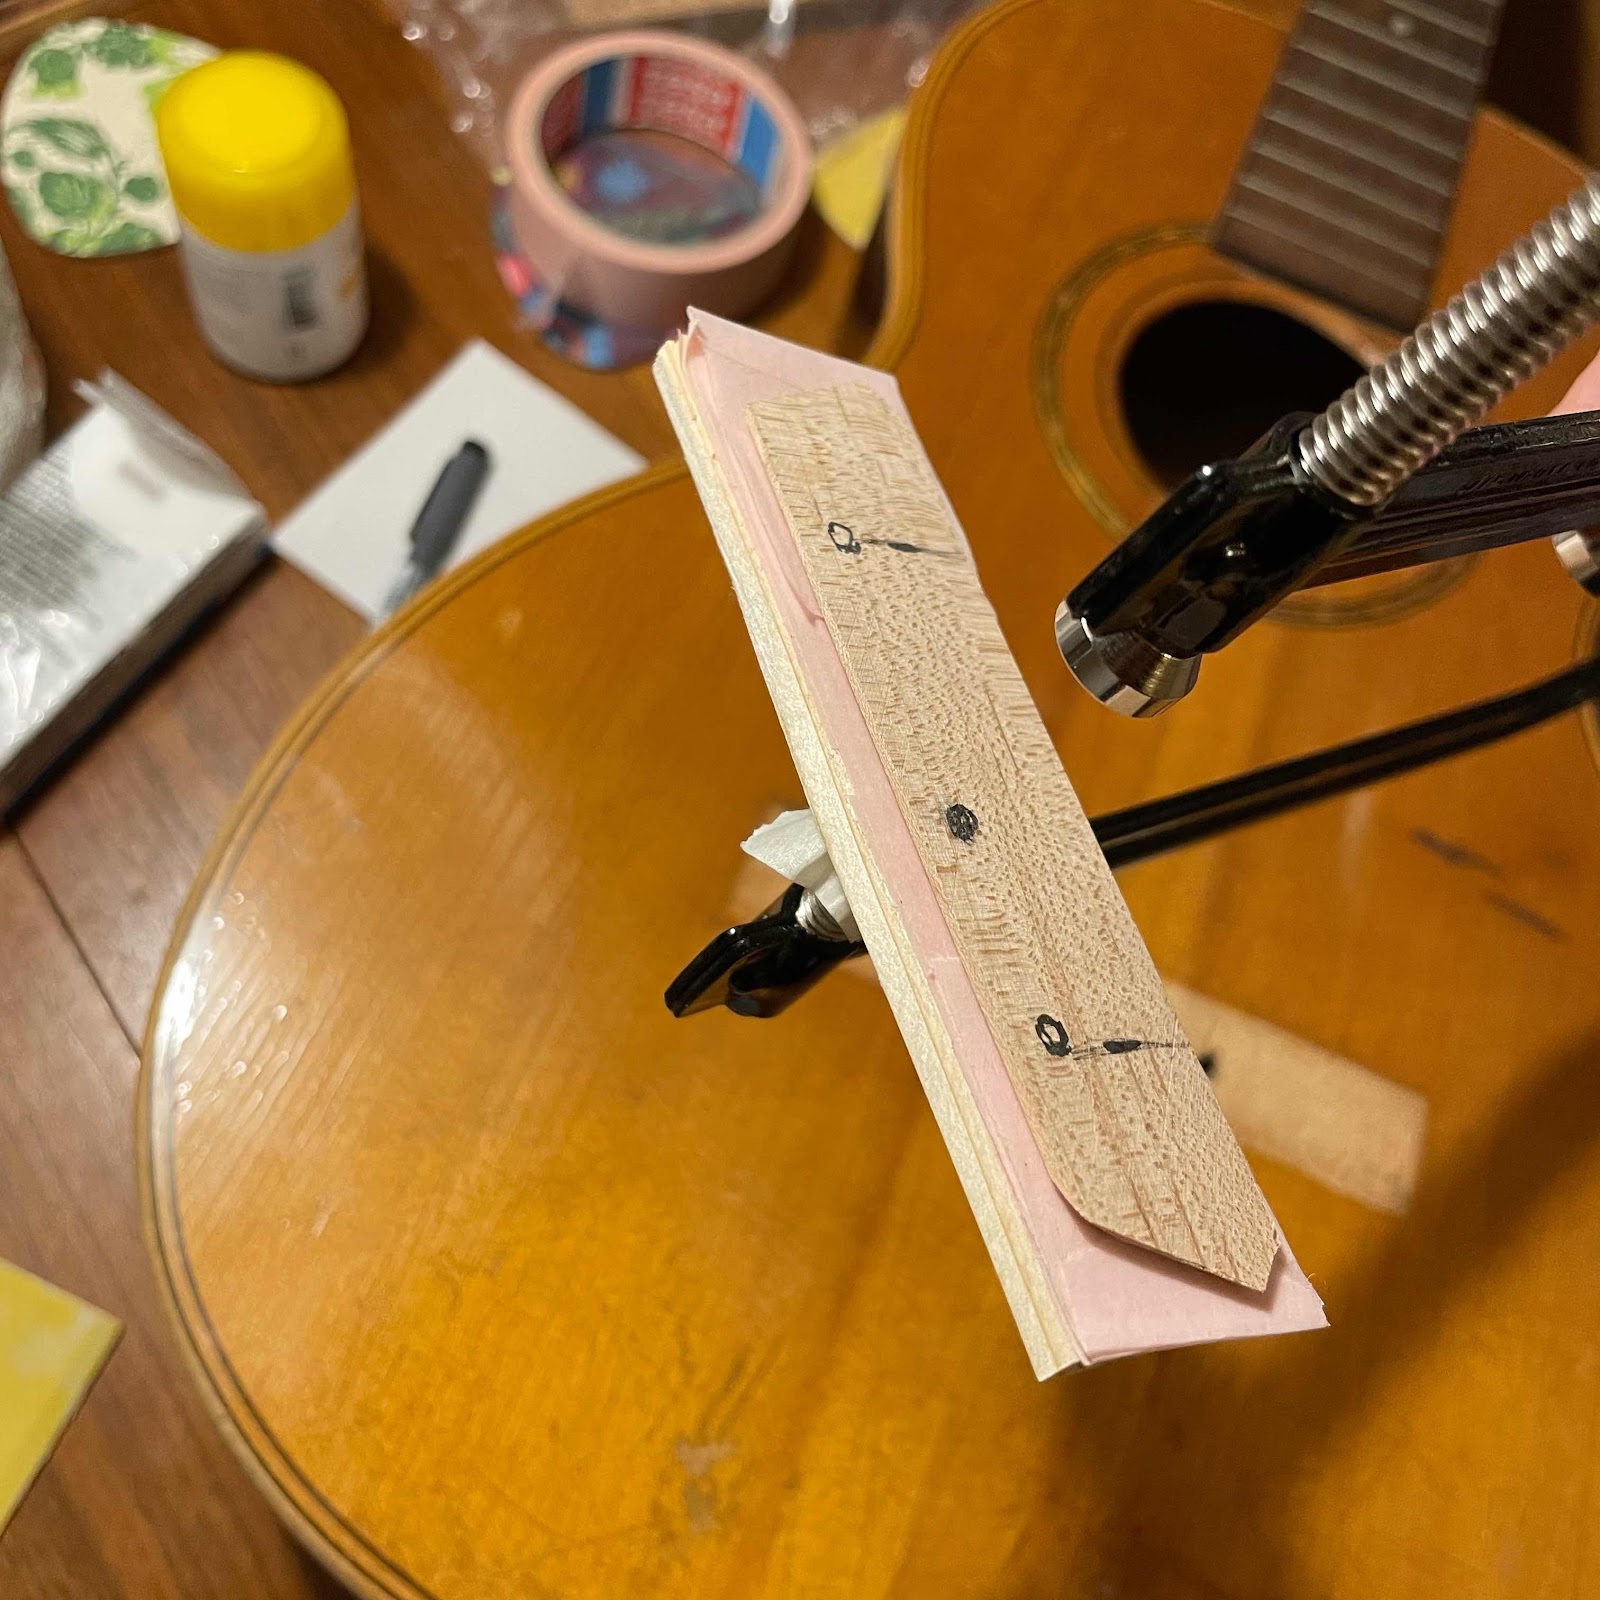
I went back and forth a bit, marking the new patch through the holes so it would end up in the right position. Here you can see the size and shape I worked out by guessing. 


Smart moment number two: I glued a caul on the clamp, and built two tiny ramps of masking tape so they were higher towards the ends of the caul. That way when I tighten the clamp it’ll give pressure to the entire maple patch instead of just in the middle. 

The patch was temporarily fastened to the caul with masking tape and superglue, and wiggled into position. My wife helped me because my hands were too big once the clamp was in. 


A caul on the outside and left to dry for 24 hours. 


Gut shot that shows we did well. Next up is drilling holes in the new patch and also in the new bridge, to get that positioned correctly over the existing holes through the soundboard. 


Tuesday, December 28, 2021

Getting ready for surgery

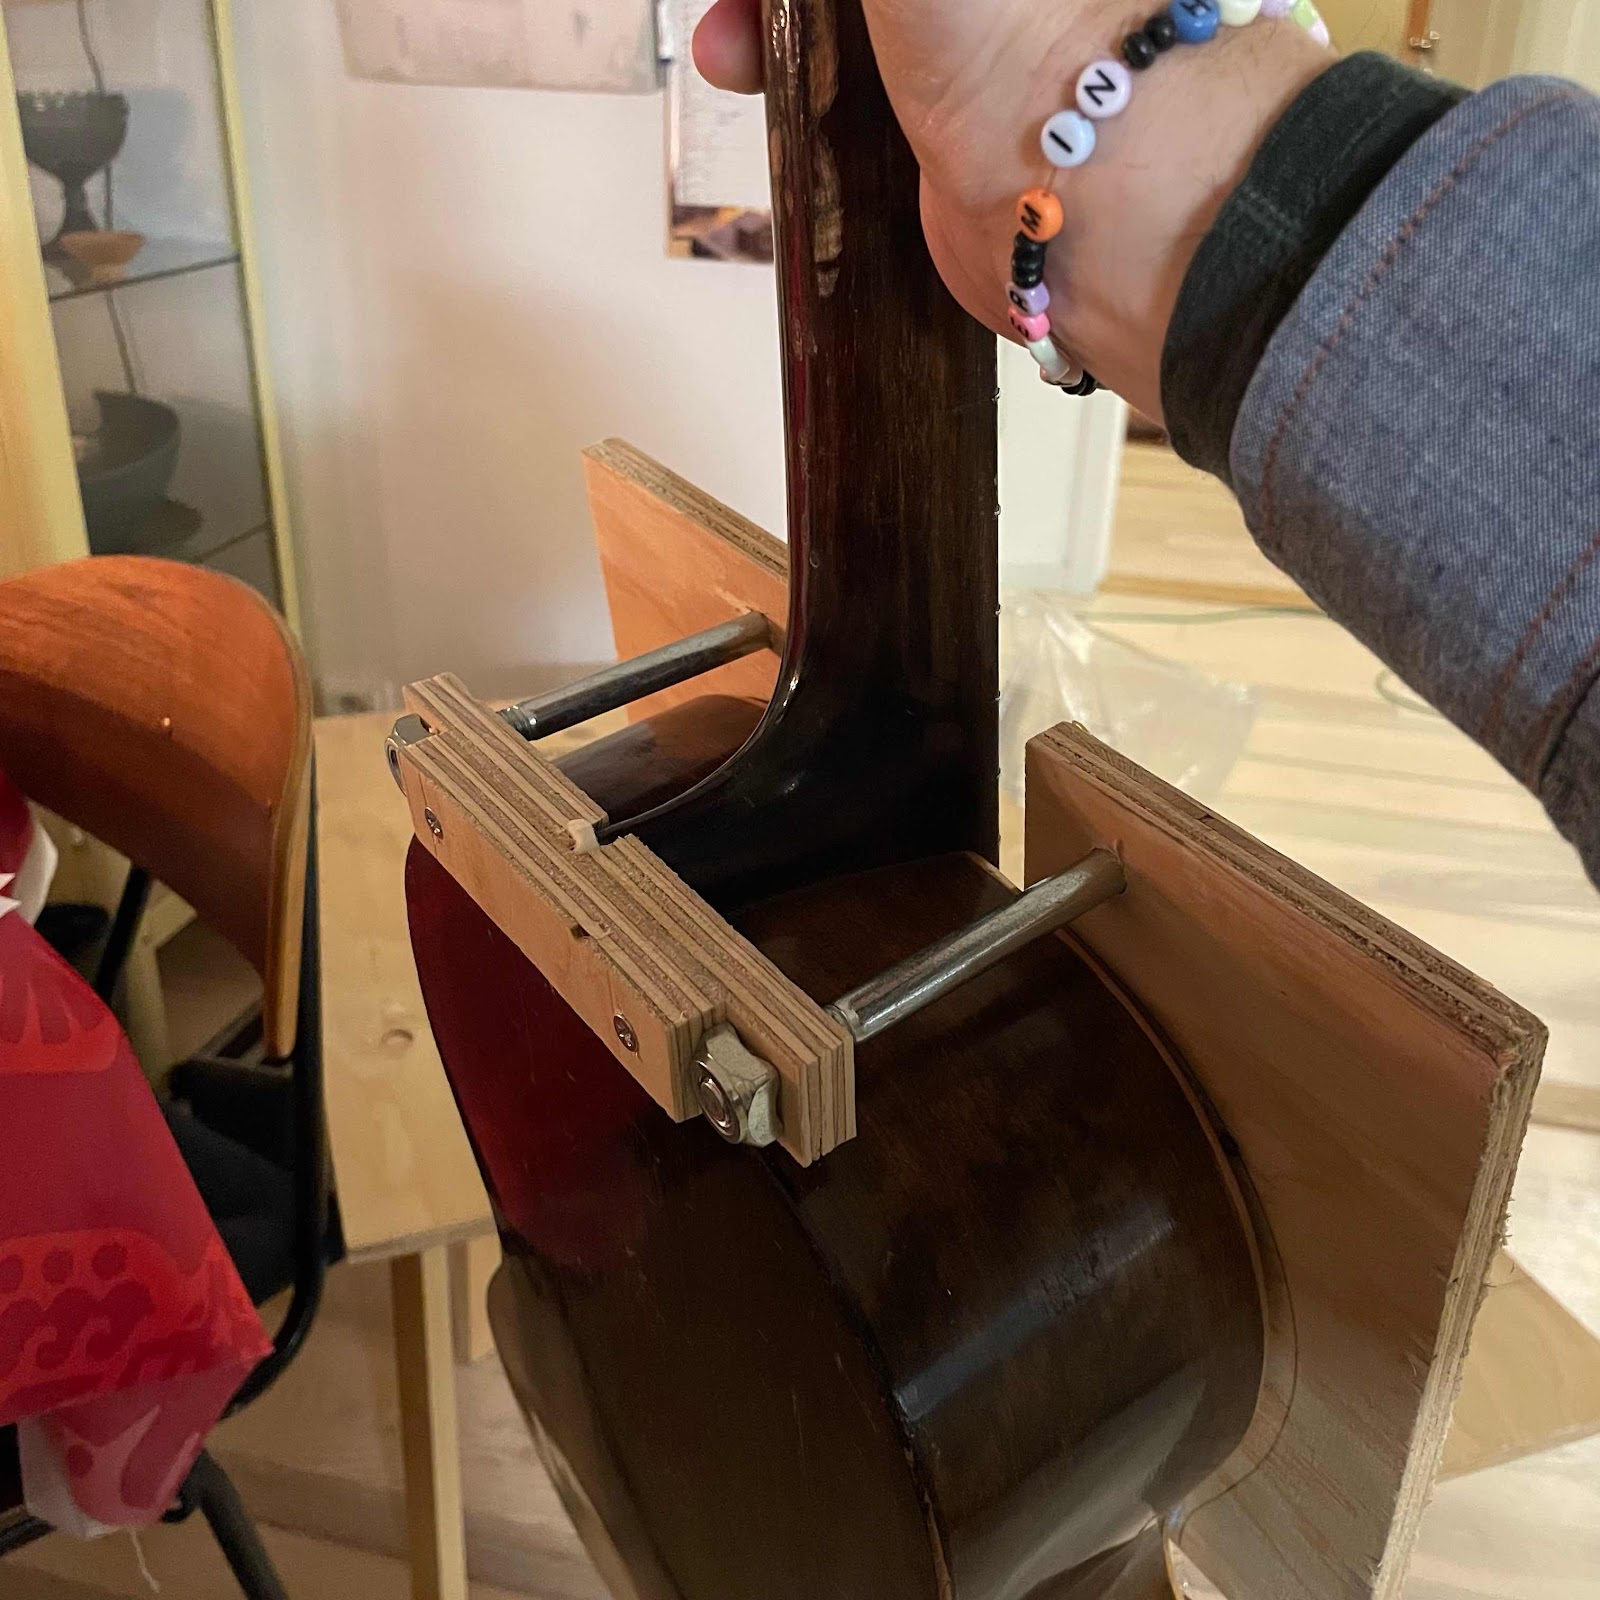
Having stumbled onto some plywood I set out to make a neck removal jig for the ancient guitar. As with all jig ideas of mine - at least the ones expected to work - I based the design on a readily available product from Stewmac. But mine will have fewer moving parts, and it might not fit other guitars. 


The main idea is to apply an increasing pressure to the heel, while heating the neck joint to loosen the glue securing the dovetail. Stewmac solves this with a screw going through a threaded hole in a metal bar, but as I make this with a minimum of tools in the kitchen I’ll go for a plywood cradle being pulled up. 

The screws visible in the pic is only clamping the parts, they’re connected to a bit from a Zyliss vise system. 


And even though I don’t have the full stash from the workshop at hand, I managed to find two large screws with square nuts. You can guess the rest, can’t you. The nuts won’t spin because they’re square, so turning the screws will lift the cradle and press the heel upwards. The top plate has felt cushions and will be secured to the guitar with a strap or a couple of clamps. 


Now we await the foam cutter. And re-watch some of twoodfords vids on youtube. 

Wednesday, November 17, 2021

Old guitar in for repair

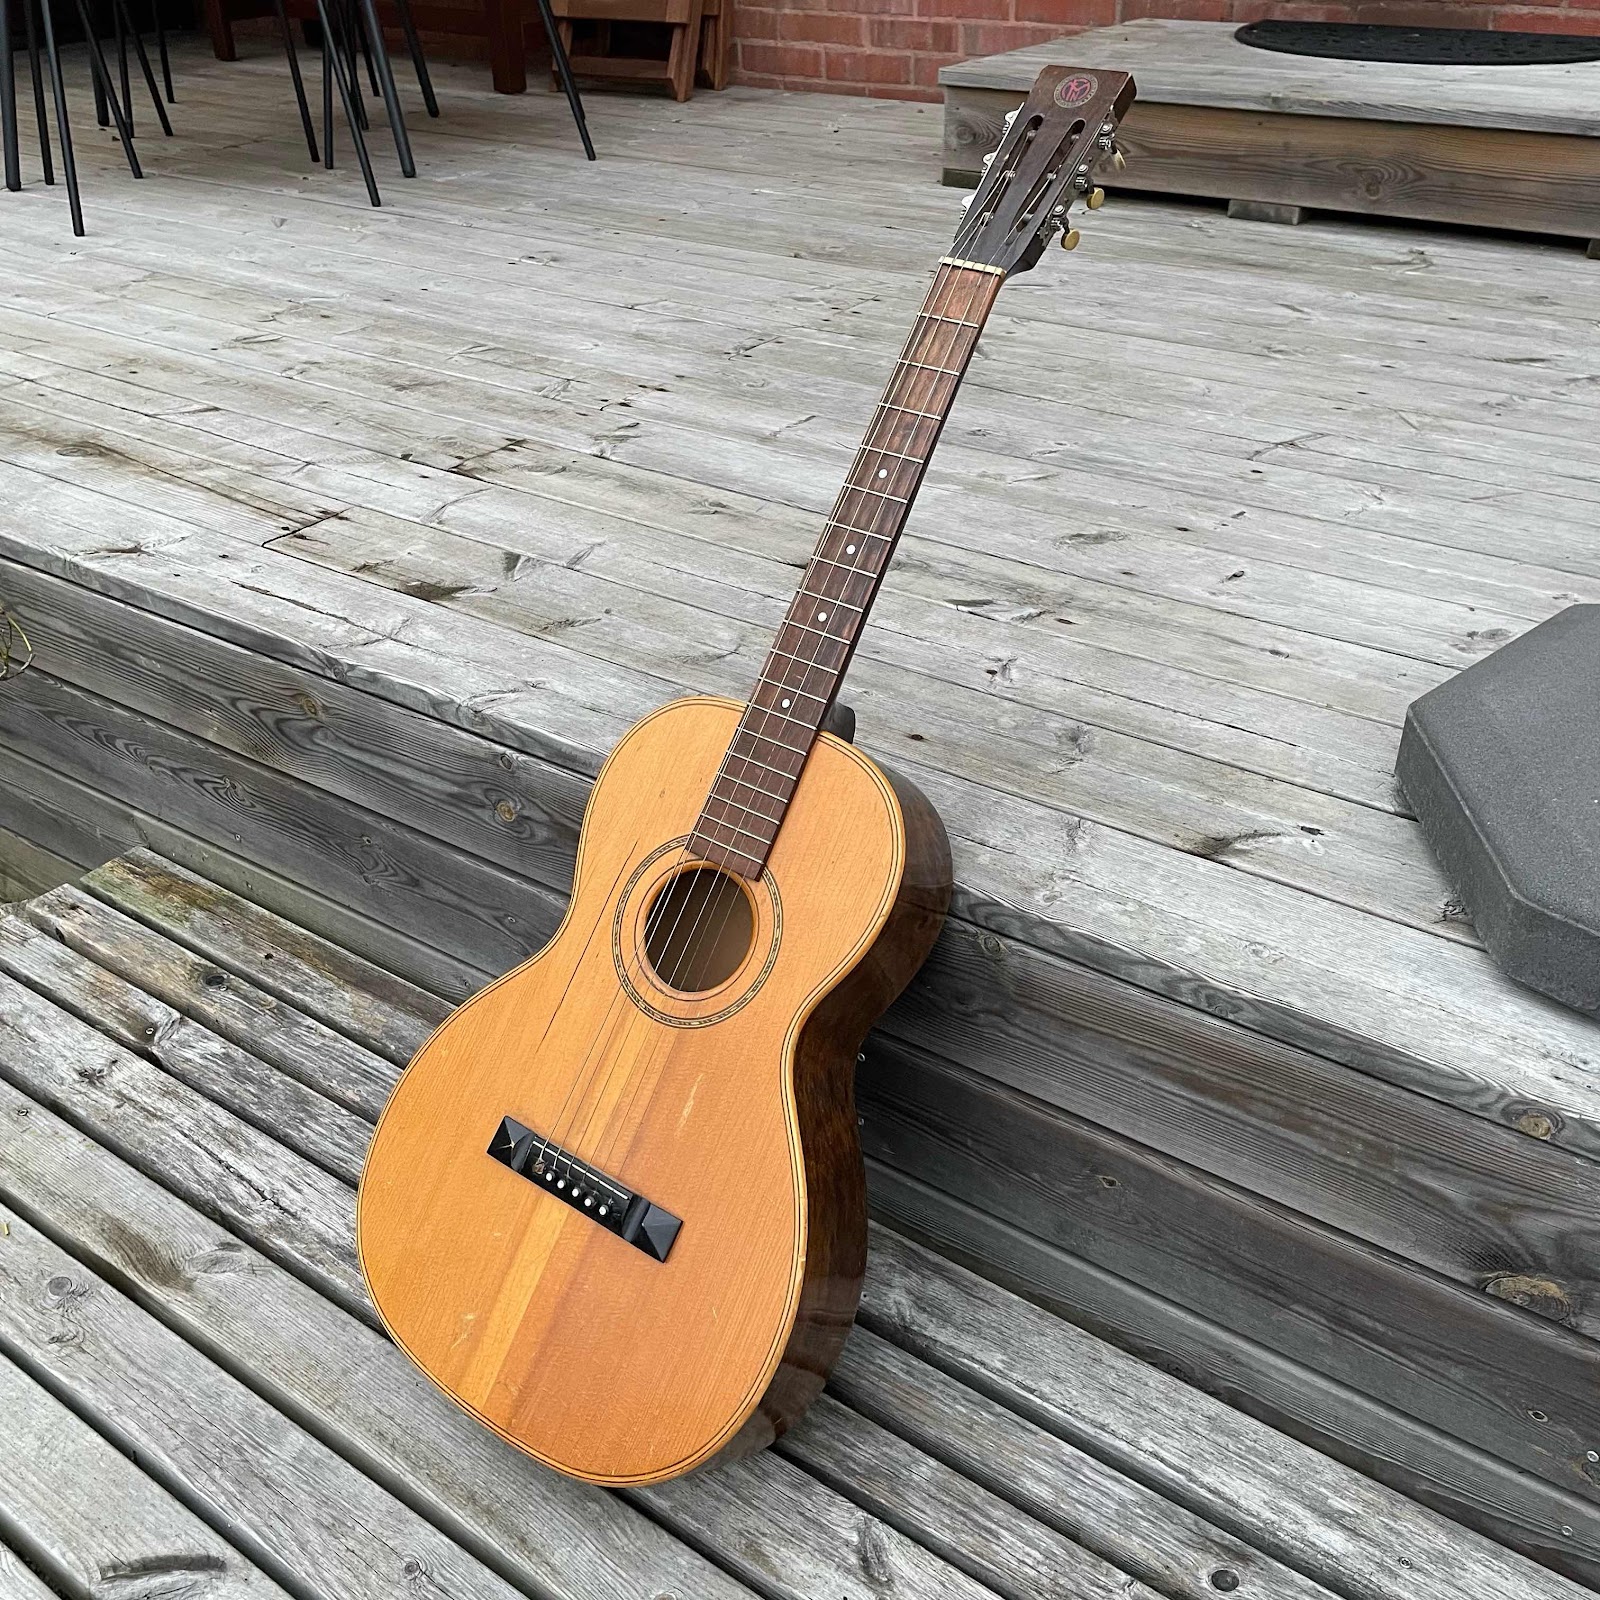
My friend bought this ancient guitar at an auction, and I’ll have a look at it to try to fix some more or less obvious issues. It’s at least 100 years old so I will tread carefully. 


The brand is ”Nya Musikinstrumentfabriken Göteborg” and the instrument is very similar to the parlour guitars from Levin. 


Issue 1. A crack in the top with the accompanying loose brace. The top is on the thicker side and the crack is fairly tight so pretty easy [in theory].


Issue 2. The bridge. Not only is it lifting, it has the fret wire saddle and the peg holes are worn. Plus it might be in the wrong place, I haven’t measured it yet. Maybe it can be fixed, maybe I’ll make a new bridge. 


Issue 3. A crack in the headstock, plus the tuners are wonky and mismatched. Might need to change them. 


Issue 4. The neck most likely needs to be reset. I’ve done this to a couple of cheapos but need to stock up on better equipment to do a clean job. 


Issue 5. The back of the neck has been… run over by a lawnmower? Used to parry sword blows? We’ll becer know but it will have to be at least sanded but probably carved. Then stained and lacquered. 


This’ll be fun. I will use it as an excuse to learn how to work with hide glue, and I will rewatch all Woodford’s vids on youtube. 

Wednesday, July 18, 2018

Slow but unsteady

We’re having the worst heatwave I can remember. I have to stay in the shade and take it as easy as possible. But I made the bridge (twice) and glued it on (twice). I started finishing (twice) and stripped off the finish (once). 


And I made the six holes and reamed them for the set of Wittner Fein tuners I got from Germany. More about them later. 


And I took my Dobro tenor guitar apart to service it some. I wanted to make a bone nut and try different strings. Now it sounds better but I might change the strings to get a wee bit more tension on the cone. 


Here’s the saddle slot in the spider, it was super rough so I trued it up and recessed the screw. 


Thursday, May 31, 2018

The Baron’s soprano in for service

My friend Robin is off to the UWC in the States, so he wanted me to polish up his soprano that I built so many years ago. 


I checked the frets to make sure they were all level. There was one or two that needed attention but no big issues. 


I checked by letting my tiny square straddle three frets at a time. A high fret will cause the square to rock. 


Then I taped the fretboard and made sure all were crowned properly and polished them. 


After cleaning the fretboard thoroughly with some naphta and scrapers I oiled it with linseed oil and restrung it. It barks as it should, one size löuder!

Monday, April 24, 2017

Getting closer to getting a result

The neck's back on, back plate and binding is in place. Time to partially re-finish the poor uke. For some reason the shellac goes on beautifully, better than usual. Which is a welcome break. 


The mahogany binding goes pop! under the first coats. 


Front edge binding with a very subtle maple line inside the mahogany. It's 0.5 mm I think. A bit more visible in real life, and it does look good. 


Friday, April 14, 2017

Body bound and neck attached

I bound the front edge, then took a deep breath and attached the neck. It went on straight. Then I glued the back back on and routed a rebate for the binding. Around the heel I had to make the rebate with a chisel, as the router wouldn't fit. 


The first two pieces went on with some careful taping and a wee clamp. As the glue dried I bent the rest of the binding. 


Here's a pic of the front, with maple and mahogany. 


And the back, with only mahogany. 


Time to mix some shellac!

Tuesday, April 4, 2017

Aligning and binding

To properly check the neck before re-attaching it, I made a jig of perspex and carbon fibre rods. The slots make a centre line and the rods slide up against the edges of the fretboard. 


I love one piece tops but sometimes miss the centre line you get on bookmatched ones. Anyway this is looking better and better. 


When I glue the back back on it will be nigh impossible to get it perfectly aligned around the edges. So I can either make a new back or use the old one and bind it. I'll bind it. But I can't have binding around the back without adding it to the front as well, and the front goes first before the neck goes on. I'll use maple and mahogany on the front and maybe just mahogany for the back. 


The works progresses with less stress as I get into it. I feel a bit more in control but I do look forward to finishing this. 

Friday, March 24, 2017

Back [in black]

Did I ever say this blog is a warts-and-all narrative of my building escapades? I did didn't I. So be prepared for a few all-warts posts then. The truth is I have received the first known Argapa in need of a neck reset. Sensitive viewers be warned, there will be pics from the operating theatre. I don't know yet how much text there will be mitigating the impact of the pictures, to be honest it's quite difficult to write about it. 

About the neck in question, I blame it on a simple curse from cruel gods who got pissed off by my hubris earlier this year. 

But first let me show you the good news that after all exists - the shruti box pedal is done and it works. 


Now a couple of gruesome pics. 


Wait, it gets worse!


Fanx for reading. Peace. 


Saturday, December 3, 2016

More waiting, and distractions

I bit the bullet and bought a new random orbital sander. The idea of sanding the finish on these seven ukes was too much to bear so I ordered it earlier this week. But DHL tried to deliver it at noon on Friday so naturally I missed it. I'll try to change delivery address to the office.

So, this weekend won't go down in history as the great flattening and polishing weekend. Instead it might go down as the not so great bass restoration weekend. But first let me show you some ukes. 


Argapa 100, destined to be the odd child of every schoolyard it dares to tread. A taropatch soprano, who'd've thunk it? I'm rather pleased with the fret markers as I'm sure you are as well. Double strings slightly out of sync. 

And here they all are, with a rather heavy coat of shellac. I slathered it on with a brush so more a spirit varnish than polishing this time. You get why I need that sander. 


But the sander isn't here so I turned to my short scale Teisco bass. I will swap tuners, electronics and the pickup. I already did a re-fret job and made a new pick guard. And changed the bridge. So it's not much left of the original (it was already heavily altered when I bought it).

Here's the back of the headstock. I filled some screw holes. 


And I read in Dan Erlewine's book on guitar repair: "... guitar electronics is one area of repair where a novice usually doesn't do much damage." Those are good news since I'm a bit of an amateur when it comes to soldering and stuff, but look at the state of it now. It can't get any worse. 


Wednesday, January 13, 2016

Tenor guitar restoration

This post has taken me several years to write. 

A couple of, or three maybe, years ago my wonderful friend Brian read a comment I made about them ultra cool Gibson SG tenor guitars. He emailed me at once asking "why have you never told me you like tenor guitars, I'll send you mine". And he promptly did, in a totally shit package which left it to luck whether or not the guitar would arrive in one piece. From Arizona to Stockholm. 

And what was it? It was only a Dobro resonator tenor from 1937 wasn't it. Now old Dobros were made by different factories as far as I understand, some of them under different brand names. But this one has the Dobro lyre on the headstock and it was marvellous. 

But it had neck issues. The neck was bowed and had a twist too, making it very hard to play with my poet hands. And the frets were shot, some of them grooved so they looked like nuts. So I thought, hey, I'll fix this. And if I still can't play it when it's perfect I'll send it back to Brian.

I had a couple of other clunker guitars with bowed necks and someone told me they could be set straight with heat and clamps alone, so I tried that. One of them went straight but suffered some lacquer damage, the other one got a bit straighter but it felt very unpredictable. And I didn't want to risk the lacquer on the Dobro. 

So I posed some questions at a luthier's forum about those fretwires with fatter tangs, as I'd heard they could be used to straighten necks. The tang is the part of the fret that goes into the slot in the fretboard, and a fatter tang can push that slot out, lengthening the surface and bending the neck backwards. I've read about restorations were a set of frets with tangs of different thicknesses fixed bowed necks, but I had trouble sourcing the special fretwire. 

At the forum some guys said it might work but the legendary luthier Rick Turner chimed in saying "that's the most back asswards way of doing it! The only way is to pop off the fretboard, plane the neck straight, route a channel in it and glue in a carbon fibre rod."

That sent the whole idea of fixing the guitar to the back burner. I felt very poorly equipped to pull an operation like that off. 

Then my friend Brian died. 

I was devastated. And so were all of his many friends. The Dobro was in its case (a case I bought in a thrift store for it since it came only in that ratty box) and the case got covered in dust. I would show the guitar to friends sometimes but I couldn't play it unless I used a slide. 

But things happen. I was shopping for fretwire for a friend's guitar and found fretwire with fatter tangs. So I bought some, thinking it might be worth a shot at least. I was still reluctant to pop, plane and route as mr. Turner so kindly had advised me to do. 

And then this weekend I had a couple of hours and examined the old frets in their slots. I realized right away that not even magic super tangs from the fourth dimension would do anything to that old and weird fretboard, it was stained birch or something soft like that and when I pried an old fret up it brought enough crumbling wood with it to make the slot wide and uneven. I went into fight mode. 

I ran a scalpel along the edge of the fretboard (because I've seen Dan Erlewine do that) and put a clothes iron on the fretboard at the nut end. When it smelled bad enough I put a wooden wedge and the nut end and pushed it in. 

And off it popped. Or started to pop anyway, I had to move the iron down the neck a bit so it was a suspended pop lasting a few minutes. (Not poop though as I'm sure many of you already read into the above description.)

Sighting down the neck (which was a soft stained birch) I saw the bow and the twist but it was easily fixed with a couple of different hand planes. Good thing I have a few of those. Then I looked for a carbon fibre rod, and did find one of the exact required length. I tell you, this was meant to happen, as mr. Turner no doubt knew. I needed a two mm wide slot, no problem, and also a way of guiding the router. Could be a problem. I tried a few ideas for building some rails to guide a sled in which the router would be mounted, but saw it would be unwieldy and overly complex. 

Then I looked at the router bit and it has a three mm shaft. Hm. There is useful information in that fact. Let's continue this with pictures, shall we. 


Two slats of scrap wood, but with smooth and completely straight edges three mm from each other. Screwed onto the neck, which is held steady by clamps and struts. 


Me routing with my Proxxon router. I let the shaft of the bit ride between the guides, and went deeper with each successive pass. I made three or four passes for a ten mm deep channel. 


The rod in a very snug dry fit. The width of the channel was perfect despite the several passes. 


I drilled some holes in the rod and roughed up the surface a bit, then put epoxy glue on it and in the channel. 


And let it sit for 24 hours. I actually planed down the excess, a fun experience that sent the plane iron to the sharpening queue. 


Then I pulled all the old frets out, sanded the fretboard and replaced a broken position marker. 


The fat tang frets was a perfect choice. Notice also I re-stained the fretboard. I took my time and filed the ends of each fret before glueing them into the slots. Who wouldn't want PSFE:s on their own guitar?


And then I glued the fretboard back. I managed to put it exactly right, a bit of a challenge since the width was the same as the neck. When I build ukes I usually keep the neck a bit wide and scrape it down to the fretboard edges after glueing. 

Yesterday I put strings on and it came alive. Growly and coarse but with a unique warmth and a truly loveable voice. 

Just like Brian. 

Sunday, November 10, 2013

Saturday night action

After the kids had gone to bed I whipped out the shellac and muneca, the bending iron, and Robert's baritone. So look at the pics, in the first you can see the concert half way through the french polishing process. To the right in the photo you see Patsy's mahogany sides bent and put into the piccolo mould.

Second pic shows the baritone which had a loose brace end. I was going to sand the old glue away with a piece of sandpaper in the gap, but the whole brace fell out. That was so much better because I could then plane a new surface and glue it in again.

But..! What of the two latest resos that were in progress?! I know you were wondering. Look at the last photo, both tops are glued to their respective skeleton. This way of doing it saves clamps, and I really want them to move on side by side. (But maybe I just wanted to take a funny picture.)