Learning Ukulele 50 Sites Top 50 Ukulele Sites Argapa Ukuleles - one size louder: Bracing
Showing posts with label Bracing. Show all posts

Saturday, June 13, 2020

Back braces on soprano

I make my backs differently from most builders. Rather than bracing the back and glueing it on I mount the braces first and then the back plate. 

I needed some bracing stock with the right grain direction so I chose this piece of square section spruce with a tight grain structure. Using the Pax rip saw I split it into three triangular pieces. 

Rip sawing is very satisfying. 
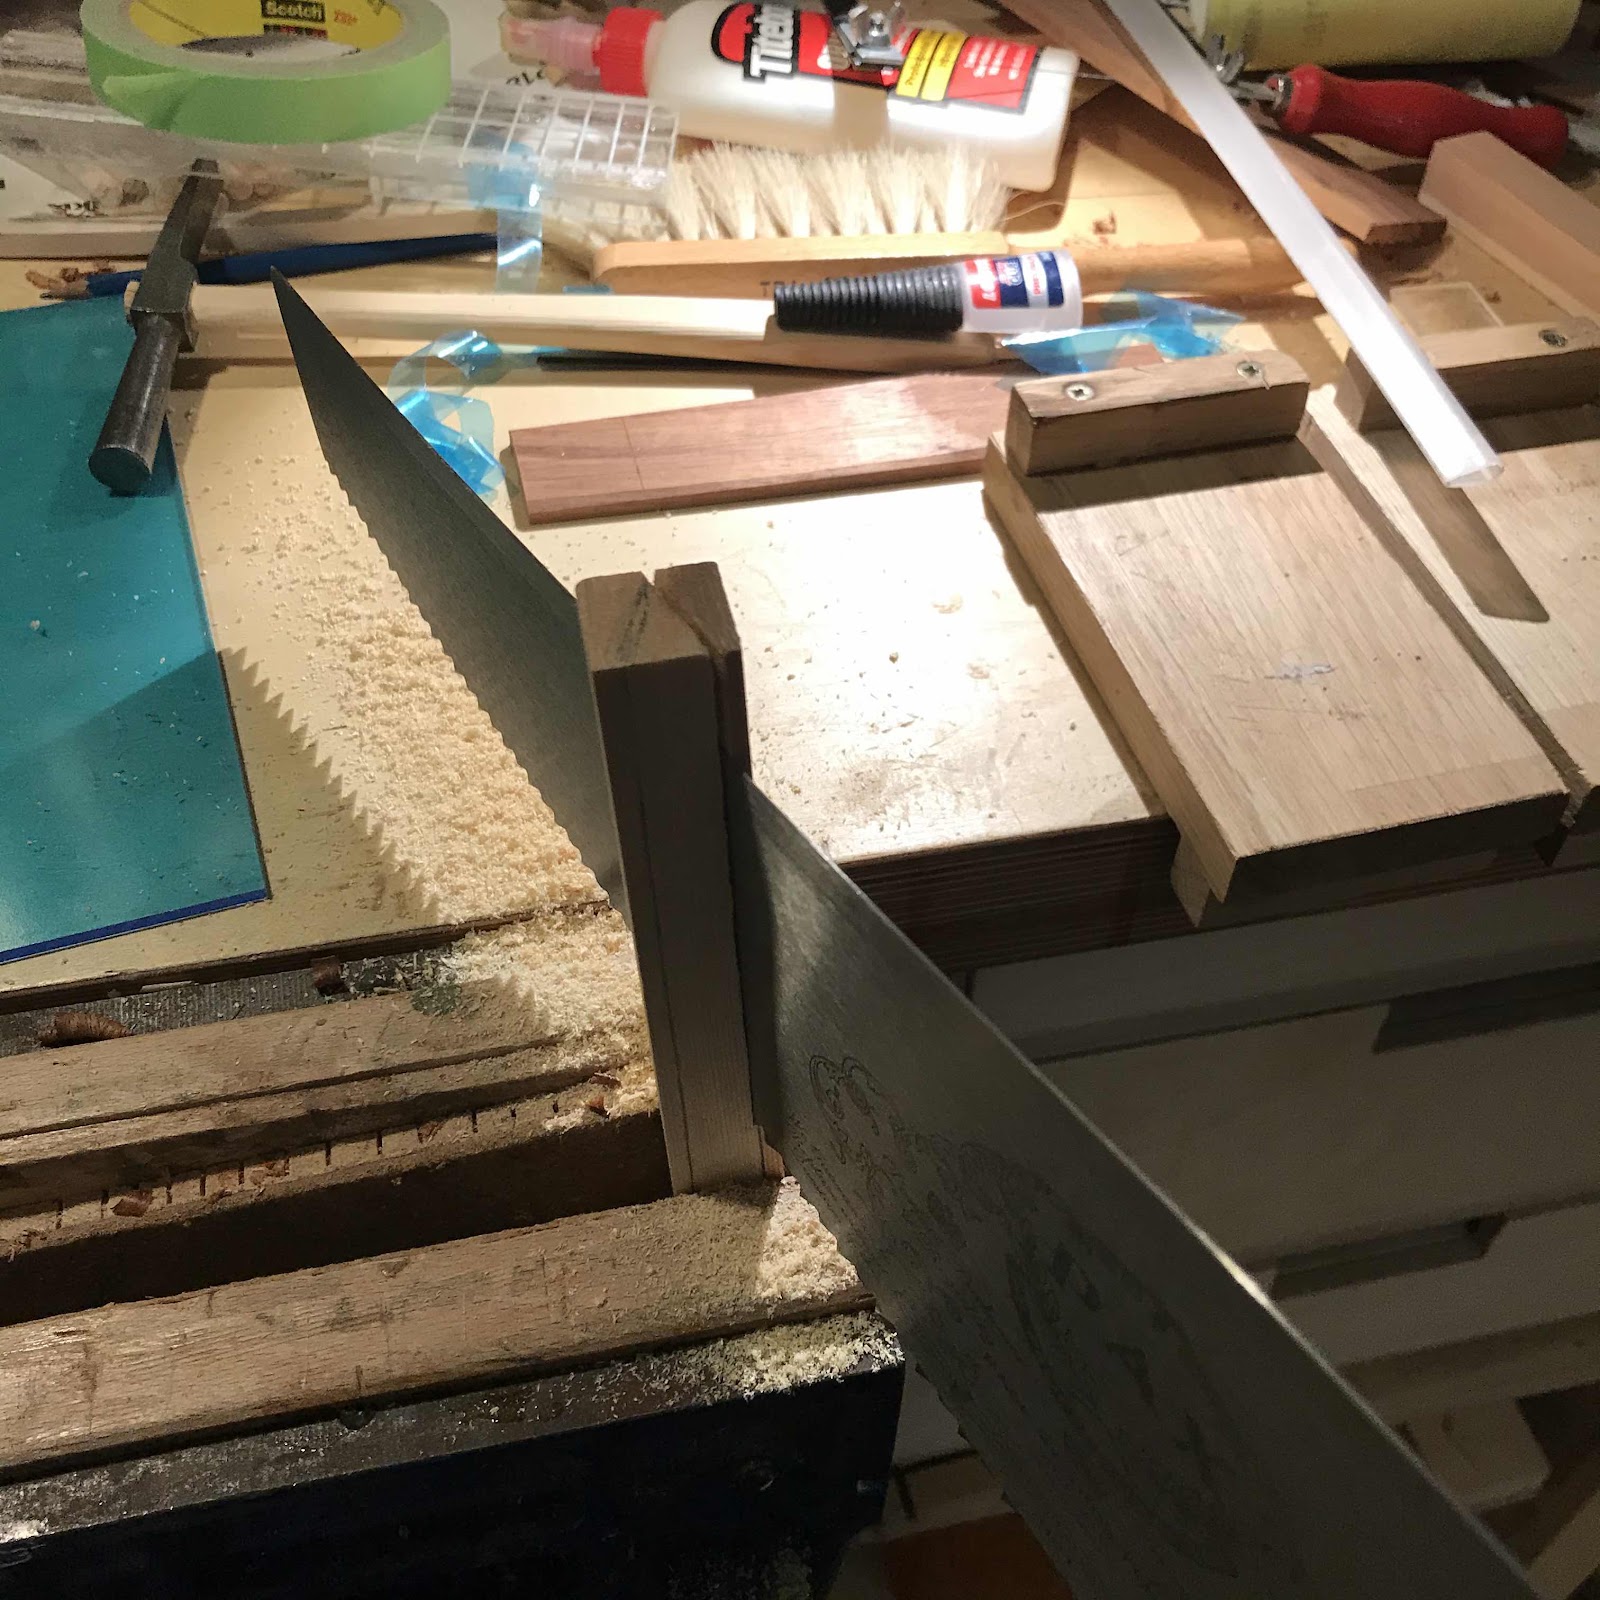


Here they are, before I refined them with a plane. I made a planing jig to hold them, I’ll post a pic next time I use it. 


I arch my backs. The rim is already planed down to match a spherical radius dish, and after glueing in the kerfed lining strips I take the whole assembly to the dish. It’s clad with sandpaper and makes everything match the same curve. 

The braces are planed to the curve and finished in the dish, the pic shows me rubbing a pencil on the curved edge so I can see the progress during sanding. 


Using a wee saw I make notches in the lining to accept the braces. The notches goes in a kerf so the remaining pieces are equally big and offer support. That’s why the back braces of an Argapa can be slightly slanted. I’m sure many of you have noticed and wondered about that. 


The first brace is glued and clamped with my small Japanese bar clamp. 


And here’s the back of the resonator. The scribbled words on there shows my planning skillz. 


Wednesday, February 20, 2019

Back braces and back

I made the back braces from some old spruce wood, salvaged from a loom. Planing in the nut and saddle vise from Stewmac, a great vise for this but I have to watch out so I don’t hit the jaws with the plane iron. 


Then I notch the kerfed lining to accept the braces. I use a Japanese modeller’s saw with very fine teeth. 


And I clamp them with my tiny Japanese brass clamps. 


The whole assembly goes into the radius dish, but of course the braces were roughly shaped before glueing. 


The back seam is reinforced with a strip of cedar, glued across the joint. Really fiddly to keep the strip straight, I ended up paring it straight[er] after the glue had dried. I want a chamfer anyway and I have really sharp chisels. 


The back is prepped with small guide blocks and the cross banding strip is notched for the braces. 


And it is glued in place with screw clamps, a caul, strips of wood and a few go-bars. Not much left now!


Monday, June 12, 2017

Bracing

It was a while since I braced a soprano top. I went with the, hopefully correct, muscle memory and it was no problem at all. I went with a spruce bridge patch but will consider hardwood patches next time because of the string through bridge I use. But spruce works, with beads above the knots. 


I deliberatly left the braces square because I enjoy shaping them in place. 


Tuesday, September 30, 2014

Glueing back braces on the walnut tenor

Tonight I did some work on the tenor which is in progress. The first pic shows it clamped on the workboard. You can see the pickup I installed, a K&K twin spot. It's very neat and the cable won't rattle against anything. But I found it irksome to get the nuts tight enough and would not attempt to mount one of these on a completed uke, the back being off was crucial for me. 


I build backwards, putting the braces in the body and not on the back. Here you can see me tracing the curvature on the radius dish. 


With the Veritas apron plane clamped in the Zyliss vise I take the braces close to final shape. The braces are triangular in section, I sliced a longer rectangular profile into three pieces on the mini table saw. Grain direction is vertical. 


Then some super fast sanding in the dish. 


The braces are shaped with a carving knife and the miniature block plane (which is a lovely tool).


The notches in the linings are cut with a model maker's saw, I think it's an Exacto. I used one of these in England this summer and bought one when I got home. I've used a Japanese saw for this earlier but it's too aggressive. The notches are triangular to suit the braces. 


Done. Would you look at those brass clamps? They're available online, I think I got mine from a webshop in New Jersey. 

Also, in the foreground is my friend Tiny Plane, and its friend Wee Shavings. 


Monday, September 1, 2014

Bracing and binding

Since I got back from the Middle East I've braced the concert soundboard, glued it to the sides and worked on binding both the concert and the tenor. 


I shape the braces with a large array of tiny planes. It's resting on a mouse mat that I bought on sale, and you might remember the Dust-E-Whacker. 


This concert will be slightly narrower than my other ones, the sides were a little shorter than I had wished. 


I routed the binding channel on the walut tenor. And it's an easy wood to work with, no surprises and no splinters or tear-outs. But I have to wear a dust mask. 


The last pic shows the binding installed and taped, and the concert has been routed as well. On both I bent a single piece of mahogany binding, but that is unnecessarily difficult really. You have to be really careful to avoid gaps which will appear if the distance between the two waist bends isn't exactly right. 

Saturday, October 5, 2013

Shaping braces on the koa concert

This is the third concert I build, without doubt the rarest of Argapa models. So there are no rules or truths yet, just me guessing and using whatever feeling or instincts I've developed during my almost five years as a hobby builder.

The pic shows the braces and bars about halfway done. I'd almost forgot my larger Ibex plane, and the wooden brace place. Both came in very handy and I can see myself avoiding some nasty cuts in the next softwood top I make - I'll just have to remember to use these planes instead of some more square ones.

Monday, March 28, 2011

First top glued

Soundboards braced with the single brace, and the first one is glued to the sides. It's of alder as you can see. I haven't cut the holes yet, I'm working on a new method.

Monday, January 3, 2011

Robin's soundboard braced

Finally. I re-used the brace closest to the neck, but made a new and slightly better for the middle one. Bridge plate has the same dimensions, but I have to evaluate the need for the single racer brace that was there originally. The cedar I use this time is stiffer and might not need it.

I think I'll have to rely on Robin's tinnitus, and just tell him it sounds exactly the same as before.

Saturday, April 10, 2010

Pineapple continues

Yes it is time to finish Markus' pineapple. It's not that much left
actually. Just the back and the fretboard (on which Markus wants some
big ass inlay work...).

Back braces got installed today. Most builders glue them to the back,
but this way suits my manner of doing things.

Tuesday, November 3, 2009

Bracing, little by little

I sneak down between the rest of the duties to glue a brace or two. I
also did some work on the neck, made the recess where the soundboard
will fit.

It is great fun.

Sunday, November 1, 2009

Tenor no. 4, bracing

Melker's tenor took a leap forward as I started bracing the
soundboard. Now I'll enjoy the feeling of assembly that I get when I
build my tenors. It's mostly because of the spanish heel, but now the
parts have been ready for a while and it will feel even more as if I
just glue a kit together.

Experience so far has made me try a slightly larger bridge plate on
this one, the soft cedar top is also very thin.

Thursday, May 7, 2009

Bars and braces shaped

Between breakfast and taking the kids to school, I got about 15
minutes of quality time. Rather stupid since I'll think of nothing
else today than of continuing my building...

Tuesday, May 5, 2009

Glueing bars and neck

Yup - bars, bridge patch and neck are being glued. Still no go-bar deck.

It is a huge ukulele. Compare the size to the plane in the foreground.

Tuesday, March 3, 2009

Back braces

Well I'm back after more than a few days. Had to work hard at home
with building a new wall with wardrobes and cupboards, and my day job
is sadly enough evolving into a day and night job... To many houses to
draw at the same time.

And my sweet kids. Every time they exhale they call "DAD!"

So when is a poor man gonna build his commissioned ukuleles? I don't
know. But tonight the back braces / ribs finally got in place. They're
a bit thicker than the soundboard braces, and they're notched into the
linings. Something ought to provide some structural integrity on these
ladies, and sides and back are really thin. So the braces should make
sure the domed back doesn't cave in, and also make sure the sides are
connected across the body.

I really want a scrub plane. Anyone wants to lose one?

And note the nice shavings on the pic. I love those. That makes me a
nut, I know.

Friday, February 6, 2009

Soundboards braced

Managed to put braces and bridge patches on today. And then I glued
the first one to a set of sides.

Thursday, November 27, 2008

Braces and bars

Glueing bridge patch and braces. Still everything comes from the same
piece of wood, but I'm not sure the neck will.

Sunday, January 20, 2008

Back braces


Sanding braces on the radius dish. A wonderful piece of equipment, that I thought would be hard to find / buy / make. But it was easy, and cost me nothing.

Saturday, January 19, 2008

Braces


I've scalloped the braces, soon it's time to fit the neck to the soundboard.