
Showing posts with label Next gen resos. Show all posts
Showing posts with label Next gen resos. Show all posts
Thursday, February 18, 2021
Video demo
Don’t know if it will show up here or not, but the link leads to a youtube vid of the two resos.


Tuesday, February 9, 2021
Coverplates, nuts and strings
I feel it would be verging on cruelty to say we’re getting close to the finish line or something to that effect. Let’s just see where we end up at the bottom of this post.
I have a template for marking the locations for the screw holes. This template is one of my finest achievements, I vividly remember the wonderful day when both halves of my brain lined up and fired the idea behind it.

With the cone in the well and a 3 mm drill bit at the 12th fret I dial in the height of the saddle. The biscuit is fastened to the cone with a screw from underneath.
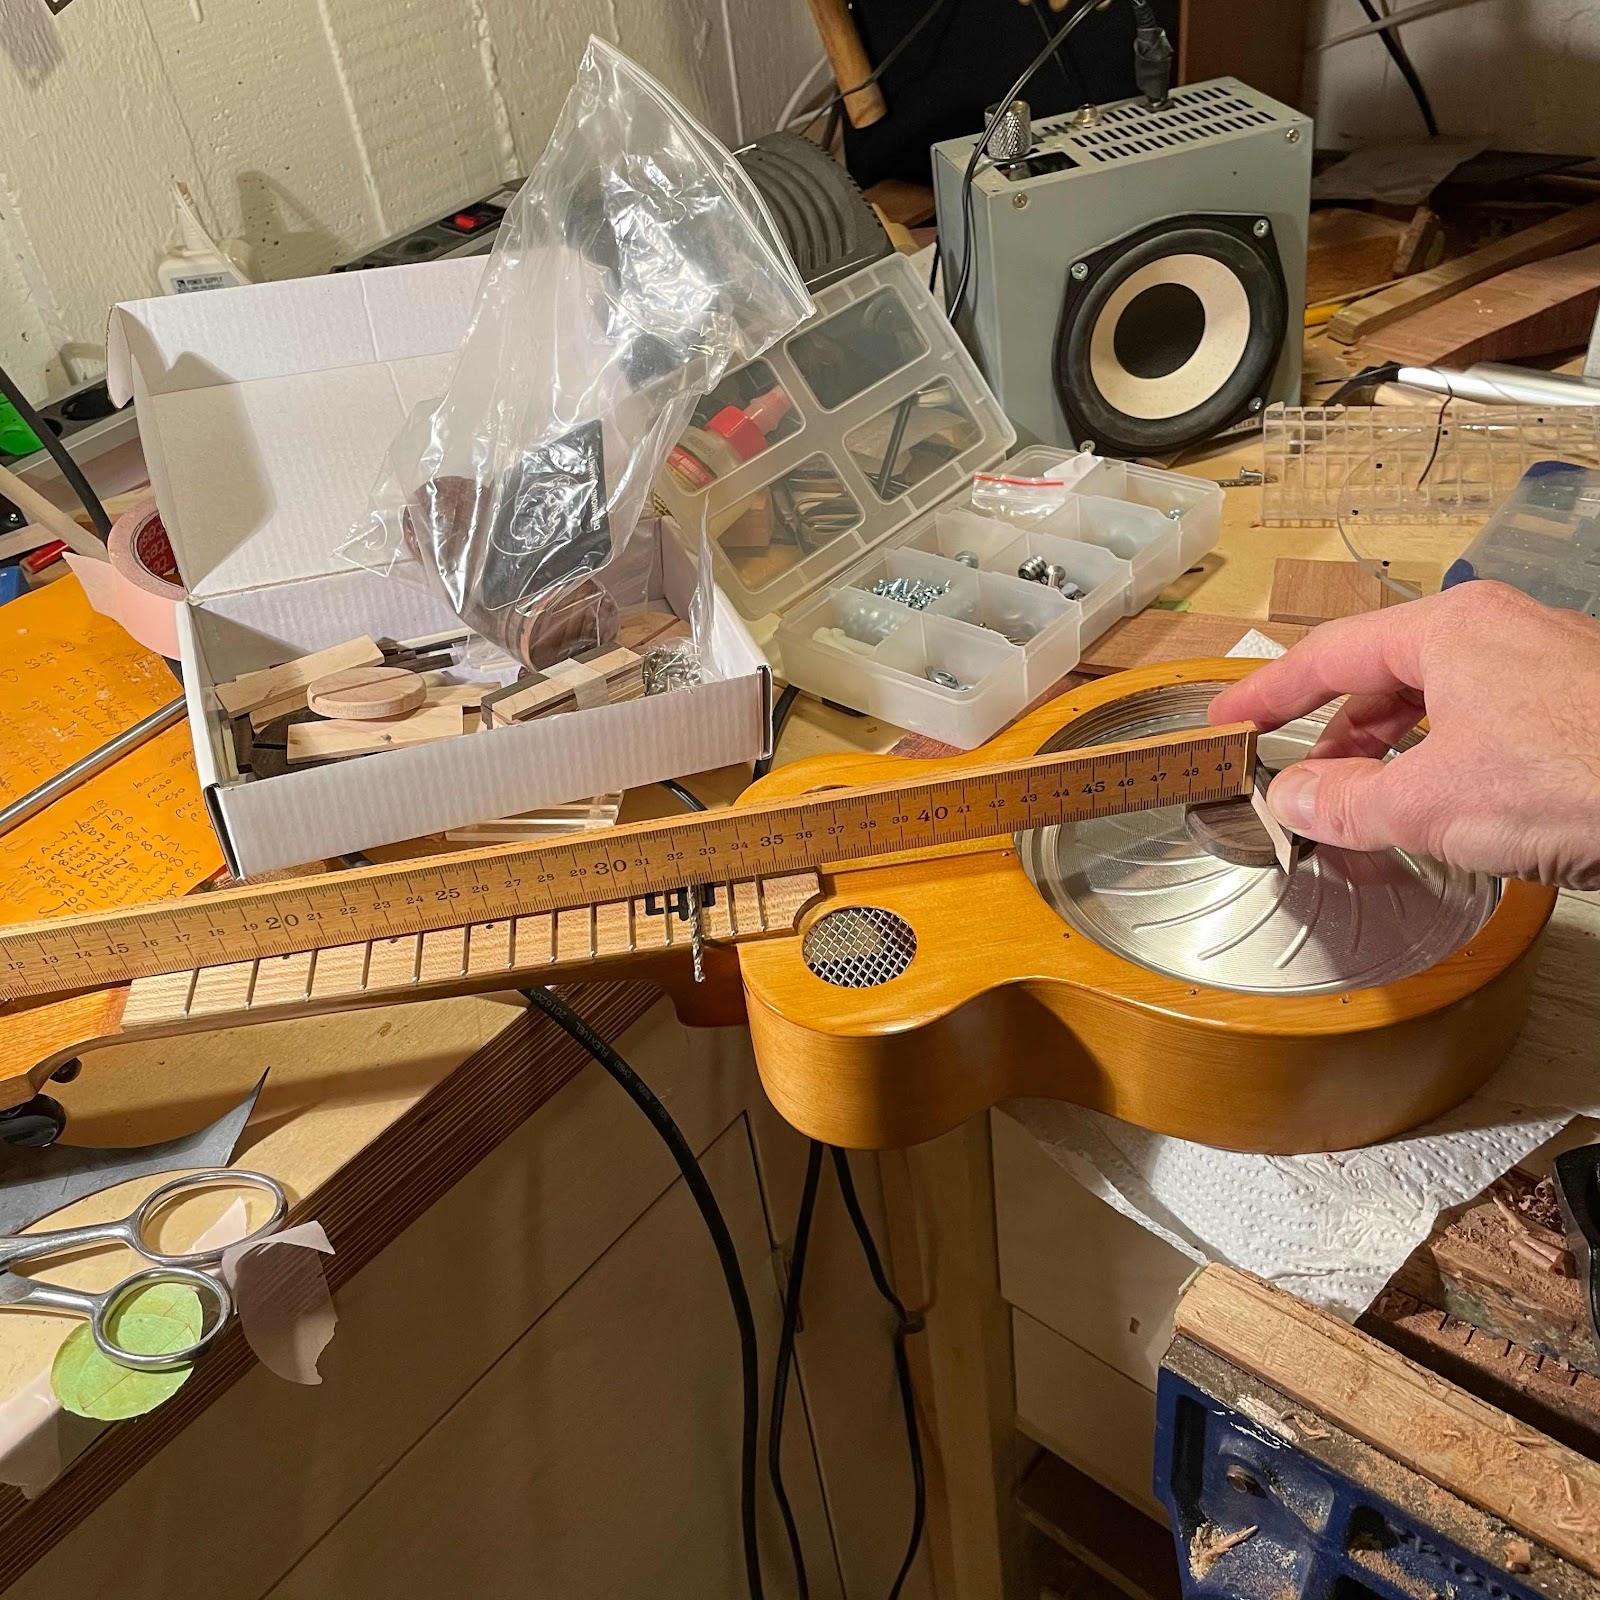
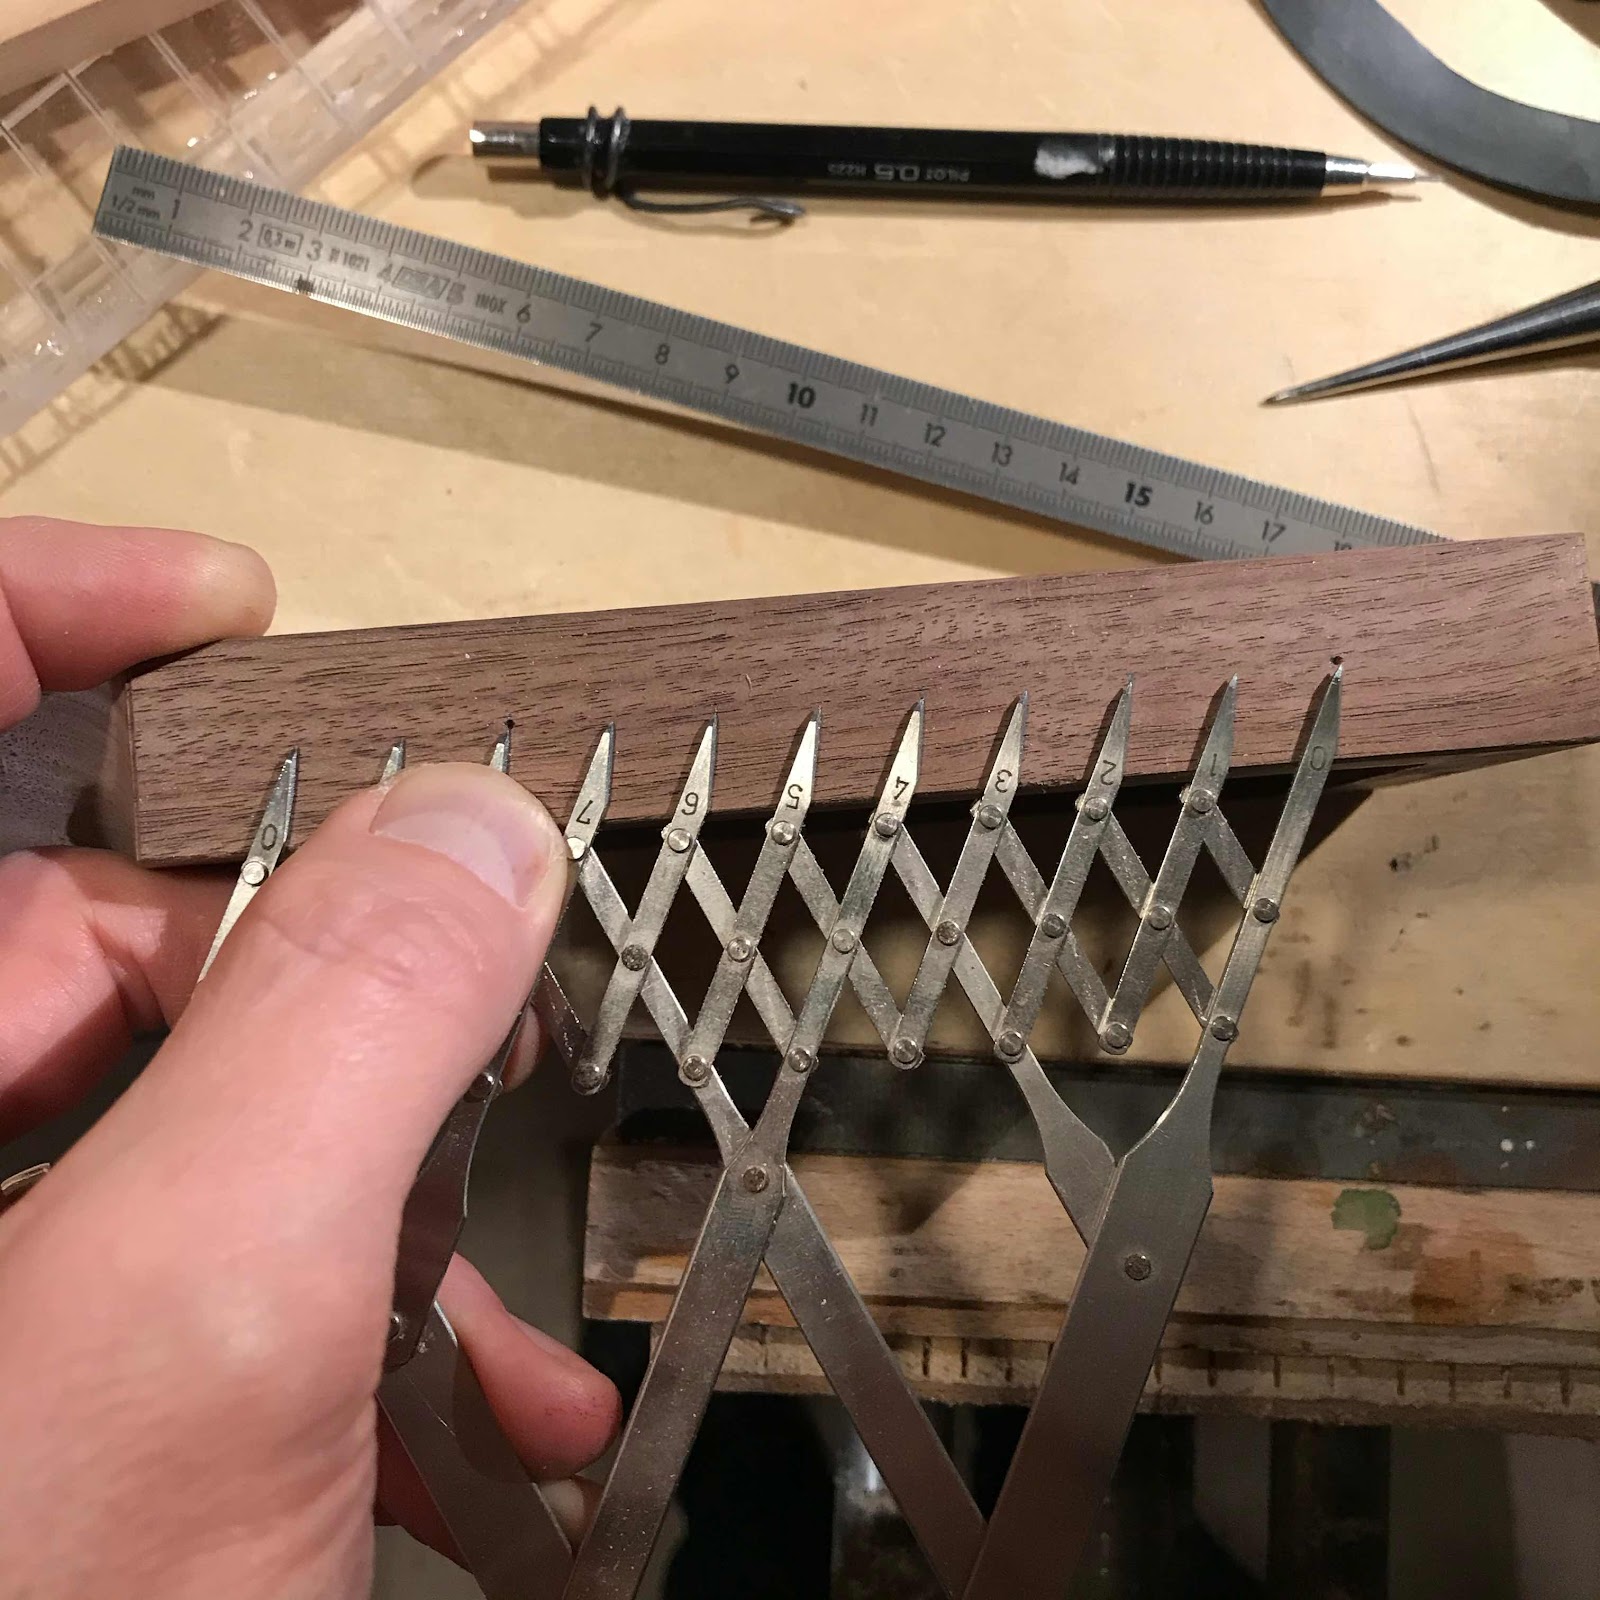
With the height sort of correct I mark for the string notches with my four point divider, made by Ken Timms. Ken is a master craftsman.

Screwing down the coverplate I managed to capture an eerie presence on camera! I’ll give any ghost hunter a run for their money.

For the nut I use bone. I ordered a bunch of guitar saddle blanks on ebay, but also got a bunch of ready made saddles in the package. Never mind, I use a quarter of each. In the pic the legendary half pencil gives me the depth of the nut slots, as it rides atop the frets.
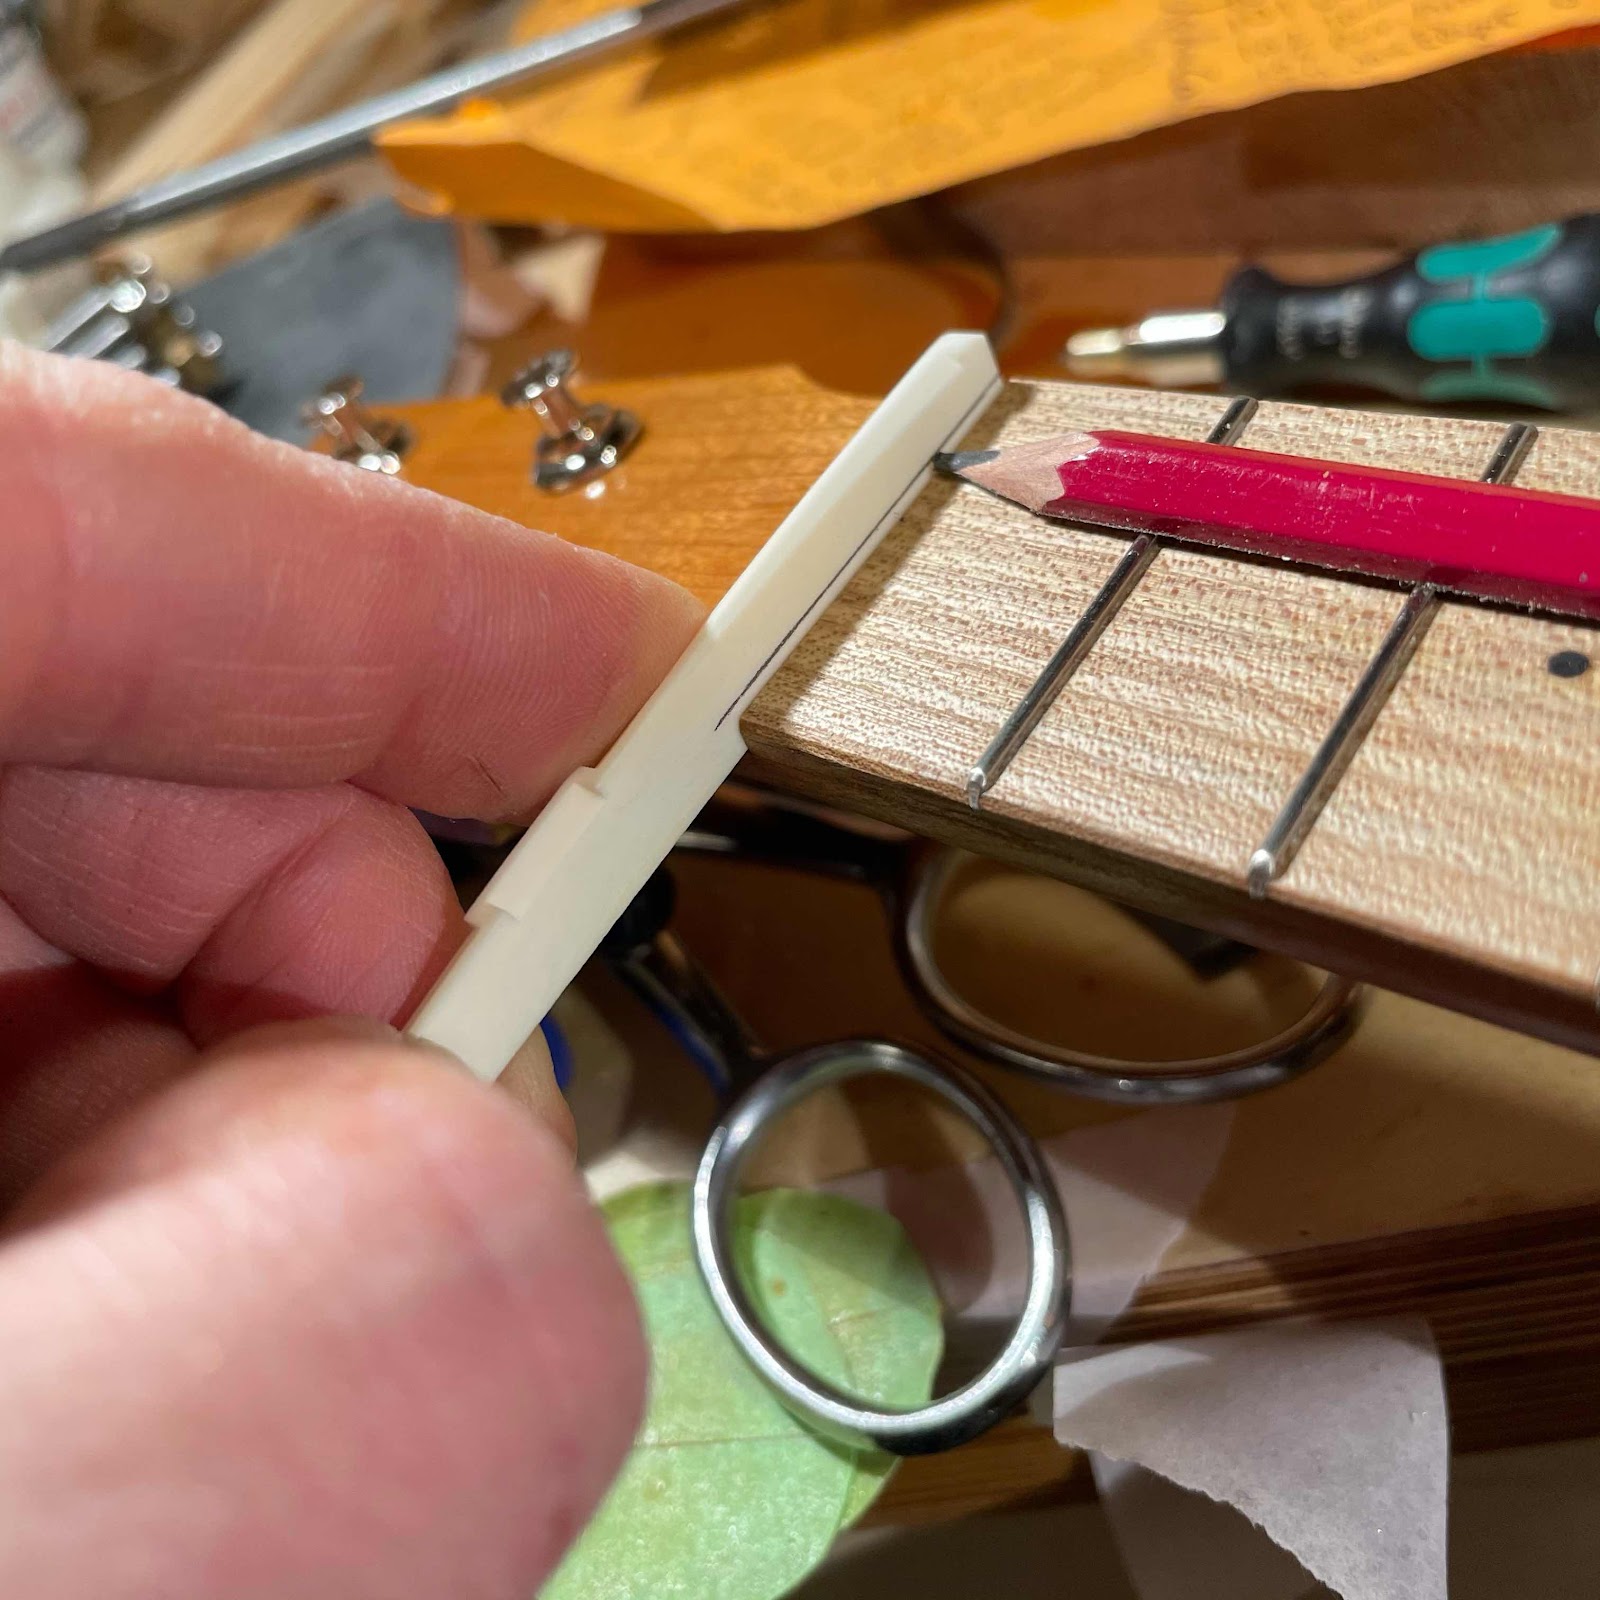
Bye bye, three quarters of a free bone saddle. You can see I saw to a line above what the half pencil gave me.

Et voilà..! A nut. I angle the slots to give the impression I know what I’m doing.

Then I brought the ukes, the fishing line, the glass beads and a rusty nail cutter upstairs because it is chilly [and cluttered] in the workshop.

Hell yes we are! A few tweaks in the nut slots and saddle notches and they should be good to go.

With the cone in the well and a 3 mm drill bit at the 12th fret I dial in the height of the saddle. The biscuit is fastened to the cone with a screw from underneath.
The last batch of cones, coverplates, biscuits and saddles came from this great shop in England. I noticed today that they had included all screws, and those for the coverplate were much neater than the ones I used before. Yay! The shop was Drummond & Hammett (Kirk, obvs).
With the height sort of correct I mark for the string notches with my four point divider, made by Ken Timms. Ken is a master craftsman.
Screwing down the coverplate I managed to capture an eerie presence on camera! I’ll give any ghost hunter a run for their money.
For the nut I use bone. I ordered a bunch of guitar saddle blanks on ebay, but also got a bunch of ready made saddles in the package. Never mind, I use a quarter of each. In the pic the legendary half pencil gives me the depth of the nut slots, as it rides atop the frets.
Bye bye, three quarters of a free bone saddle. You can see I saw to a line above what the half pencil gave me.
Et voilà..! A nut. I angle the slots to give the impression I know what I’m doing.
Then I brought the ukes, the fishing line, the glass beads and a rusty nail cutter upstairs because it is chilly [and cluttered] in the workshop.
Are we getting close to the finish line yet?
Hell yes we are! A few tweaks in the nut slots and saddle notches and they should be good to go.
I told the customers that I never expect payment before I string them up and see if they work. That will take me a day or two but I am optimistic. Even about that strange beast, the tenor reso.
Thursday, January 28, 2021
Tuners and string holders
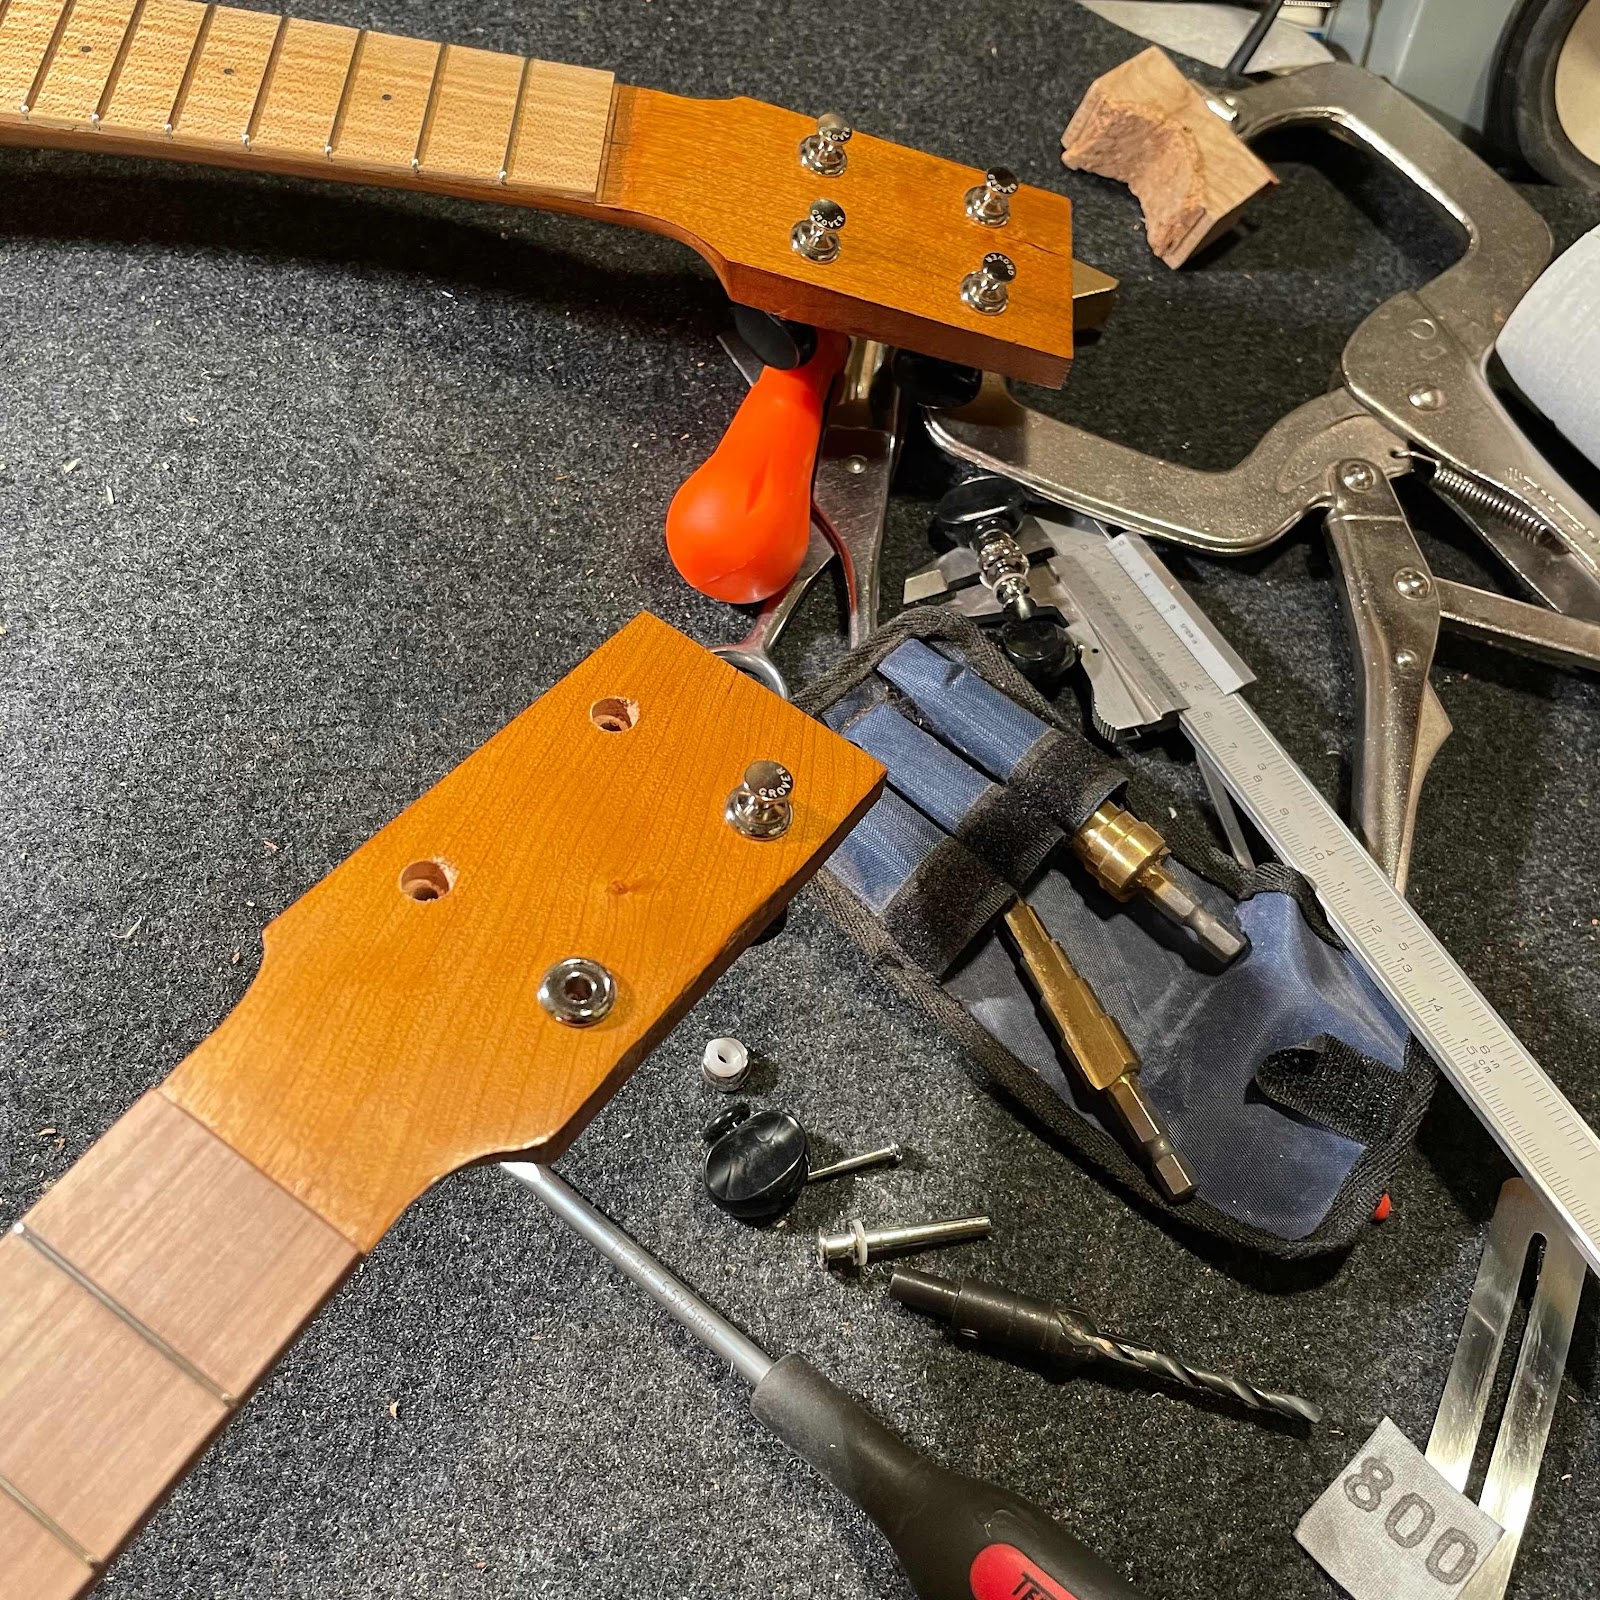
I fit my resos with metal tuners. They look the part, work well and they offset the weight a bit from the body and its hardware. Using the pilot hole that’s there already I use a countersink drill to make the stepped holes.
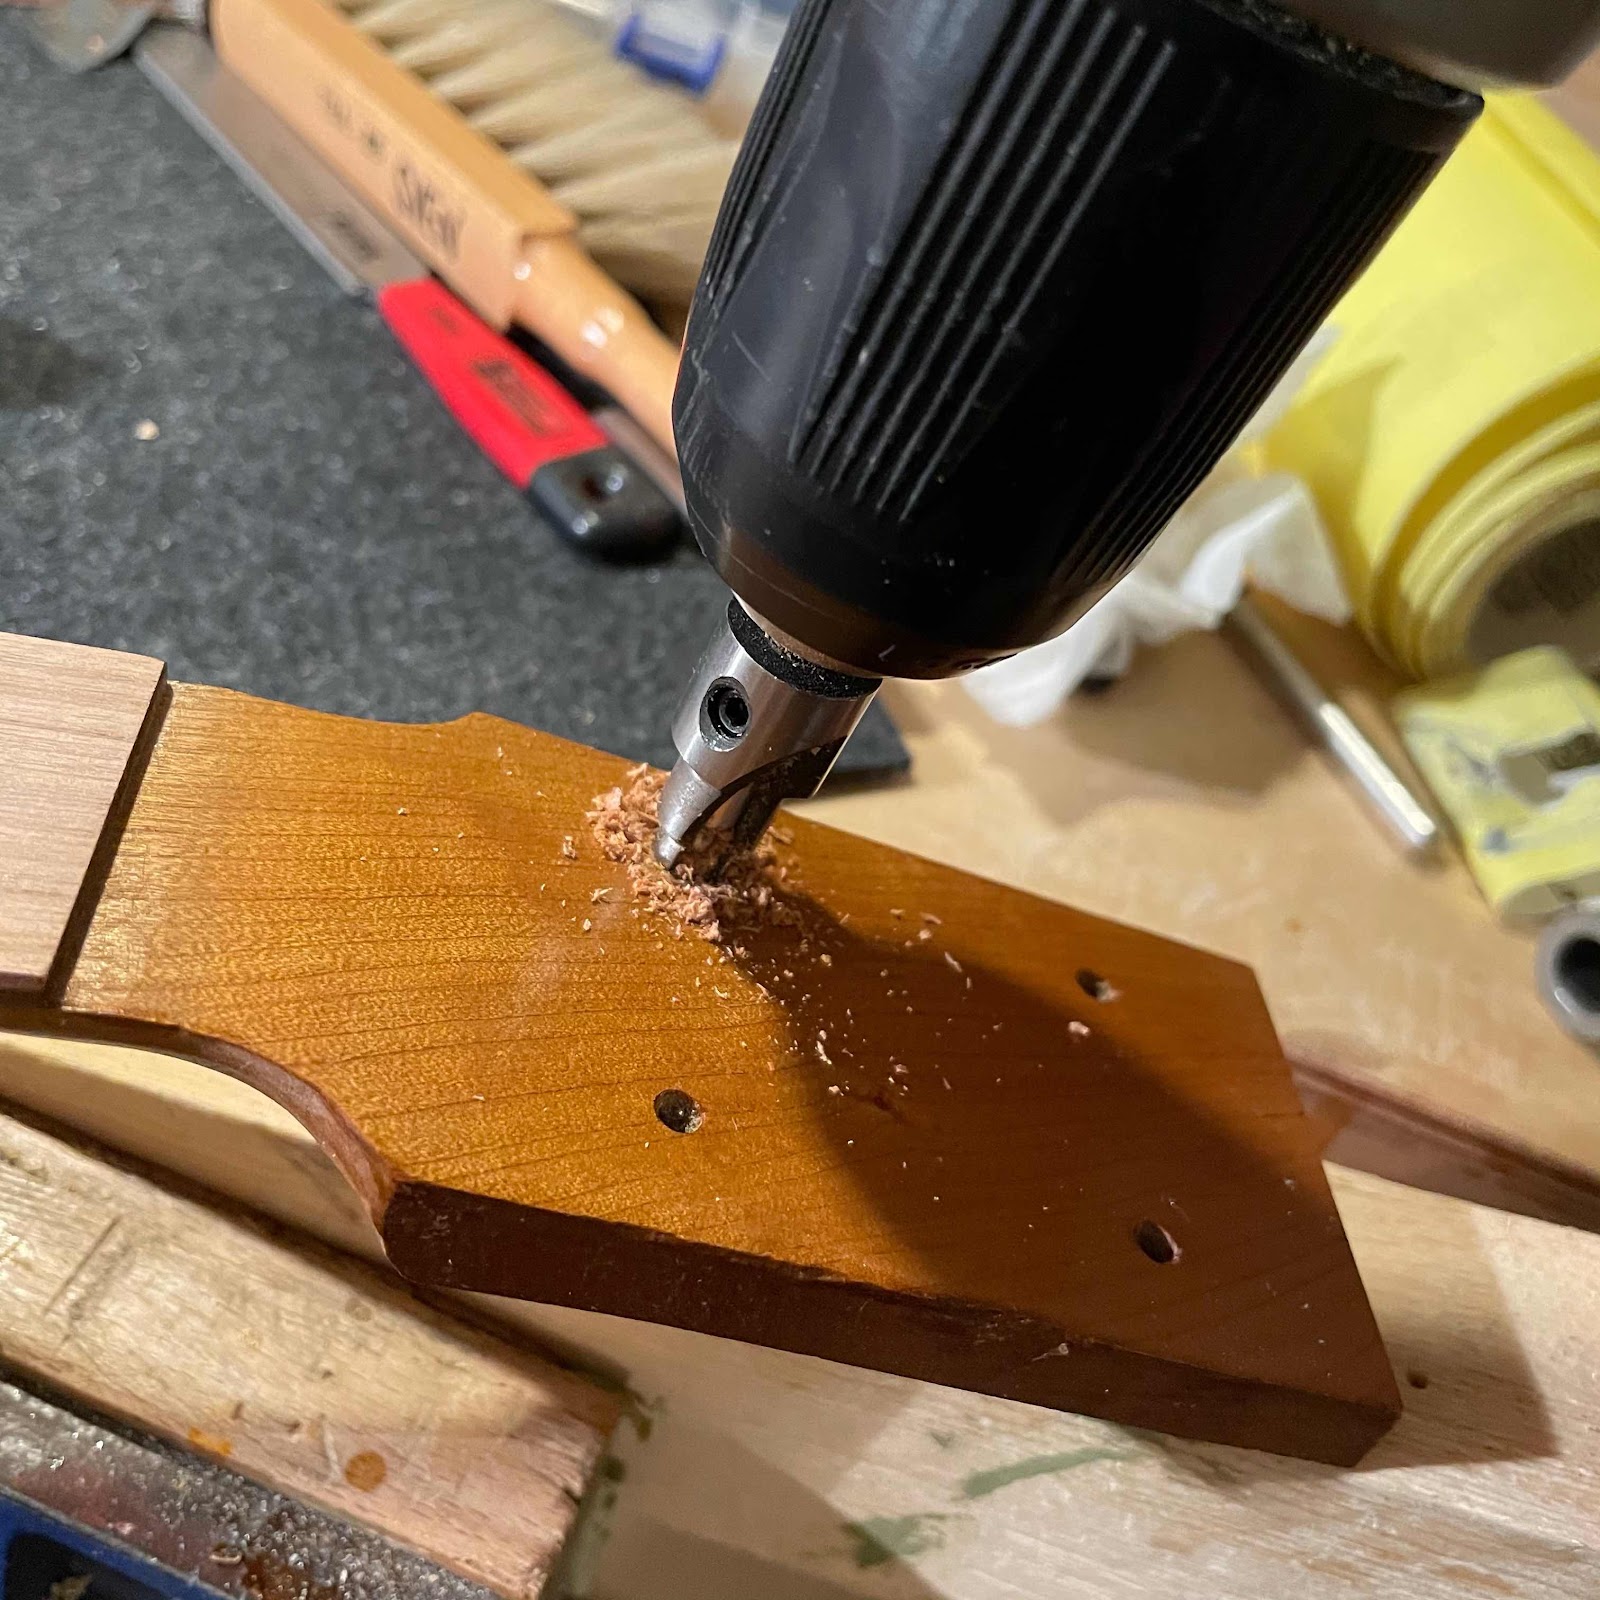
Et voila, almost all of them in place.
Then the string holders. I mean, forget about those gnarly string holes through the coverplate. I struggle to find a pair of scissors as effective as those. A wee scrap piece of cherry will work with the necks. I start shaping the profile with a chisel I restored a while back.

With a roughly sketched profile on the end I continue with a rip saw...

... and then a couple of planes.

I carve the underside to an arc and finish the shaping with sandpaper laid on the coverplate.

When I use darker woods such as rosewood or ebony I give them a coat of wax at most, but this being cherry I dip them in shellac. They are attached from the underside with screws that I cut off to length.

And here we are. What’s left? How about nuts, coverplate mounting holes and preferrably a quick re-entering by Scotland into the EU. No biggie.

Et voila, almost all of them in place.
Then the string holders. I mean, forget about those gnarly string holes through the coverplate. I struggle to find a pair of scissors as effective as those. A wee scrap piece of cherry will work with the necks. I start shaping the profile with a chisel I restored a while back.
With a roughly sketched profile on the end I continue with a rip saw...
... and then a couple of planes.
I carve the underside to an arc and finish the shaping with sandpaper laid on the coverplate.
When I use darker woods such as rosewood or ebony I give them a coat of wax at most, but this being cherry I dip them in shellac. They are attached from the underside with screws that I cut off to length.
And here we are. What’s left? How about nuts, coverplate mounting holes and preferrably a quick re-entering by Scotland into the EU. No biggie.
Tuesday, January 19, 2021
Fret work
Hi there! This’ll be a shorter post because I didn’t take enough pictures for a longer one. I am getting close to the final steps (wait I just remembered the stringholders, crikey) and tonight it was time to shape the fret ends and check that they’re all level.
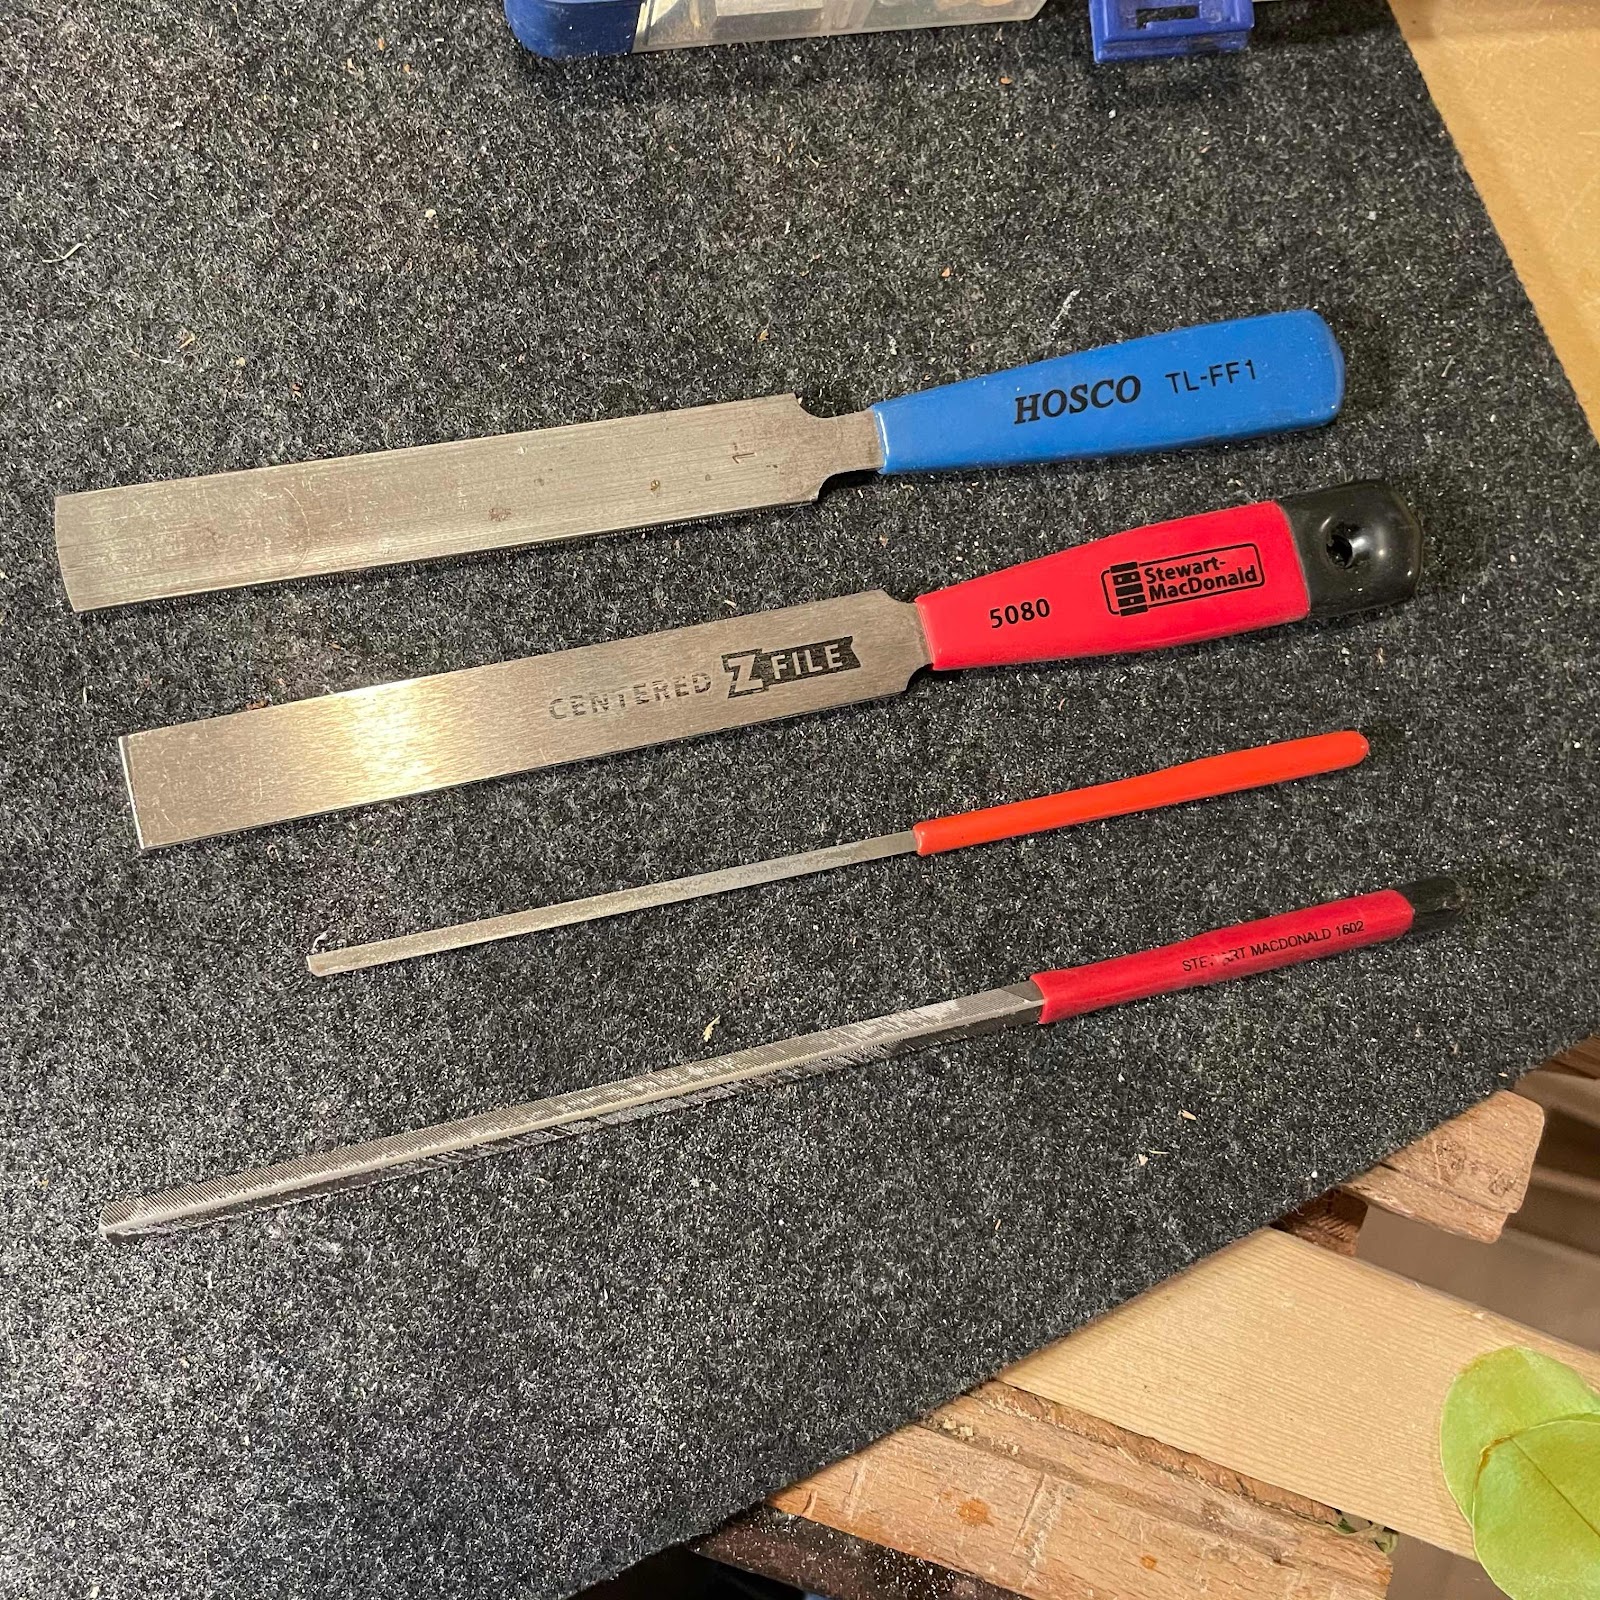
First pic is my wee array of files. From the top:
- Hosco crowning file for smaller fret wire sizes. This one is ok but it has regular file grooves and can produce some ”chatter”. Then the file jumps a bit and gives me grooves in the top of the fret. I can reduce the risk by holding the neck in a vise, and lubricating the file by rubbing a piece from a candle in the the scallop.
- New fancy pants Z-file from Stewmac. I bought this used and would maybe have preferred the offset one. This is centered. It has a diamond coating in the scallop and that makes it much less prone to chatter. I haven’t used it much yet but I like it.
- The fret end dressing file, also from Stewmac. This is a great tool and fairly easy to use. I haven’t messed up the edge of a fingerboard in a long time.
- Three corner file with smooth ground corners. Also from Stewmac. This is akin to a traditional tool, the ad said and I reached for my wallet. I really like it because I can use it on different sizes of fret wire. And it’s based on a traditional tool. Like, an old one. When luthiers - sorry, I’ll get on with it.
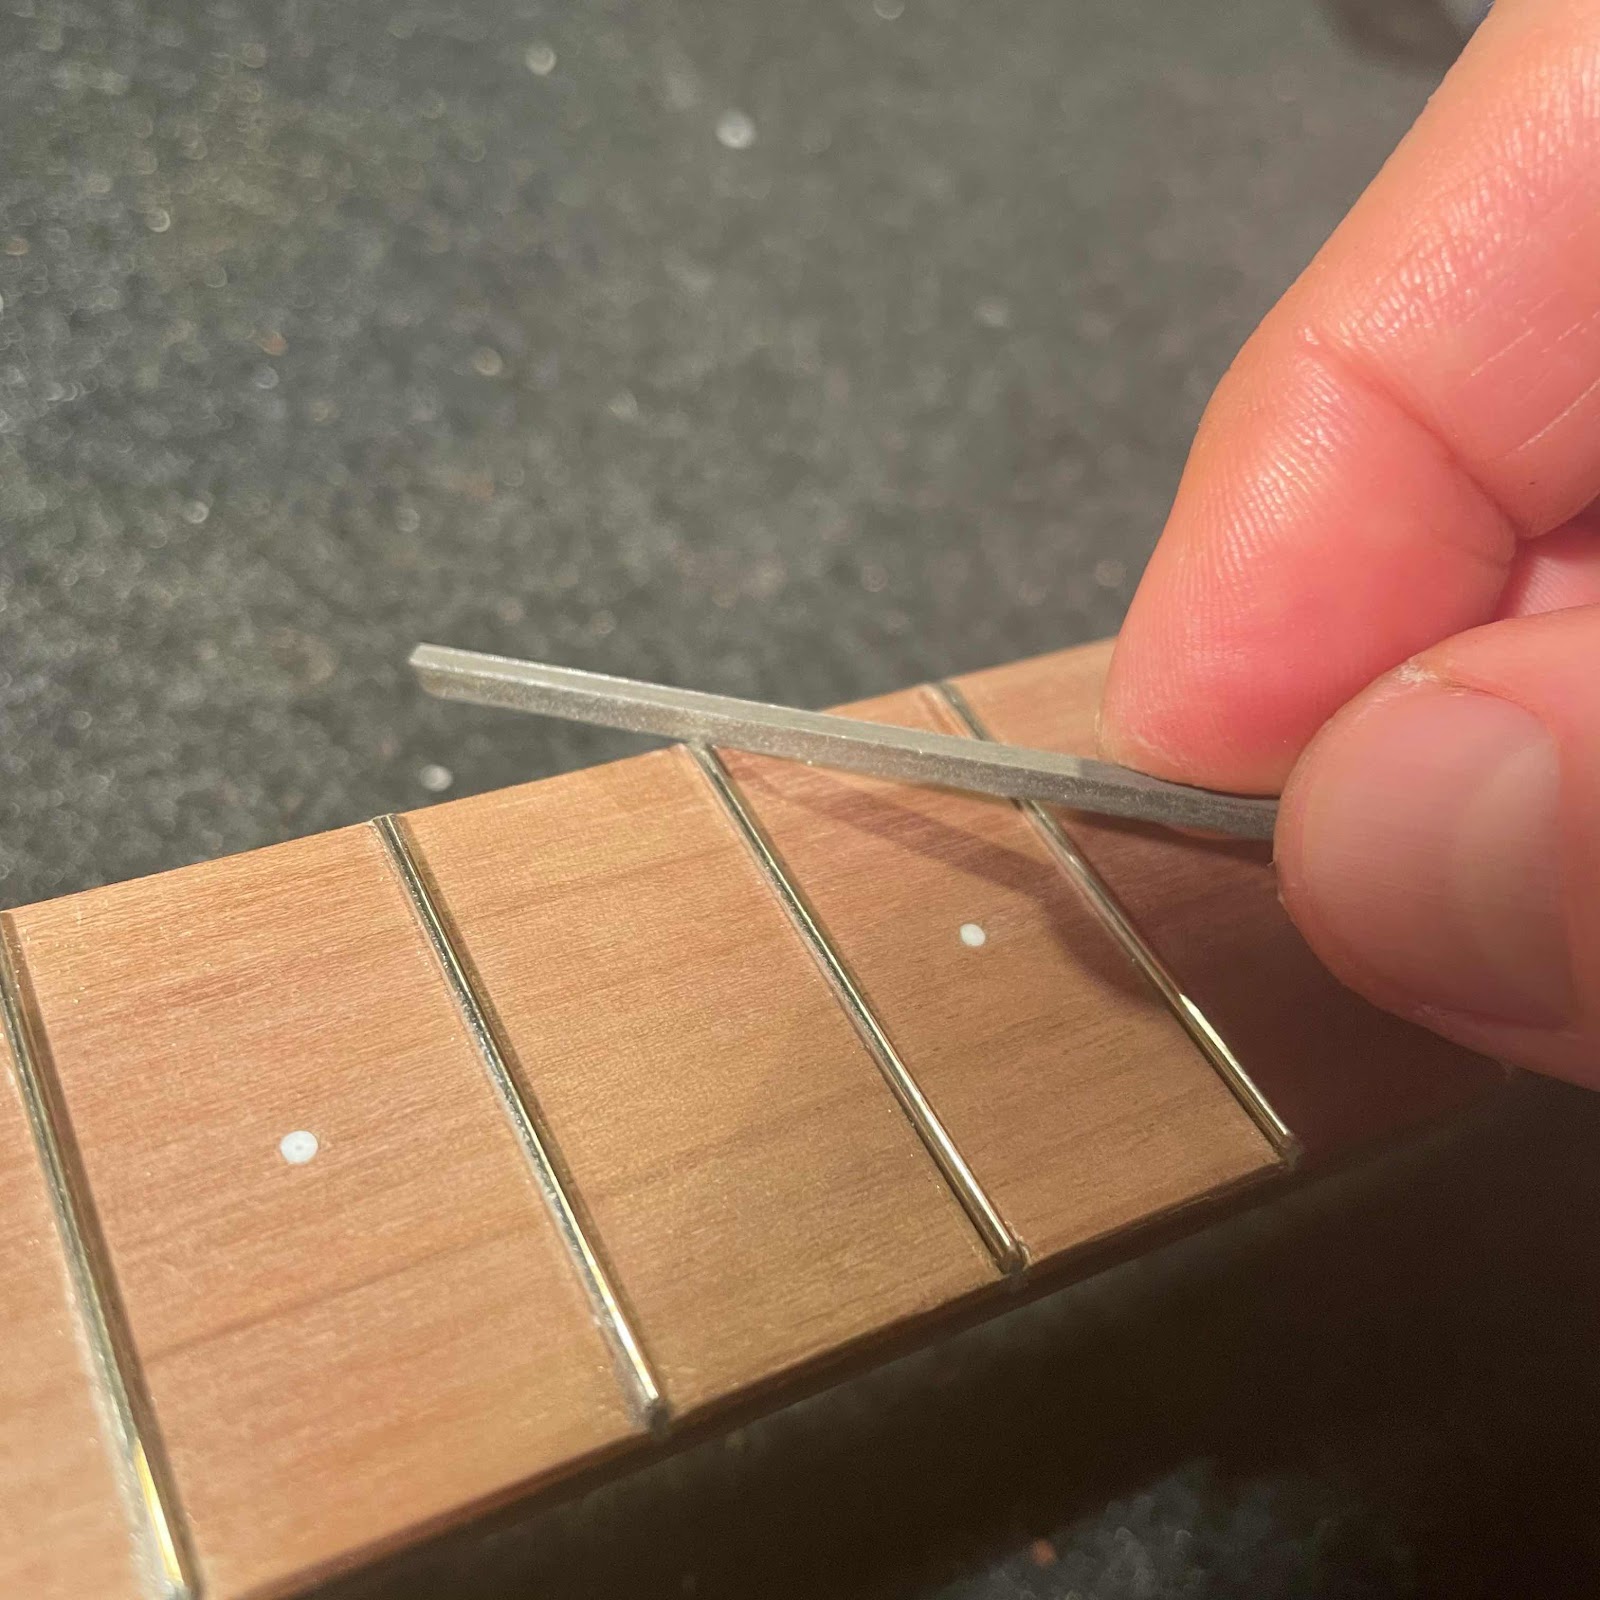
I dress the sharp fret ends with a few strokes. The trick is to start with the file in the corner between the fret and the fingerboard, then pushing it forward and rolling it over towards the top at the same time. You don’t want to push it in the corner, you run the risk of marring the wood even though the edge of the file is ground smooth. The other edge of the file is flat, also smooth but you get two sharp corners. I use these for the final, very careful stroke right where the wire meets the wood.
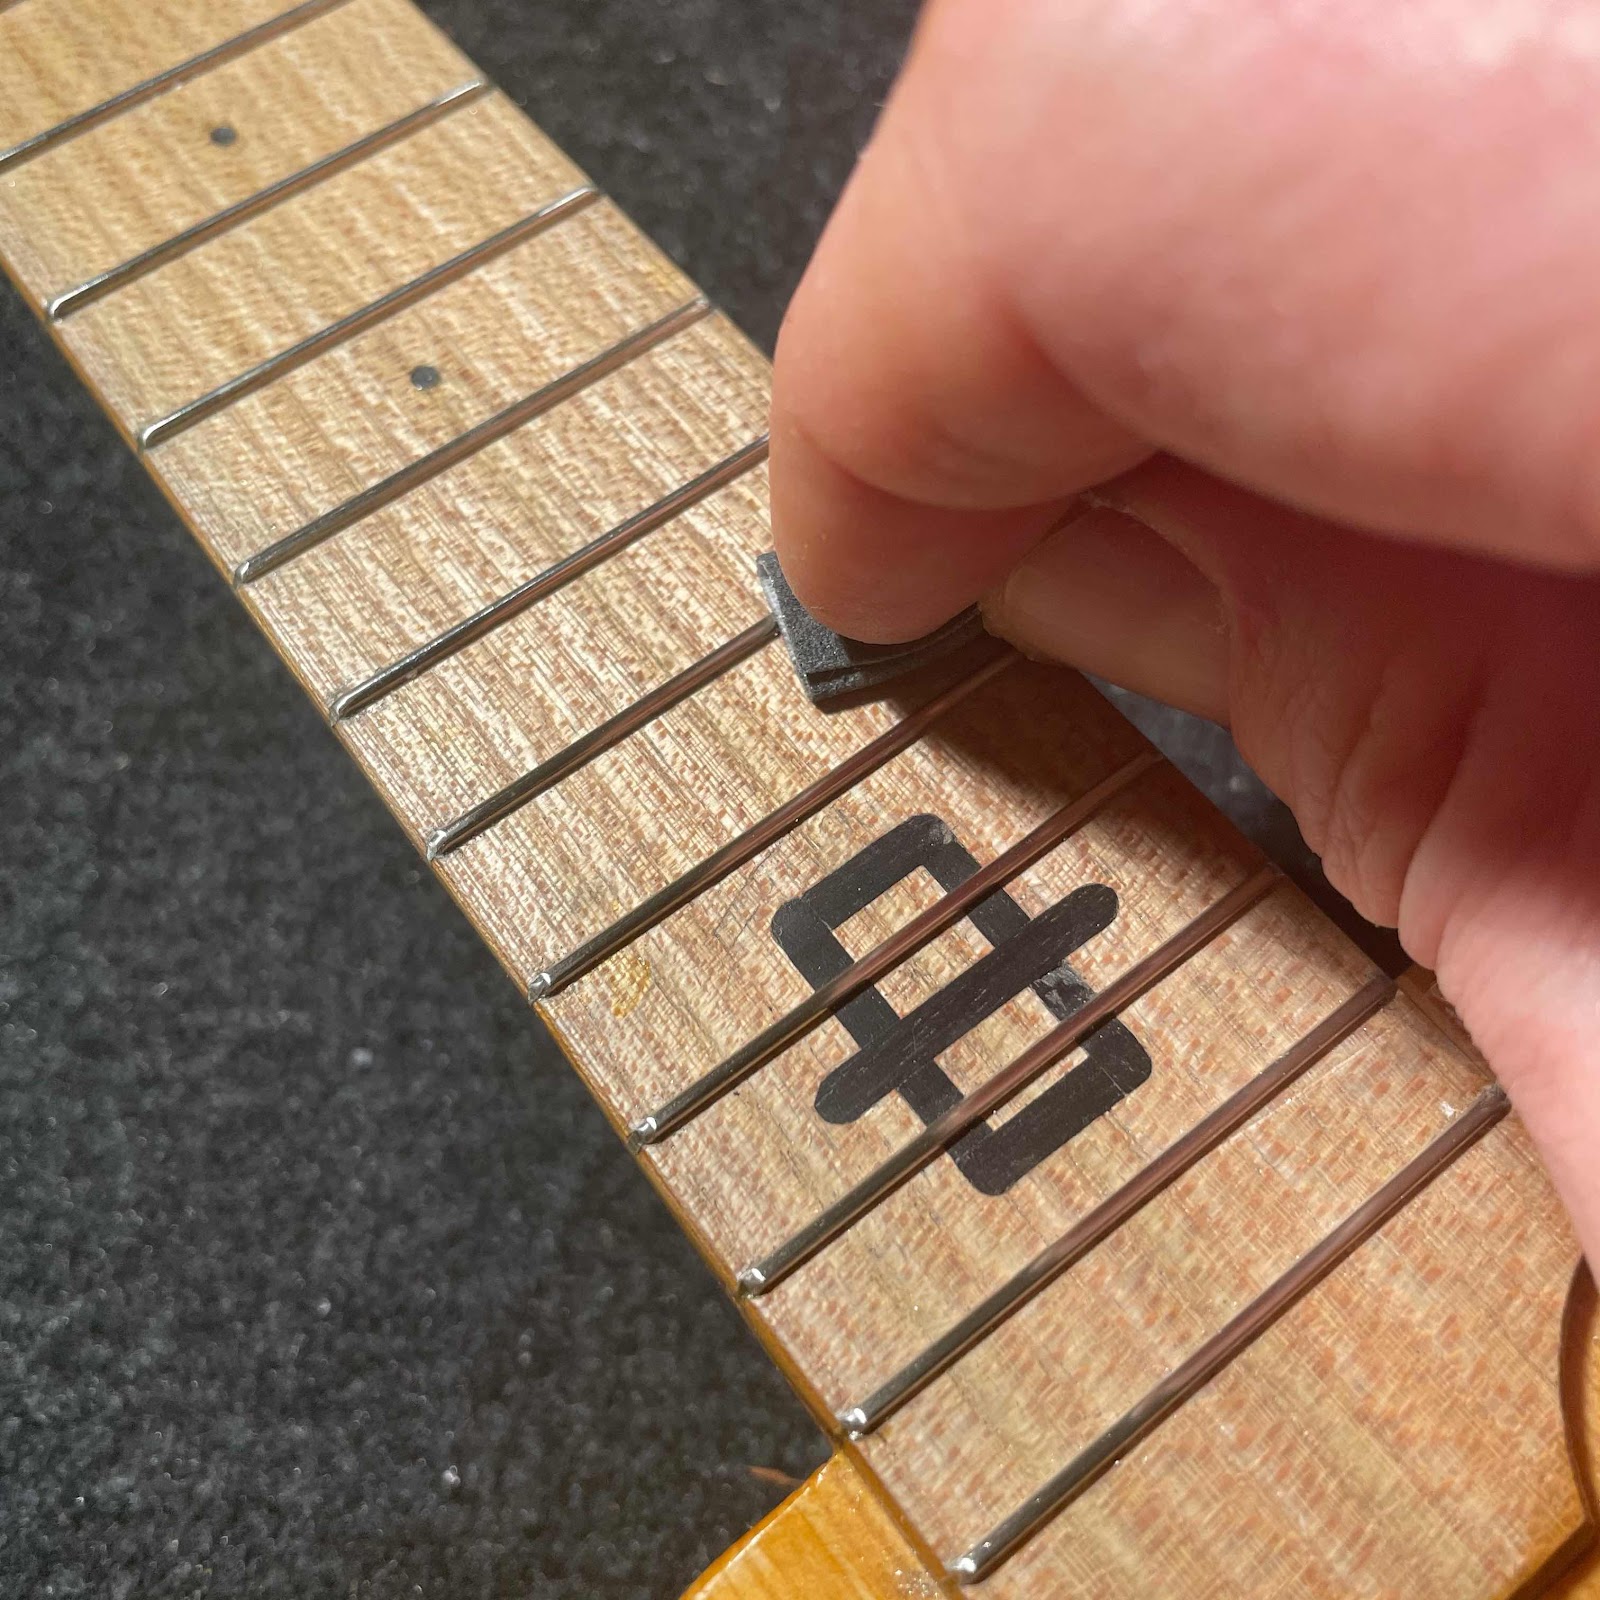
I rub the ends with a fine grit emery cloth and finish by rubbing that cloth along the frets to polish them.
I dress the sharp fret ends with a few strokes. The trick is to start with the file in the corner between the fret and the fingerboard, then pushing it forward and rolling it over towards the top at the same time. You don’t want to push it in the corner, you run the risk of marring the wood even though the edge of the file is ground smooth. The other edge of the file is flat, also smooth but you get two sharp corners. I use these for the final, very careful stroke right where the wire meets the wood.
I rub the ends with a fine grit emery cloth and finish by rubbing that cloth along the frets to polish them.
Friday, January 1, 2021
Happy new year etc, and updates
Fanx to all of you who’s been reading the blog, getting in touch and over all supported me and the beast that is Argapa ukuleles during 2020. Apart from some stuff it’s been a great year.
The first pic shows me dividing the distance between two points in four, I wanted the string guiding tube and the tuners to be equidistant. I failed for some reason despite the divider, but the tuners got correct in relation to each other.
The tuner holes are angled, thanks to my super jig. Looking like scrap wood (it is scrap wood) it tends to get lost among pieces of scrap wood. But I found it.

Then my Record shoulder plane was enrolled for making the bridge. When in doubt, use a larger plane.

I had to leave the workshop to be with my family, it was after all Christmas Eve, but I brought glue and clamps and fixed the bridge in the living room.

And the shellac then. It has hardened and I gave it a quick rub with fine steel wool to remove swirl marks and blend it all together. Once I’m happy with the satin look I reach for my Festool ROS...
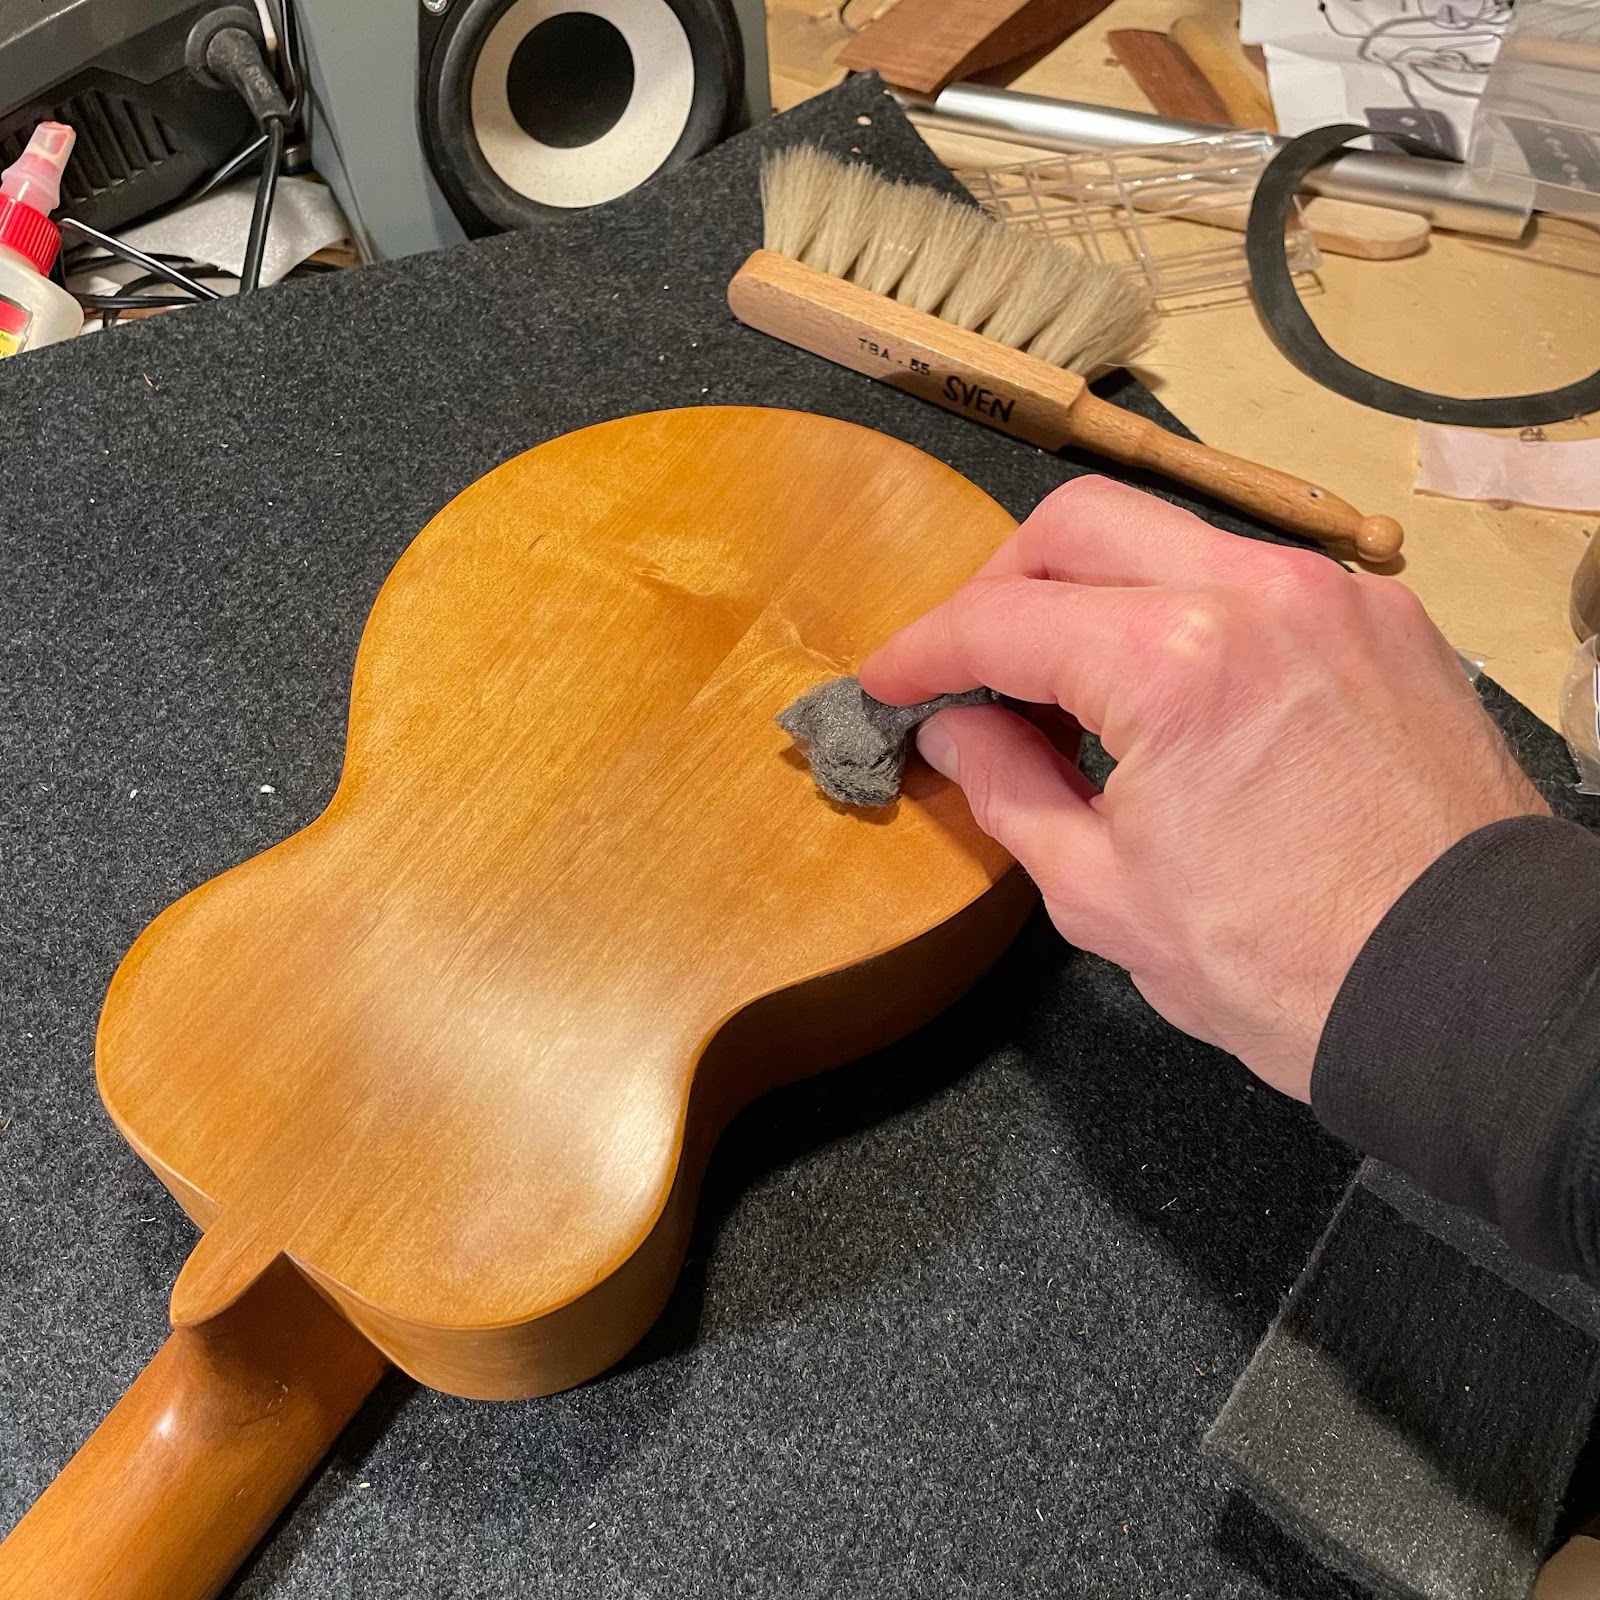
... and get working with polishing compounds. Different foam pads give radically different results. I suspect a person could learn quite a lot about lacquer, sanding and buffing. If said person could be, you know, arsed.

Happy new year! Nothing new will happen with Argapa ukuleles. And that’s the point.
The tuner holes are angled, thanks to my super jig. Looking like scrap wood (it is scrap wood) it tends to get lost among pieces of scrap wood. But I found it.
Then my Record shoulder plane was enrolled for making the bridge. When in doubt, use a larger plane.
I had to leave the workshop to be with my family, it was after all Christmas Eve, but I brought glue and clamps and fixed the bridge in the living room.
And the shellac then. It has hardened and I gave it a quick rub with fine steel wool to remove swirl marks and blend it all together. Once I’m happy with the satin look I reach for my Festool ROS...
... and get working with polishing compounds. Different foam pads give radically different results. I suspect a person could learn quite a lot about lacquer, sanding and buffing. If said person could be, you know, arsed.
Happy new year! Nothing new will happen with Argapa ukuleles. And that’s the point.
Saturday, December 19, 2020
Bridge and some polishing
I said in the last post that I made the bridge for the soprano. I chose a piece of ipé from that floor board sample from Buenos Aires, and went to town on the wee table saw.
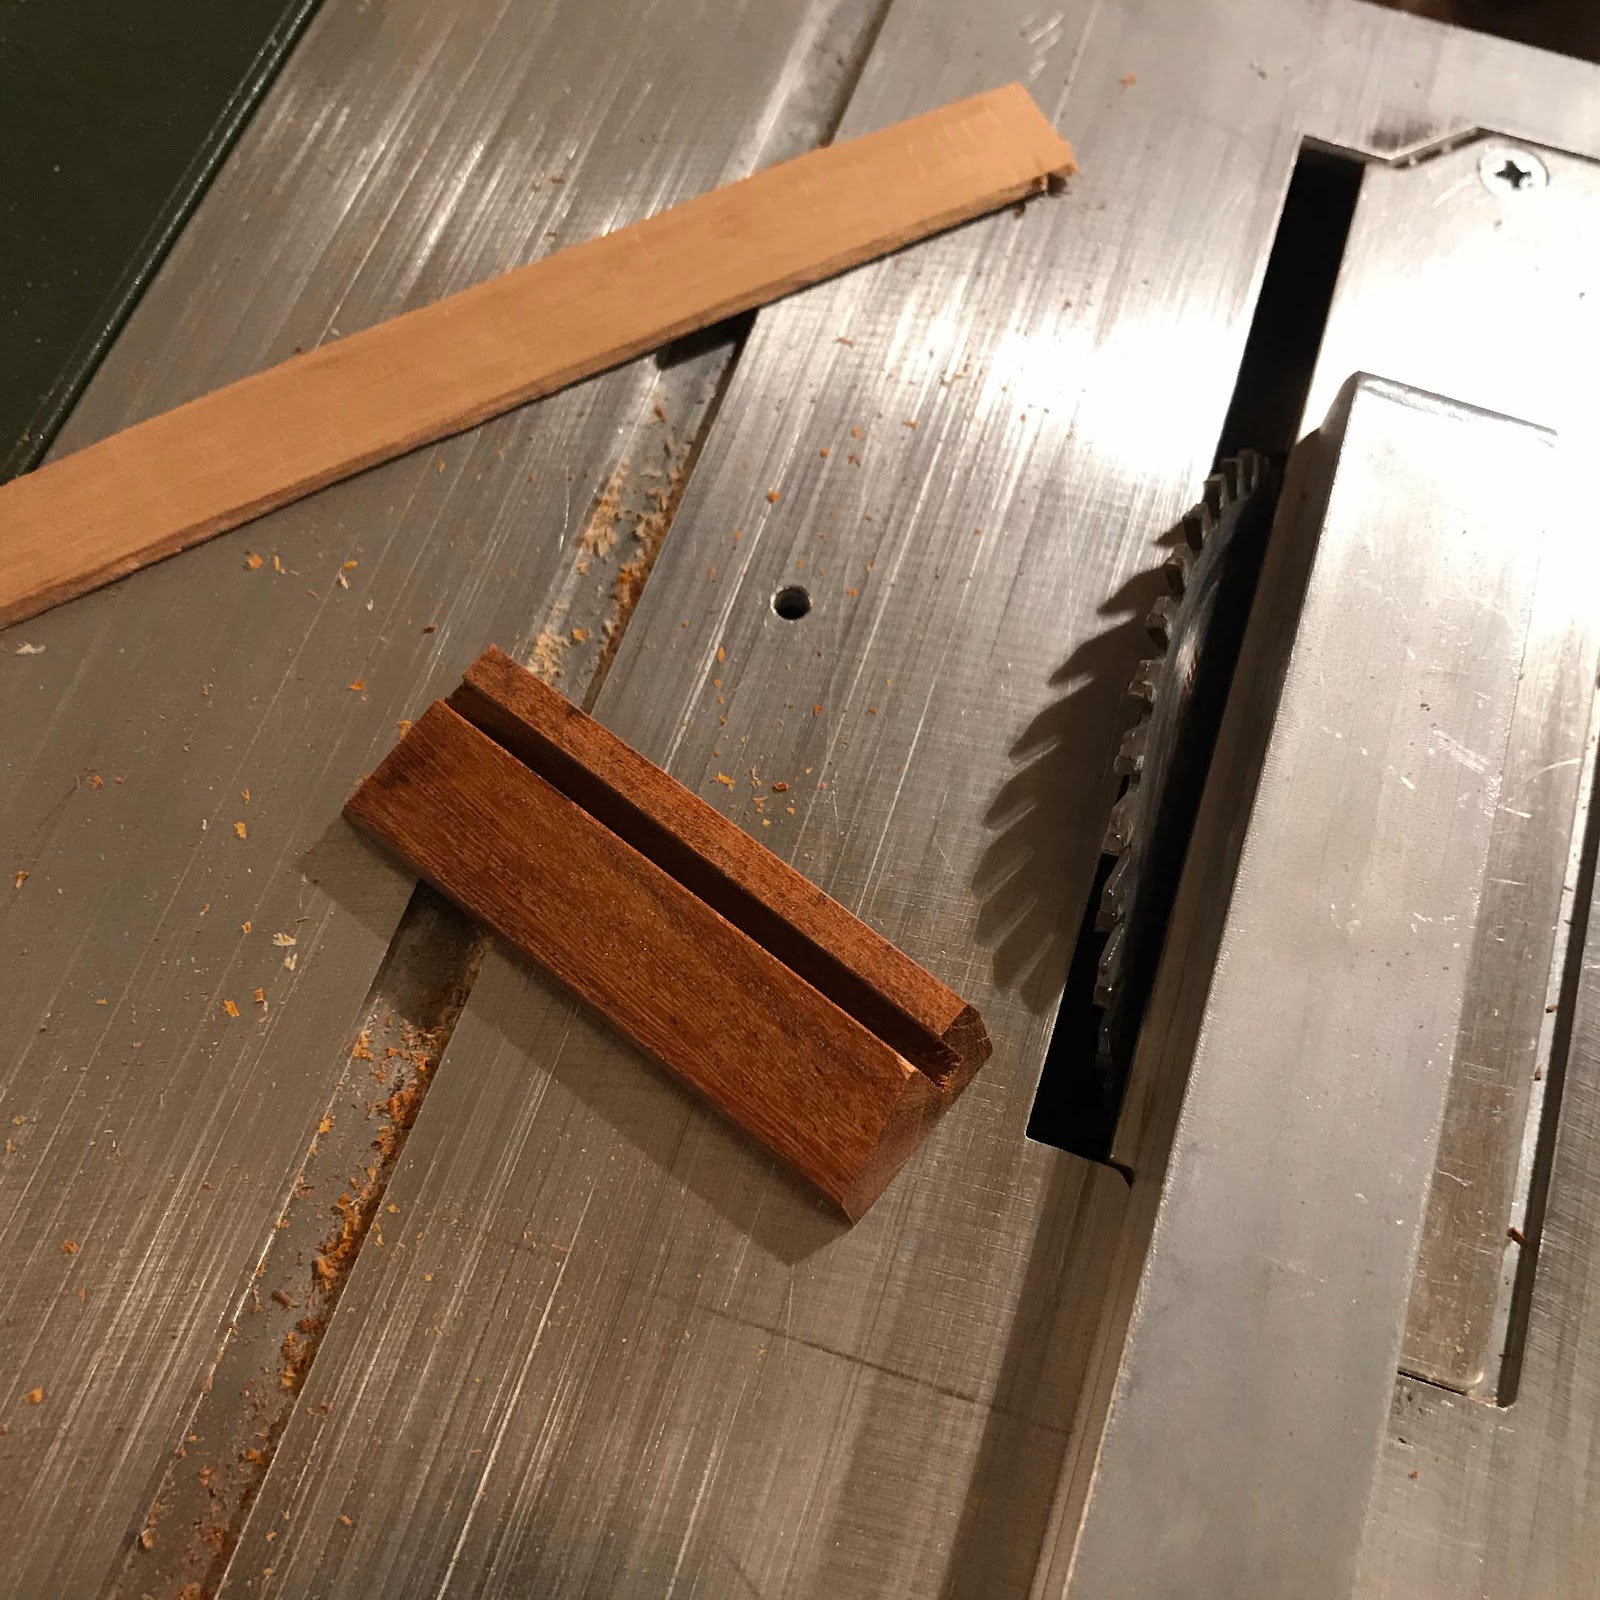
Setting the distance with a wooden ruler clamped to the neck, then low tack masking tape at the front and back edge of the bridge.

And with the ruler next to the fretboard edge I draw lines that will aid me in positioning the bridge sideways.

I use a piece of guitar string through two miniscule holes through the saddle slot and the top to stop things from sliding out of position. I didn’t take a pic of shaping the bottom of the bridge to match the curvature of the top, but I did that with a scraper.
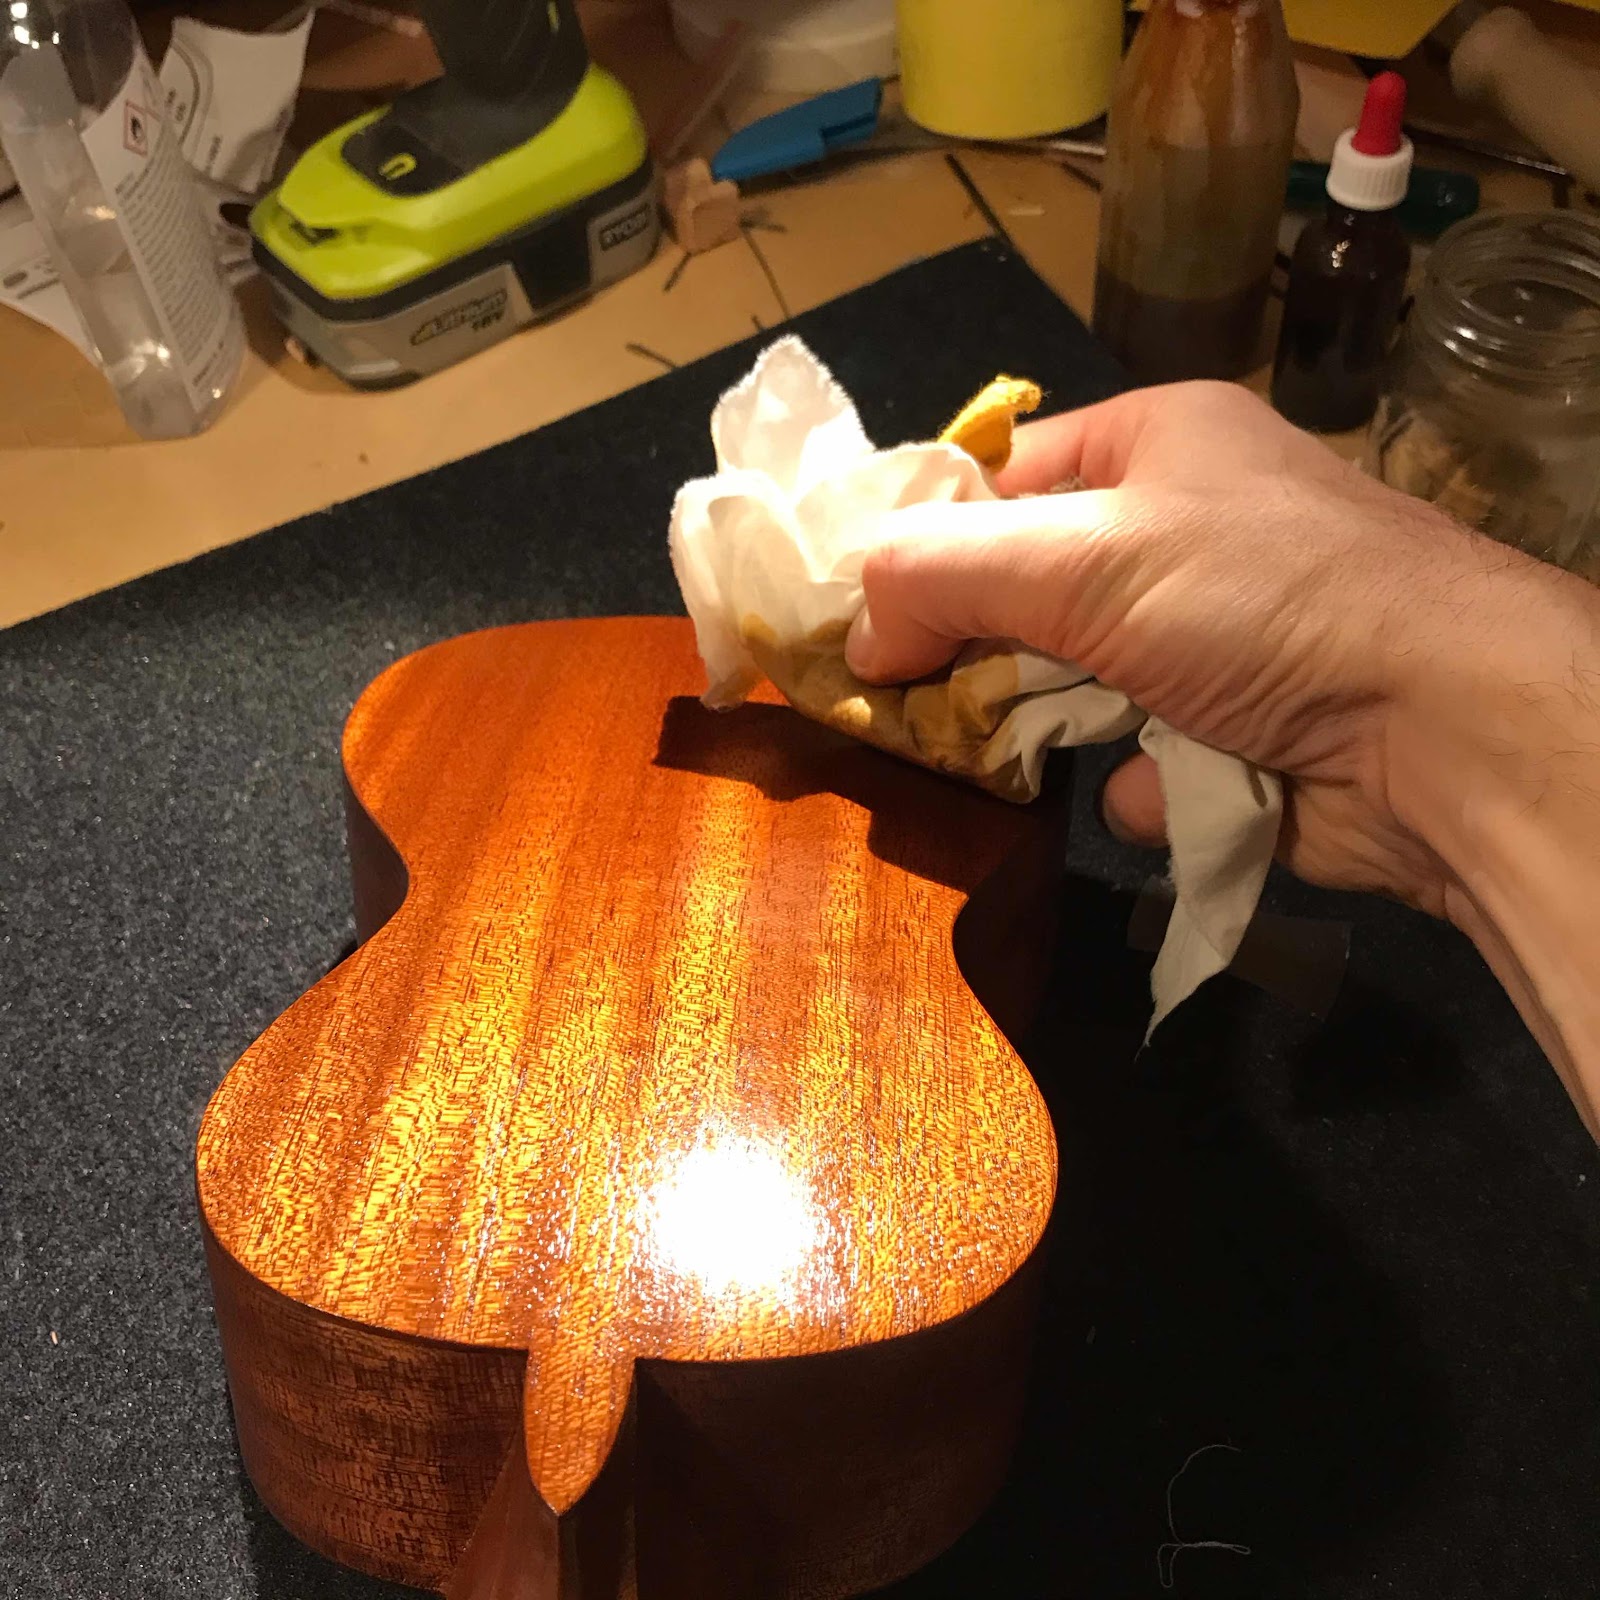
This morning I started polishing with oil. I use walnut oil because I read somewhere that it dries. My tests of its drying properties have bern inconclusive at best, but for lubricating the pad it works really well. The other obvious choice is olive oil and I know for sure that won’t dry.

And here’s Li’s soprano. That mahogany is very special. Still from the boards my dad bought in the 1960’s.
Setting the distance with a wooden ruler clamped to the neck, then low tack masking tape at the front and back edge of the bridge.
And with the ruler next to the fretboard edge I draw lines that will aid me in positioning the bridge sideways.
I use a piece of guitar string through two miniscule holes through the saddle slot and the top to stop things from sliding out of position. I didn’t take a pic of shaping the bottom of the bridge to match the curvature of the top, but I did that with a scraper.
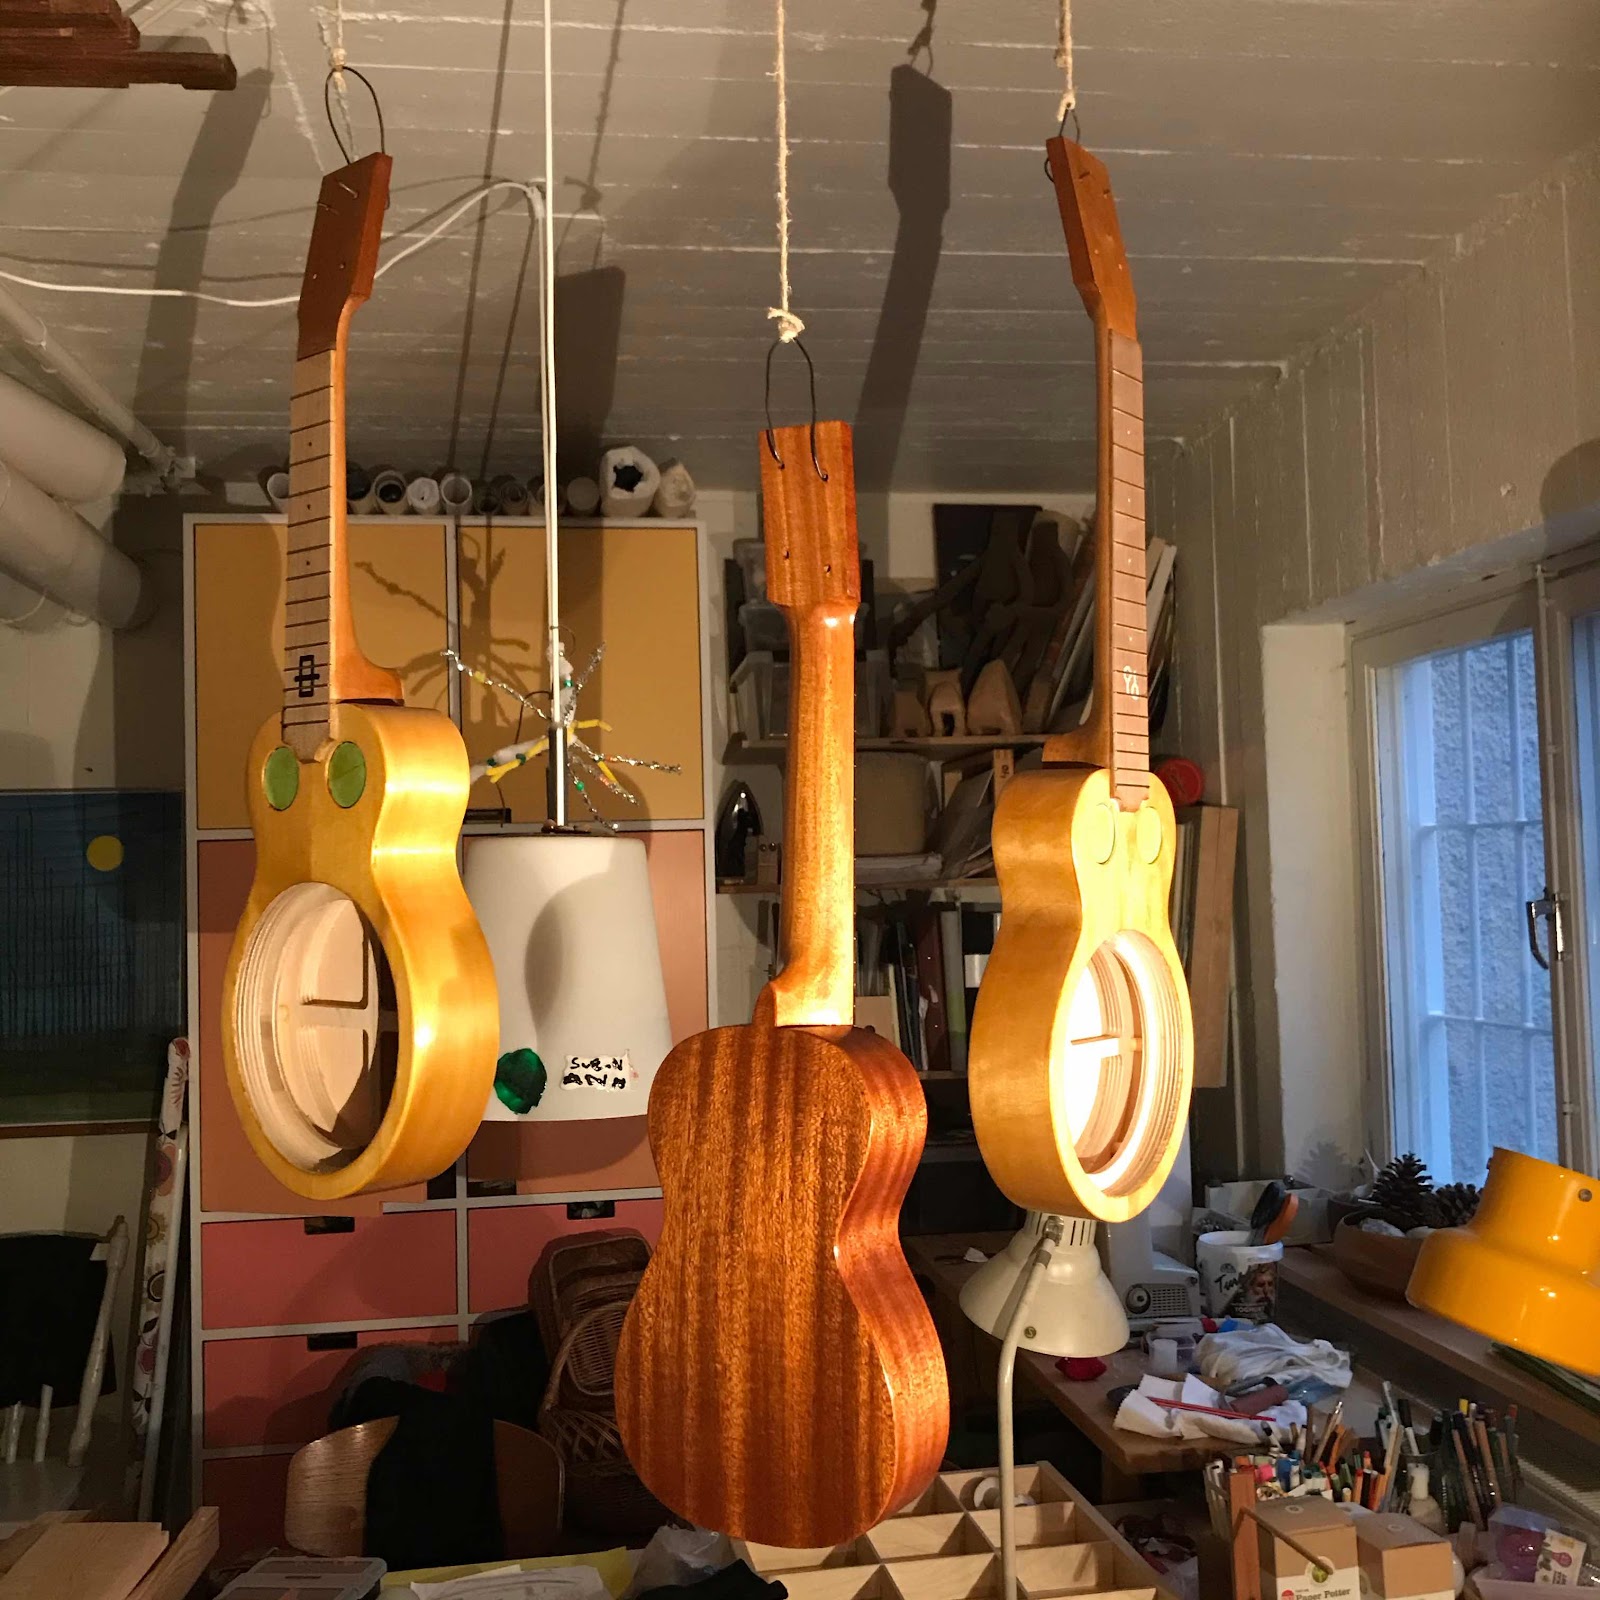
Do keep in mind the lack lustre appearance of the mahogany so far, if you grab the opportunity to despair now you’ll get a bit of a rush at the end of this post.

And here’s a pic of the gang after tvree or four coats of shellac. Those first coats I apply quite liberalky without oil, they’ll form the base for the polishing later. How much later? Well the next pic maybe.
And here’s a pic of the gang after tvree or four coats of shellac. Those first coats I apply quite liberalky without oil, they’ll form the base for the polishing later. How much later? Well the next pic maybe.
This morning I started polishing with oil. I use walnut oil because I read somewhere that it dries. My tests of its drying properties have bern inconclusive at best, but for lubricating the pad it works really well. The other obvious choice is olive oil and I know for sure that won’t dry.
And here’s Li’s soprano. That mahogany is very special. Still from the boards my dad bought in the 1960’s.
Sunday, December 13, 2020
Getting there
We’re running out of stuff left to be done, what a relief. I won’t get the resos out before christmas I’m afraid, but not very long after.
First pic shows my cheap skate version of the really nice fret press pliers that Stewmac sells. With it stuck in the vise I can get the frets in quite consistently.

And when all frets were in on all three fretboards, I glued them on. Here’s the tenor getting its walnut fretboard, the soprano clamping caul worked for the last fourteen frets, obvs.

Today I spent some time sanding and scraping. Small nooks need small scrapers, this one and a few others I made from a spent Japanese saw blade. The first coat of finish will mercilessly show all the flaws you miss so it’s a good idea to do this carefully.

And here they are (were). Ready for finish... until I remembered the acoustic one needed a bridge. Oh well, the resos were ready for finish at least.

But were they ready for finish? Nah, pilot holes for the tuners are great for hanging them during the finishing process so I quickly drilled those.

And here we go, let’s get some bug poo on these guys. The alder really comes to life, going from pale to a lustruous honey colour. The cherry in the necks goes from drab to drama too. I will show you more after a few more coats.

And while they were drying I started on that bridge. But that’s something for next post I think.
And when all frets were in on all three fretboards, I glued them on. Here’s the tenor getting its walnut fretboard, the soprano clamping caul worked for the last fourteen frets, obvs.
Today I spent some time sanding and scraping. Small nooks need small scrapers, this one and a few others I made from a spent Japanese saw blade. The first coat of finish will mercilessly show all the flaws you miss so it’s a good idea to do this carefully.
Not that flaws will be totally absent. It’ll be others than I think, that’s all.
And here they are (were). Ready for finish... until I remembered the acoustic one needed a bridge. Oh well, the resos were ready for finish at least.
And can you see I tidied the bench?
But were they ready for finish? Nah, pilot holes for the tuners are great for hanging them during the finishing process so I quickly drilled those.
And here we go, let’s get some bug poo on these guys. The alder really comes to life, going from pale to a lustruous honey colour. The cherry in the necks goes from drab to drama too. I will show you more after a few more coats.
And while they were drying I started on that bridge. But that’s something for next post I think.
Saturday, December 5, 2020
New fretboard
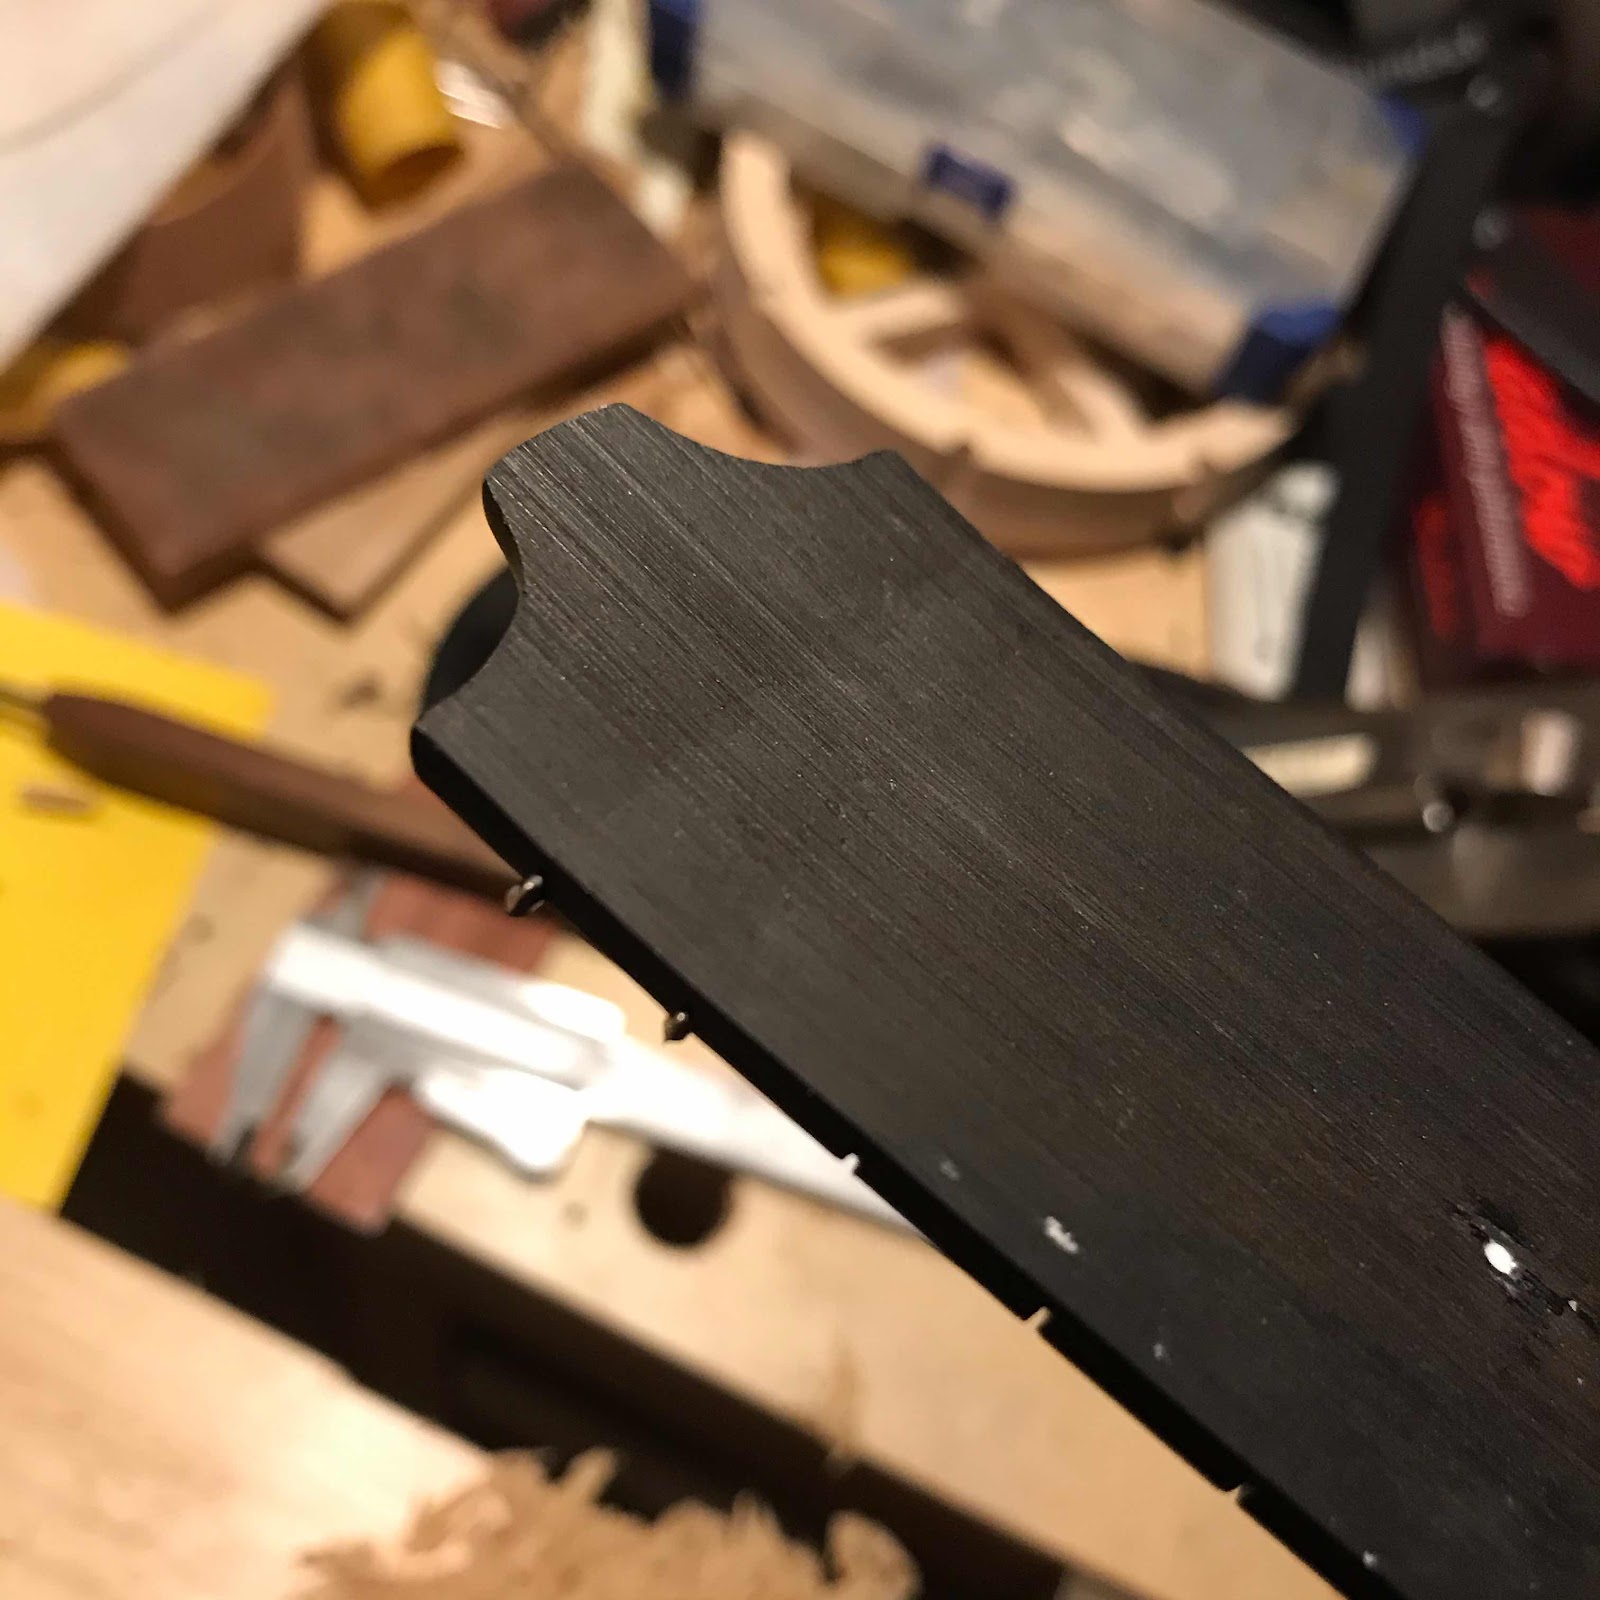
Well sometimes things go south no matter how careful you are. The ebony fretboard for the soprano reso was first in line to get the frets pressed in, and it couldn’t take it. Maybe the slots were too narrow, the saw might need some extra set. Or maybe the wood was brittle and short grained. Hard to tell when it’s black.

Then I scraped it with a cabinet scraper that was actually sharp and in good shape.

Then I made one edge straight, also with the no.6, and slotted it on the wee Proxxon table saw. I marked out the width at the nut and 12th and made the taper. You see my no.5 in the background, I used that to hog off most of the material and finished with the number 6.

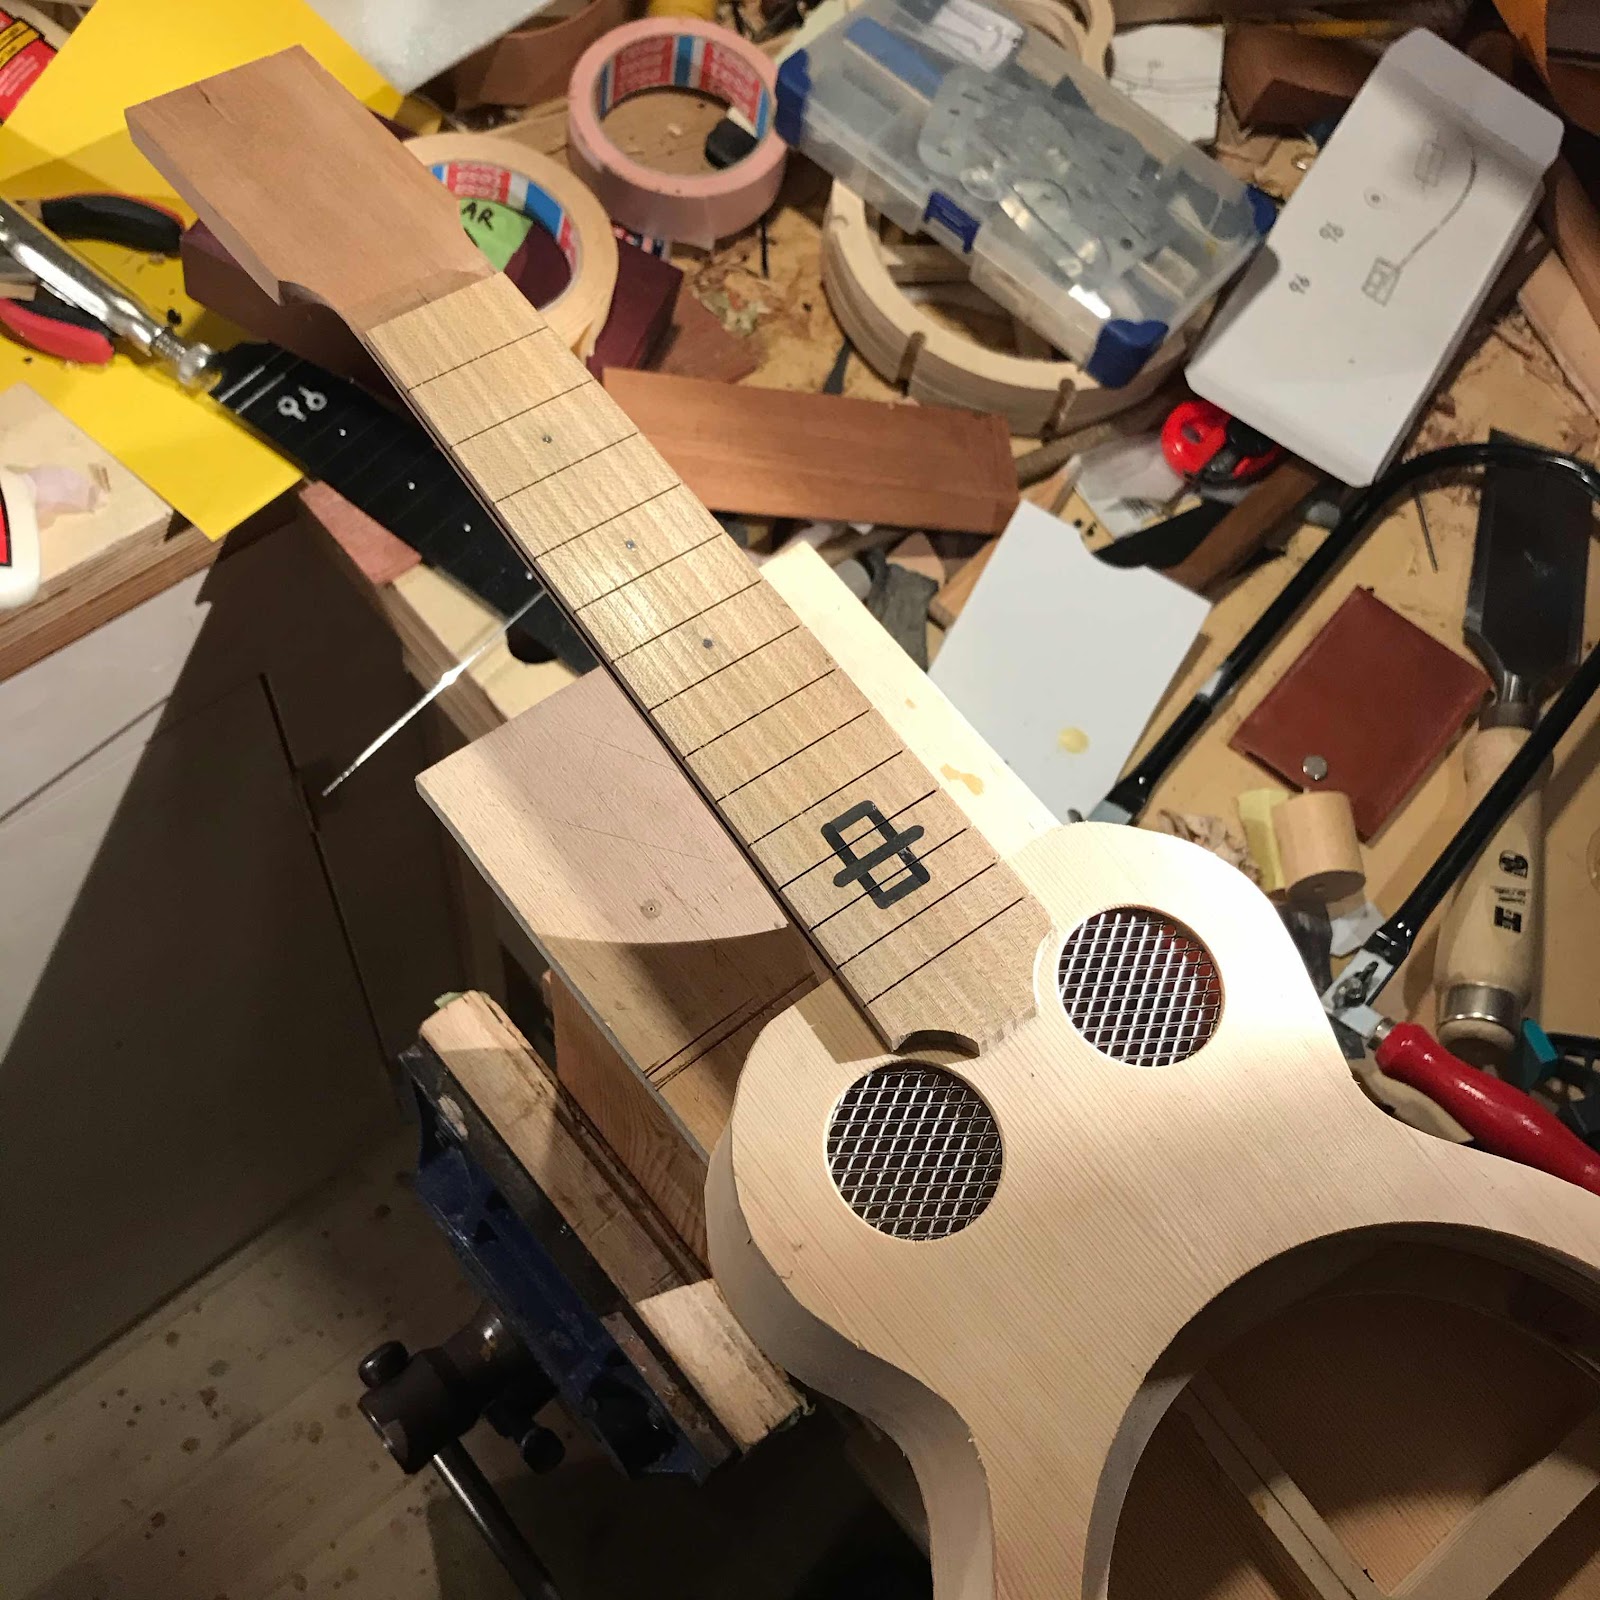
For the inlay I came up with another symbol for twins, and routed it out with my Proxxon drill/router.

And I had a lot of ebony leftover... so I made sticks to go into the channel.

And shaped them. That was a bit fiddly. In the pic I’ve started glueing them in.

And the end result, I think it turned out better than the the first one. The dots on 3, 5 and 7 are 2 mm pencil leads. I covered the dots with dabs of superglue, hopefully that will keep it from rubbing off on the fingers.
*My father might disagree so don’t discuss the no.6 with him.
First pic shows the underside, with bends at the two fret slots I started with.
So I thought about ways to remedy this but decided that a new fretboard was the only way out, forward or wherever, but south.
I chose lilac, the hardest wood species in Swedish nature. My friend Ludvig gifted me a trunk of unusual diameter, and I have used it for a number of fretboards. First I planed it with my* Stanley no.6.
Then I scraped it with a cabinet scraper that was actually sharp and in good shape.
Then I made one edge straight, also with the no.6, and slotted it on the wee Proxxon table saw. I marked out the width at the nut and 12th and made the taper. You see my no.5 in the background, I used that to hog off most of the material and finished with the number 6.
For the inlay I came up with another symbol for twins, and routed it out with my Proxxon drill/router.
And I had a lot of ebony leftover... so I made sticks to go into the channel.
And shaped them. That was a bit fiddly. In the pic I’ve started glueing them in.
And the end result, I think it turned out better than the the first one. The dots on 3, 5 and 7 are 2 mm pencil leads. I covered the dots with dabs of superglue, hopefully that will keep it from rubbing off on the fingers.
*My father might disagree so don’t discuss the no.6 with him.
Thursday, October 29, 2020
Fretboards
I picked out ebony fretboards for the Li’s soprano and the soprano reso. The tenor reso gets a walnut fretboard. There were some scratches from the drum sander so I hit them with the Mirka vacuum sanding pad.

Then I planed the edges with my Stanley no.6. This is important as it must fit along the edge of the template and be snug in the jig.

And forget about double-stick tape. Last time I used it it messed up the surface of the template and the goo is still there. Now all cool luthiers are using the masking tape and superglue trick. Matching strips of tape on the piece and the jig, rub them down with something hard (most often the base of the glue bottle), then some drops of glue on one part and a shot of the accelerator spray on the other. Press together and it sticks stronger than double-stick tape and won’t leave sticky residue.

The fret saw jig takes less than two hours to set up, but not way less. It was quite expensive and it’s cumbersome to use, and right after I bought it they made an upgraded version with roller bearings and thumb screw adjustments. I like the template but it needs two small strips of thin plywood wedged in to keep the setup rigid. You can see a strip in the top corner.

Doing the actual sawing takes 10 minutes.

And speaking of fretboards - it’s no good keeping a bunch of faulty ones taking up space in the workshop. I got these from a well meaning dude in Italy six years ago, he’d bought them from a supplier but found the scale length to be shorter than what he wanted. So he sent them to me as I was dabbling with piccolos. But sadly they were crap, the frets were placed all wonky.

... and grilled a side of ribs from a deer I bagged last week.

Then I planed the edges with my Stanley no.6. This is important as it must fit along the edge of the template and be snug in the jig.
And forget about double-stick tape. Last time I used it it messed up the surface of the template and the goo is still there. Now all cool luthiers are using the masking tape and superglue trick. Matching strips of tape on the piece and the jig, rub them down with something hard (most often the base of the glue bottle), then some drops of glue on one part and a shot of the accelerator spray on the other. Press together and it sticks stronger than double-stick tape and won’t leave sticky residue.
The fret saw jig takes less than two hours to set up, but not way less. It was quite expensive and it’s cumbersome to use, and right after I bought it they made an upgraded version with roller bearings and thumb screw adjustments. I like the template but it needs two small strips of thin plywood wedged in to keep the setup rigid. You can see a strip in the top corner.
So all things considered, not a great piece of kit I’m afraid.
Doing the actual sawing takes 10 minutes.
And speaking of fretboards - it’s no good keeping a bunch of faulty ones taking up space in the workshop. I got these from a well meaning dude in Italy six years ago, he’d bought them from a supplier but found the scale length to be shorter than what he wanted. So he sent them to me as I was dabbling with piccolos. But sadly they were crap, the frets were placed all wonky.
So I put them to better use this weekend...
... and grilled a side of ribs from a deer I bagged last week.
Subscribe to:
Posts (Atom)